Favorite things brunch

I’ve seen favorite things parties all over pinterest and I had been dying for a reason to throw one for quite some time.  Naturally, when I saw that a ladies brunch group I’m a part of was in need of a May hostess, I jumped at the chance to finally put this together.  The party itself wasn’t super fancy so I wasn’t sure that I was going to share or not, I’m not used to planning adult parties!  I did however, create several printables and I thought someone else may be able to put some of them to use so decided to do a quick share.  Because it’s just a Facebook group I didn’t create tangible invitations but instead opted for a group event page.  The party info read this:

13087862_1333413256685154_734787581445927424_n

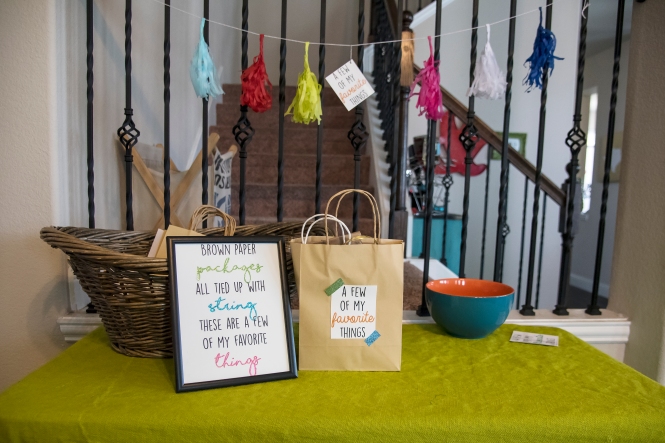
Brown paper packages tied up with strings
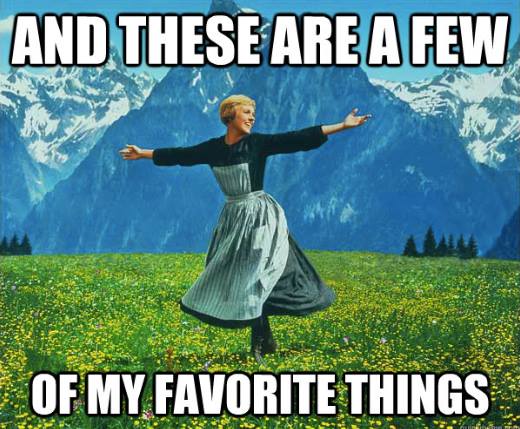
These are a few of my favorite things…

Here’s the skinny, purchase 5 of your favorite things (under $5). This can be anything at all you love! An awesome lipgloss or chapstick, a cool face mask, awesome markers, candy, snack, lotion, you get the idea. When you arrive, you’ll write your name 5 times and place them in a bowl. We will take turns presenting our favorite things and then drawing a name from the bowl to give each one away. By the end, we will each have 5 NEW favorite things!

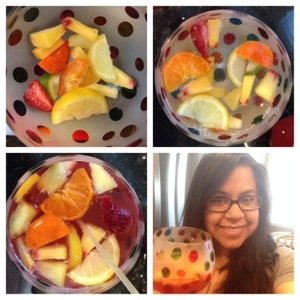
When guests arrived, they grabbed a plate and piled on the grub and mixed themselves a drink.  I set out grapefruit juice, pineapple juice, orange juice, and orange mango juice with several bottles of champagne for those who wanted mimosas.  I also set out olives, vodka, bloody mary mix, and the fixings for that.  I had water too but not much of that was consumed!  haha

_LLP5054.jpg

_LLP5047.jpg

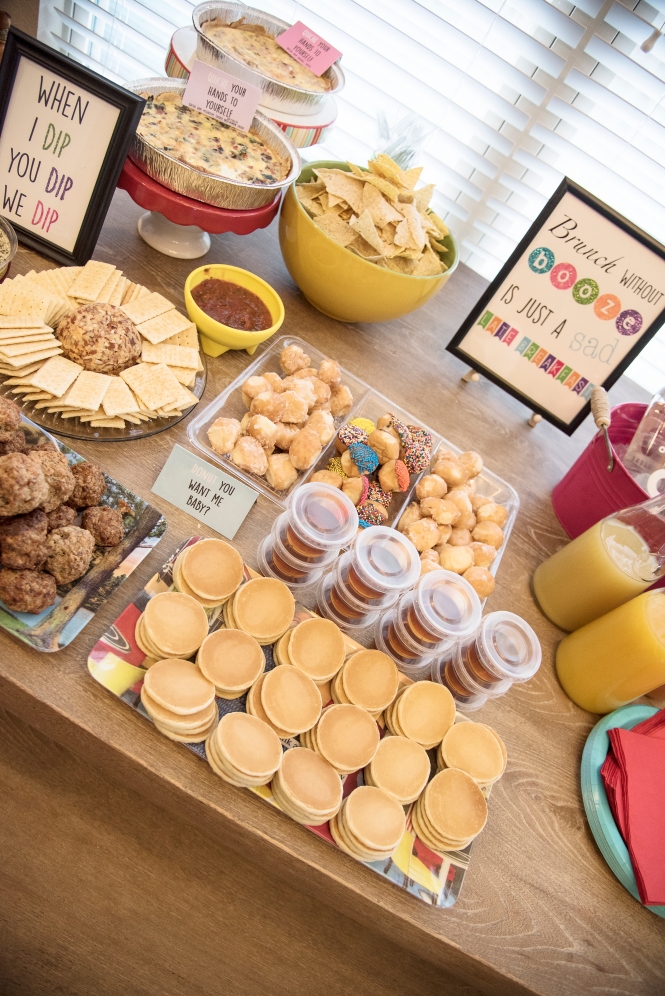
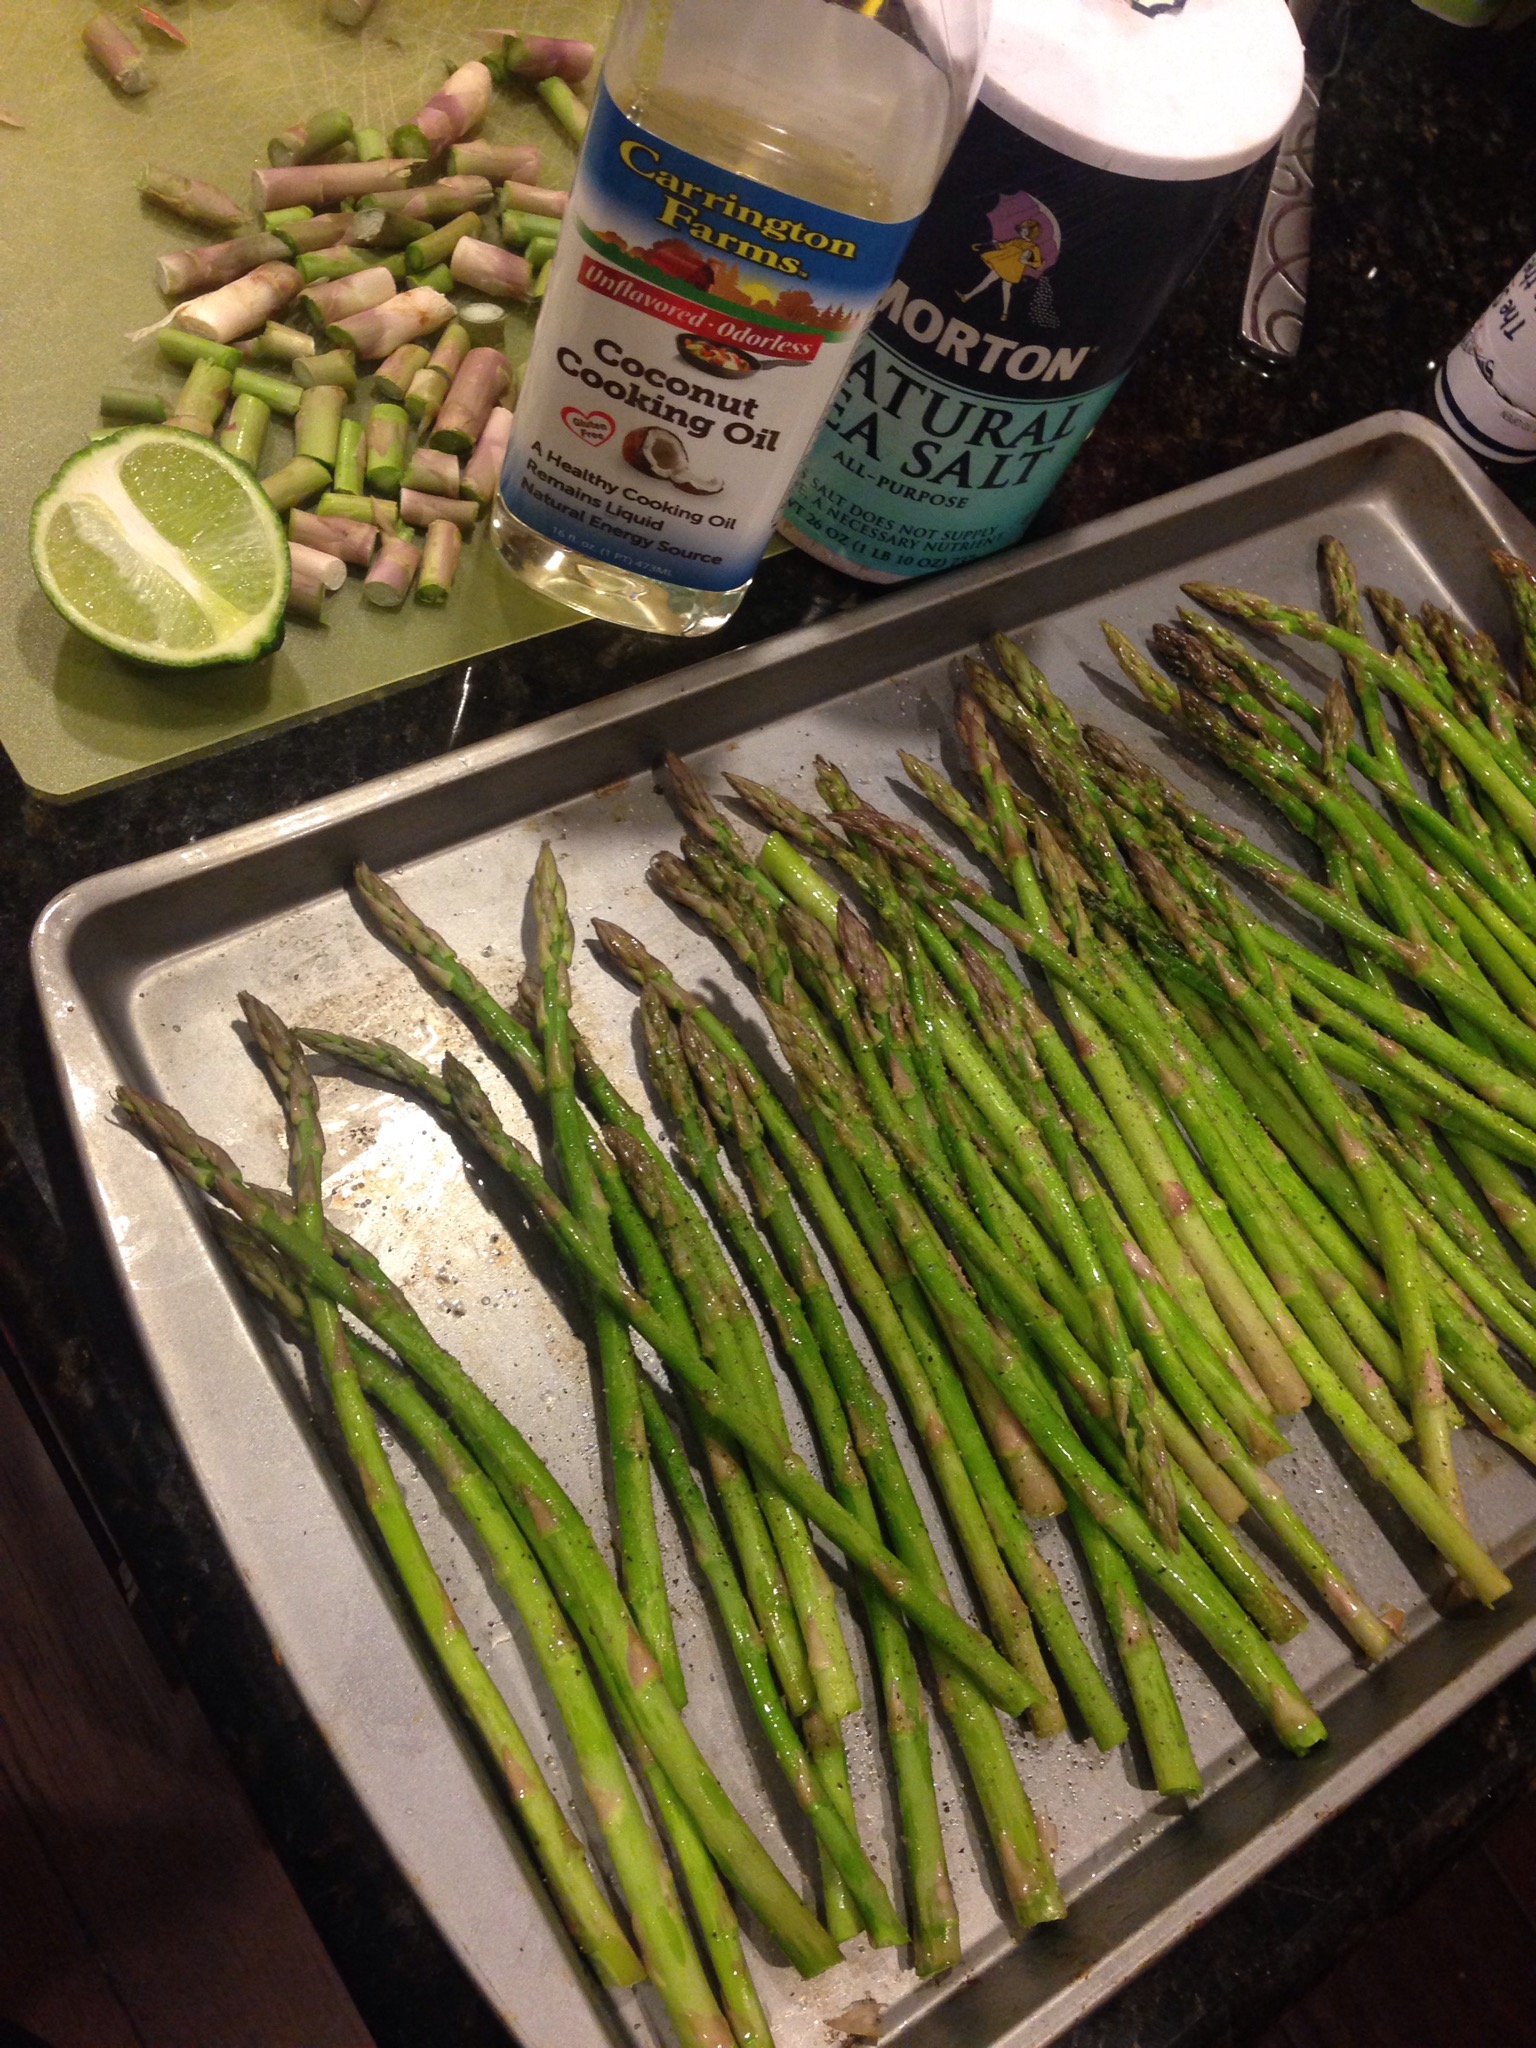
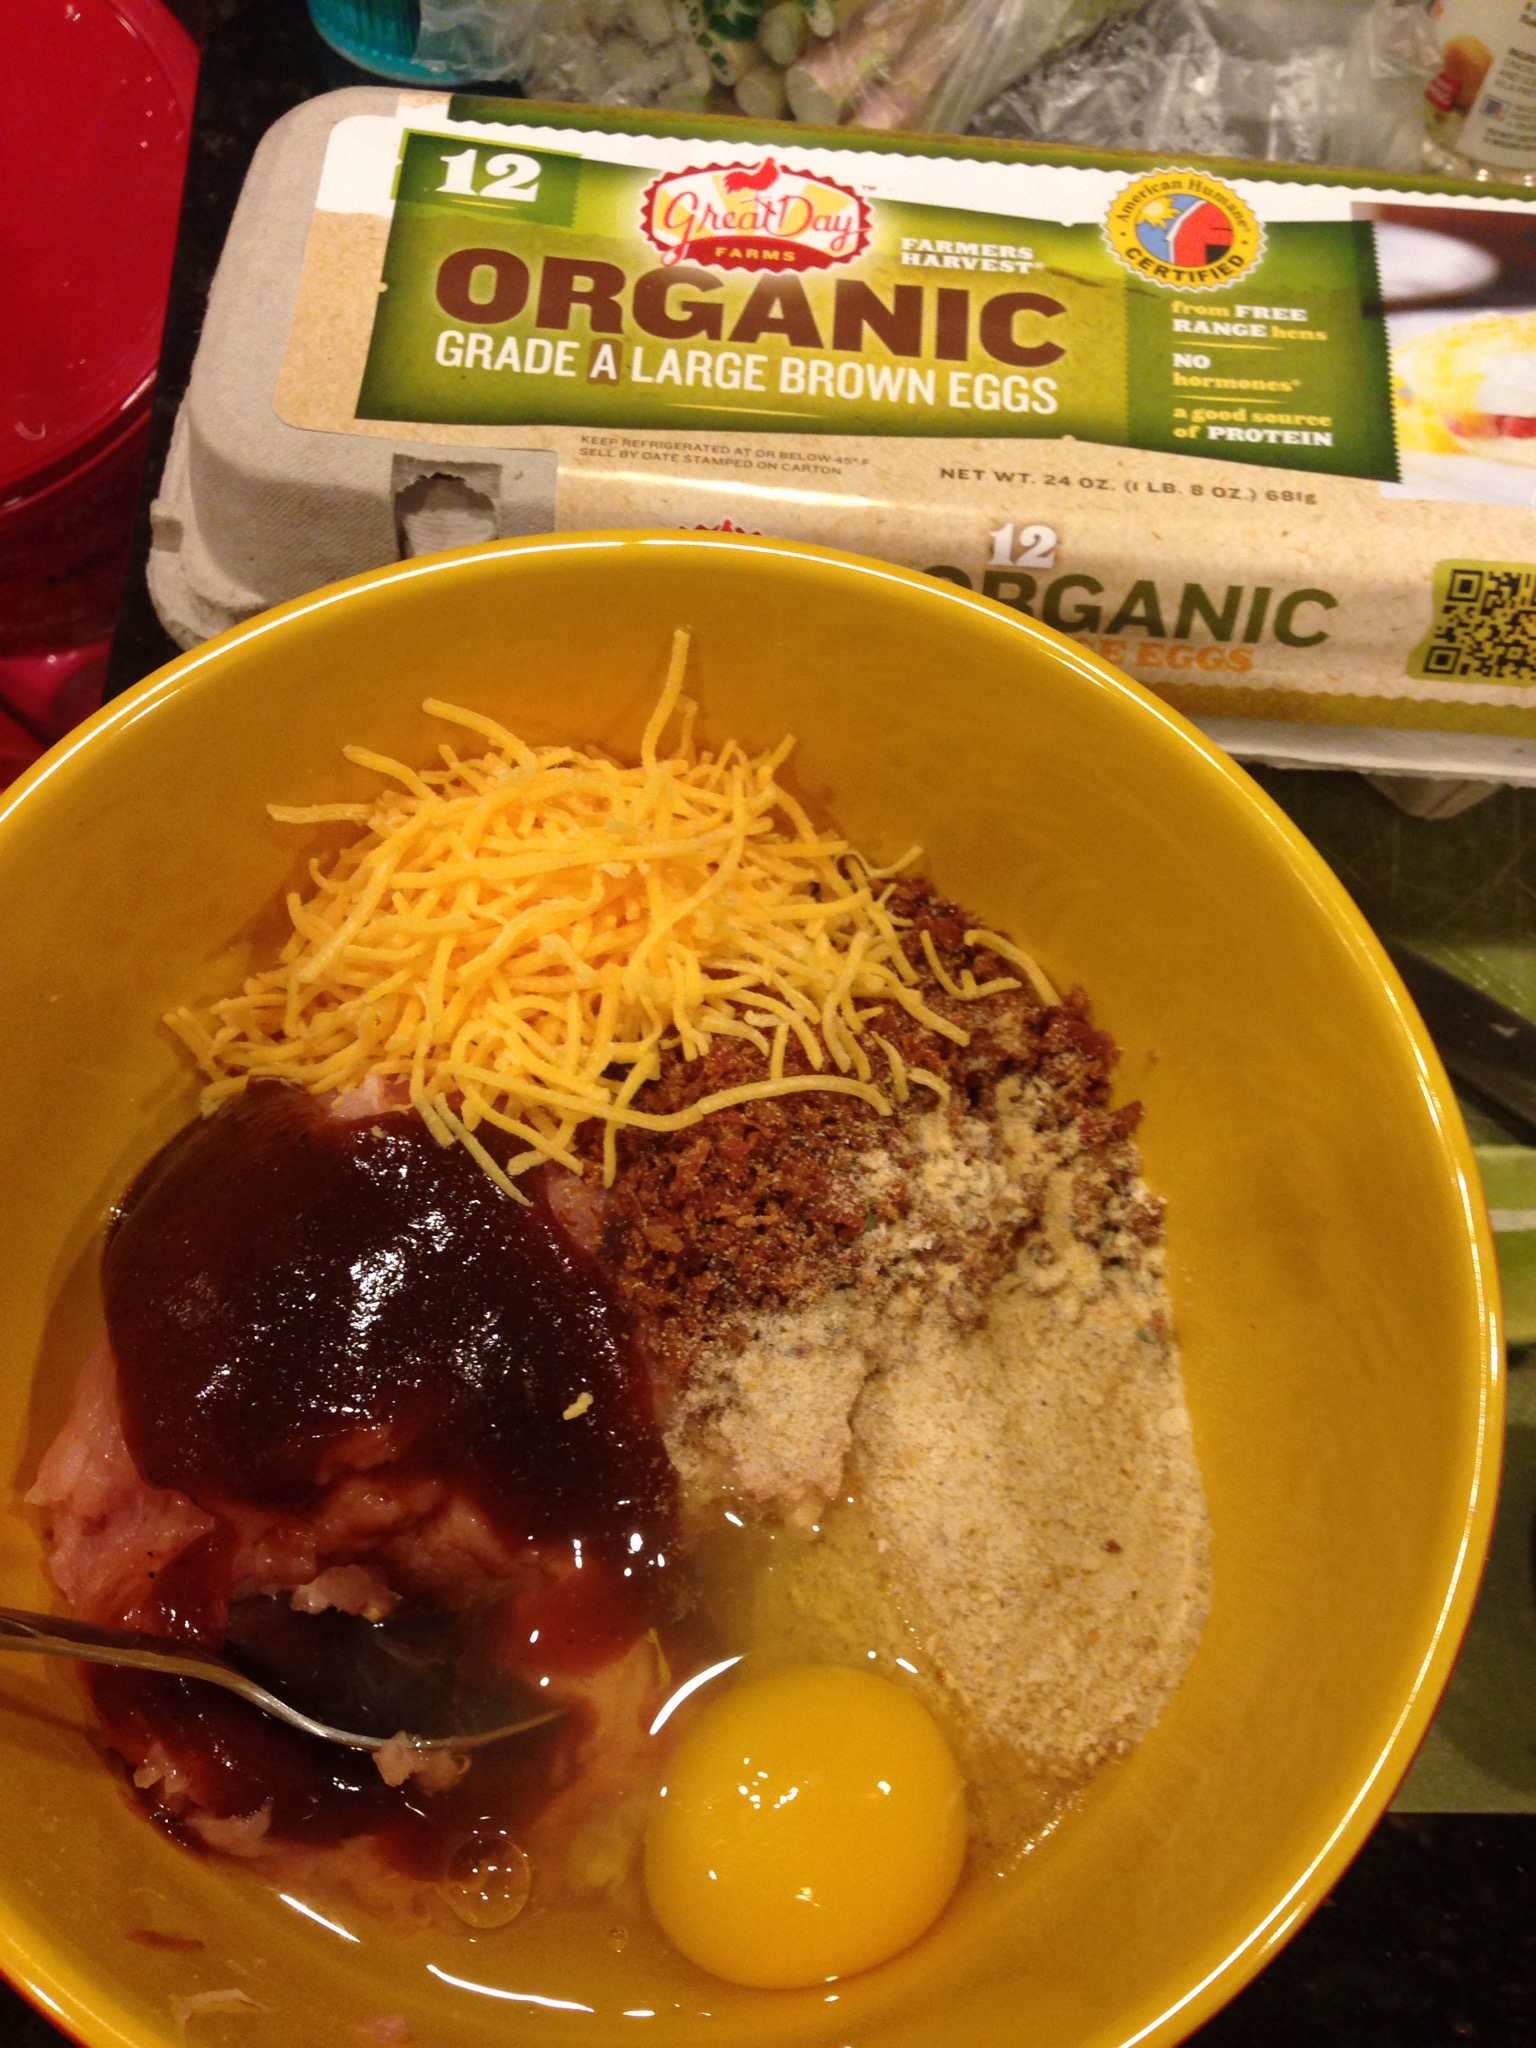
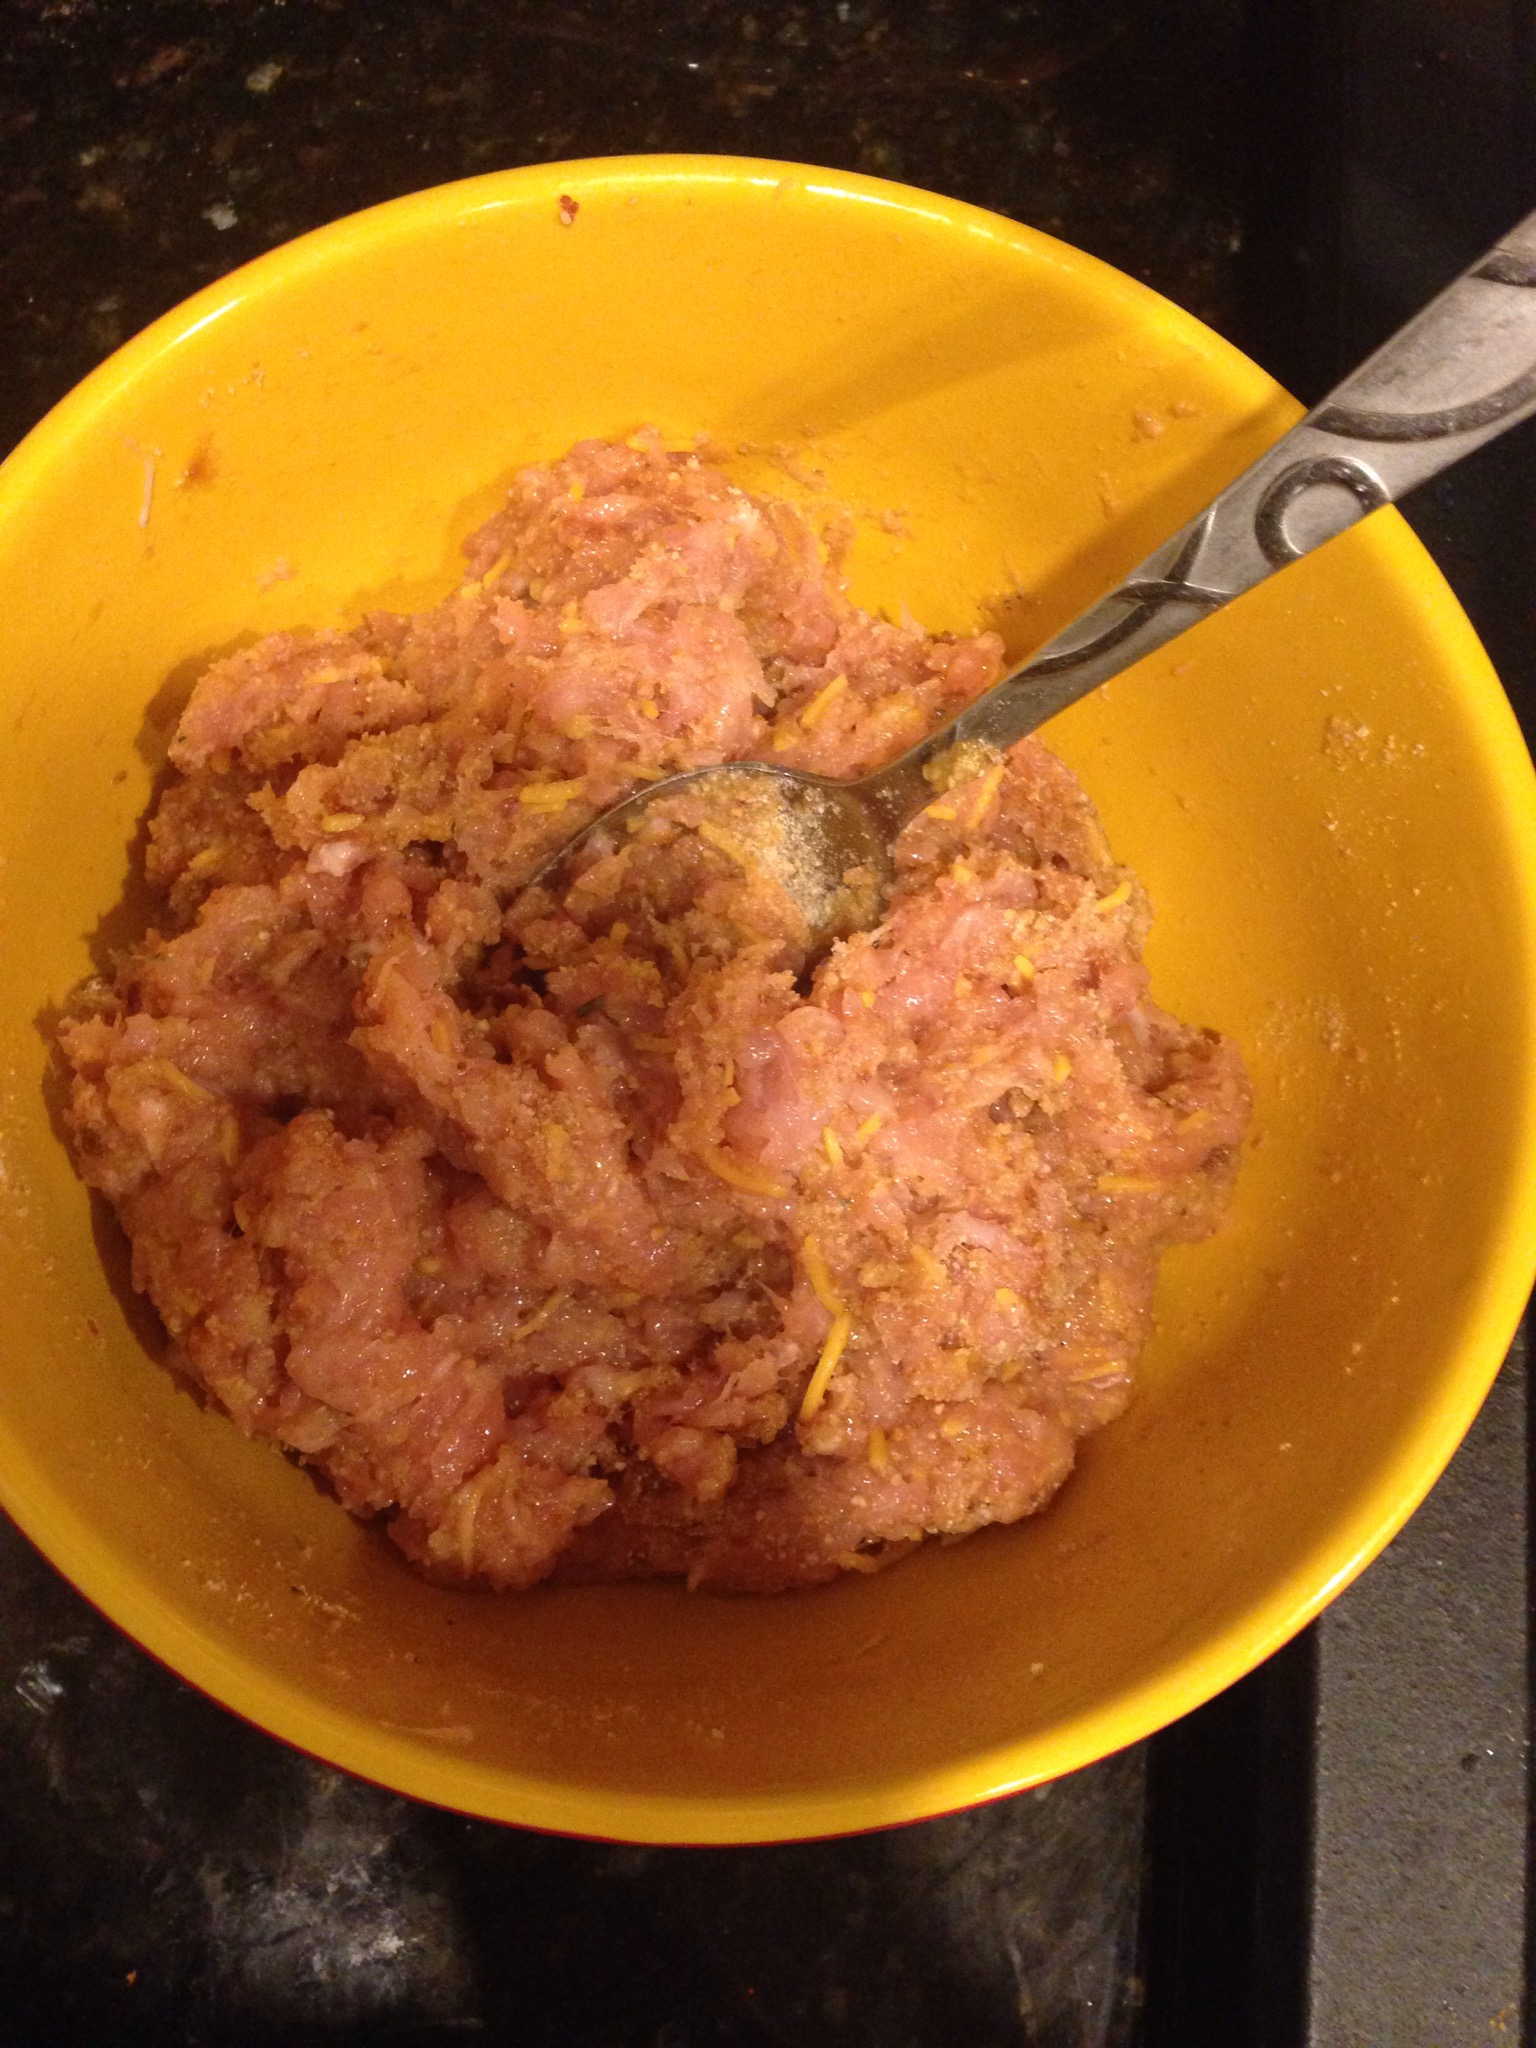
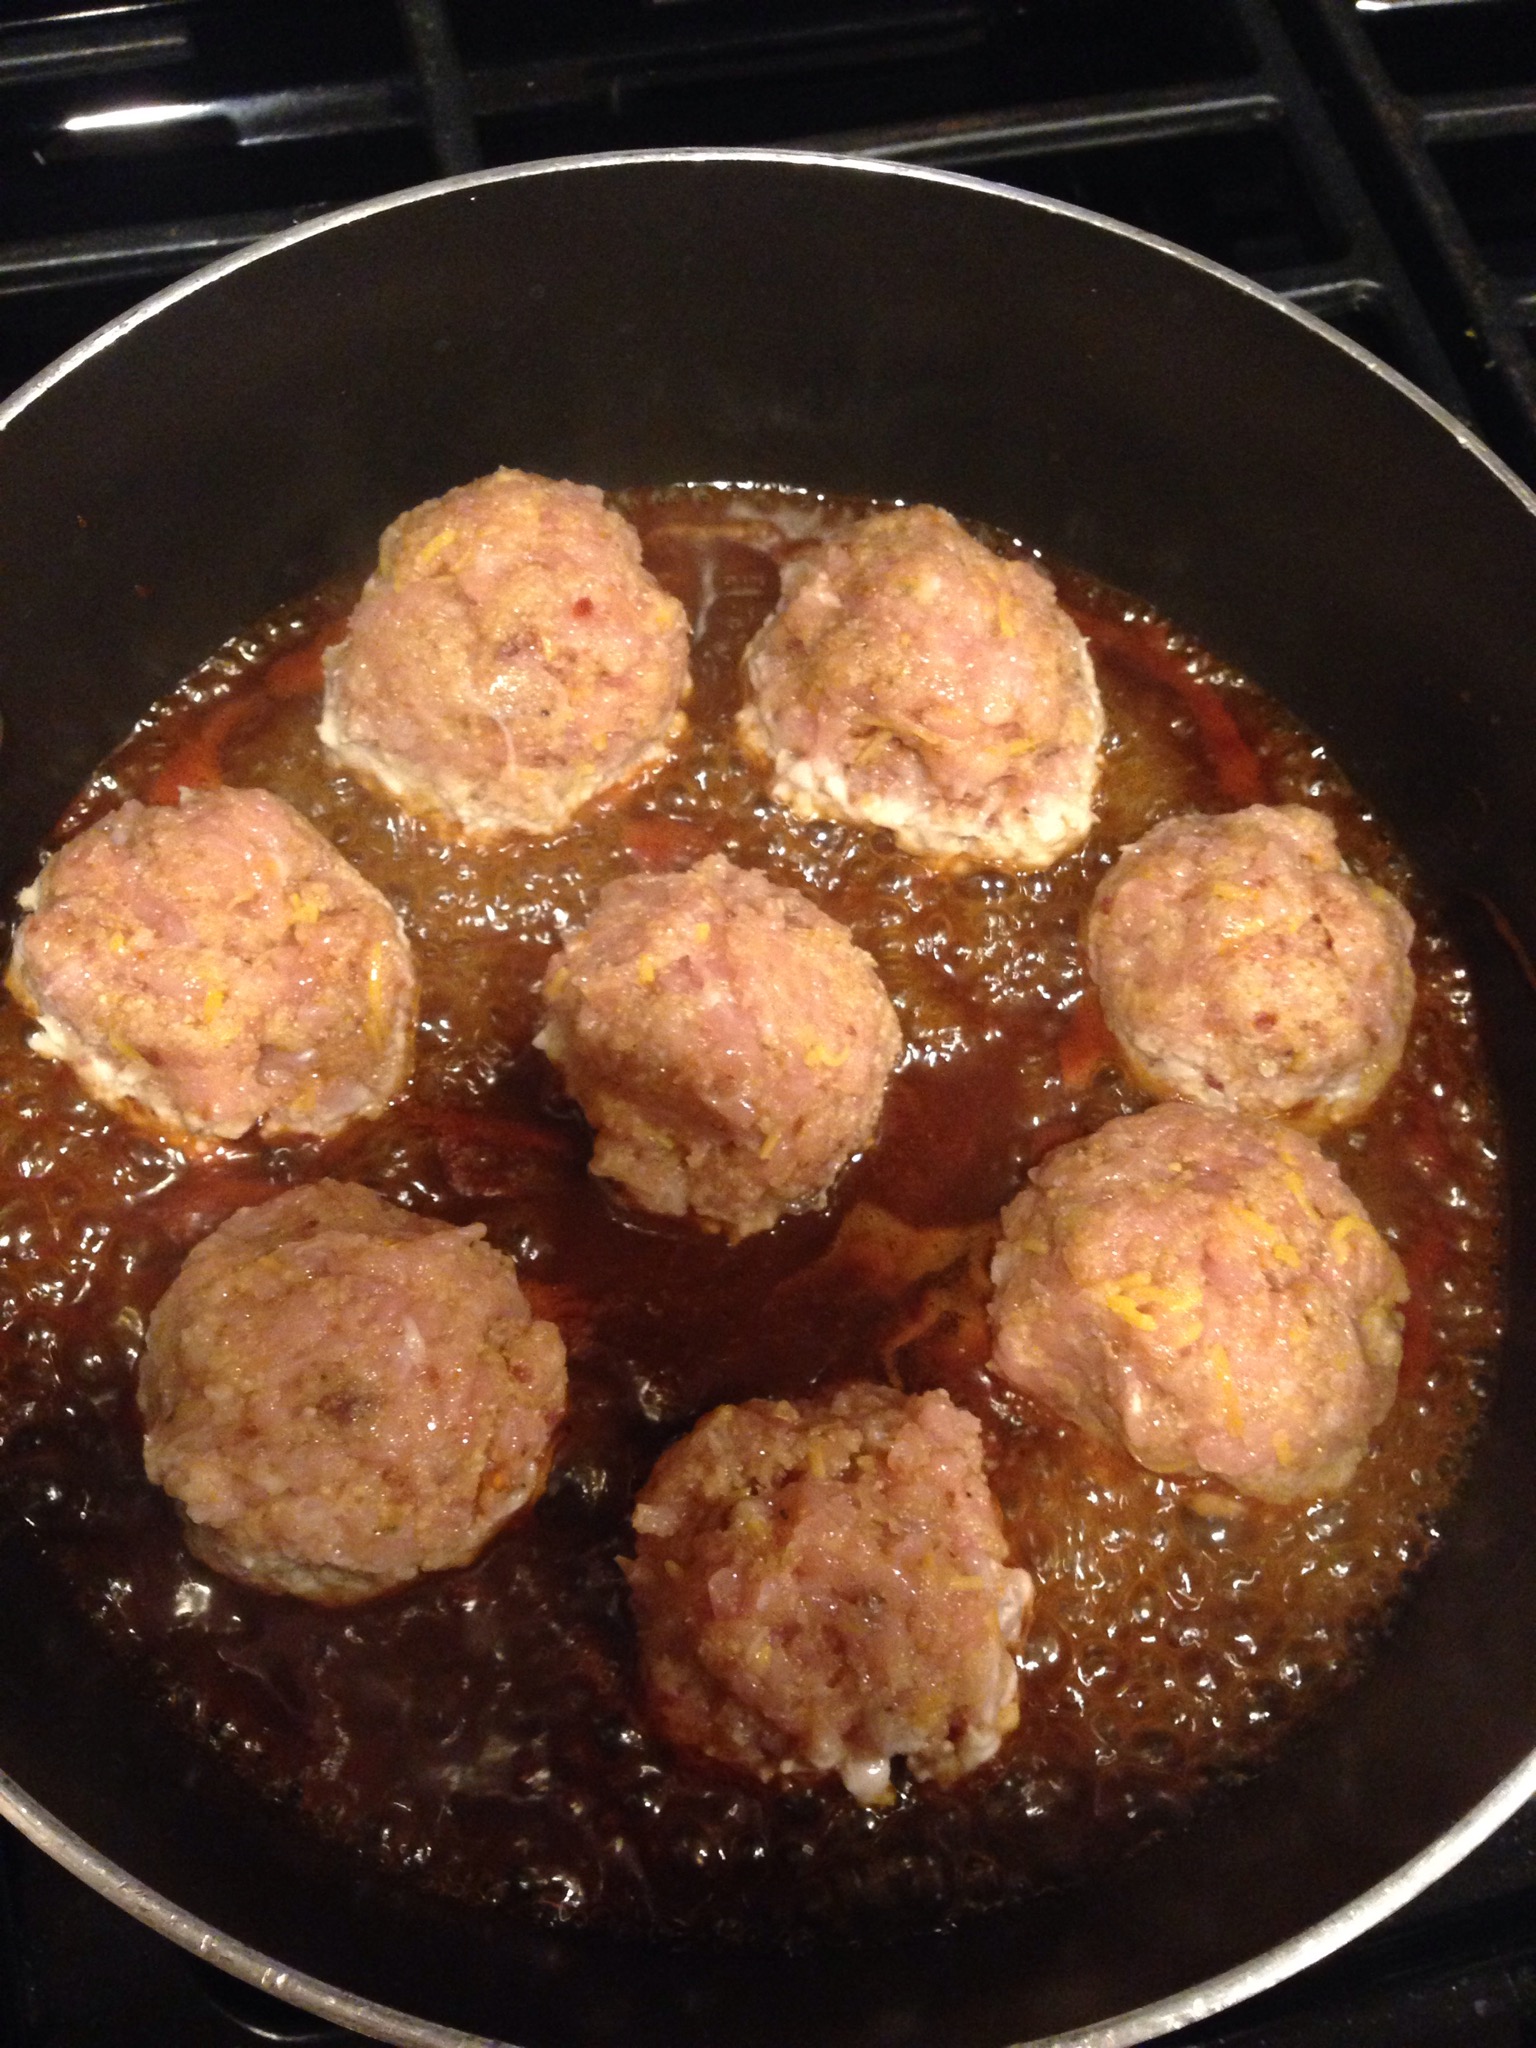
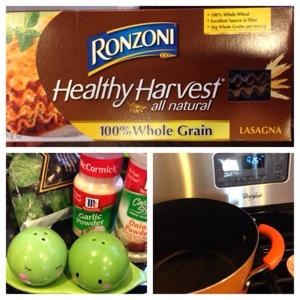
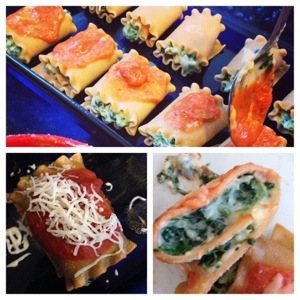
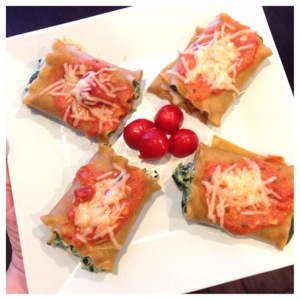
I didn’t go super crazy with food, I chose mini pancakes with syrup dipping cups, donut holes, sausage balls, cheese, crackers, chips, salsa, and 2 different quiche options.  I was worried it wouldn’t be enough food but we were all pretty stuffed.  It was a pretty cost effective menu.  The donut holes were about $1.50 per dozen at my local donut shop, I got a big bag of pre-made mini pancakes at walmart for under $5, and the little individual containers for the syrup at dollar tree (10/$1).  I made the quiche(s) myself, they’re super easy and delicious!

_LLP5049_LLP5055

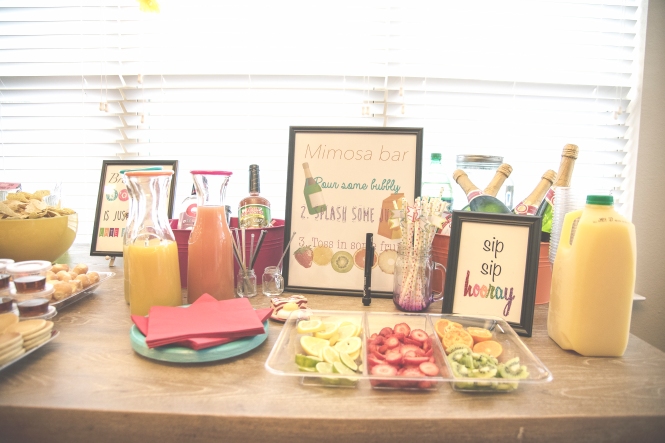
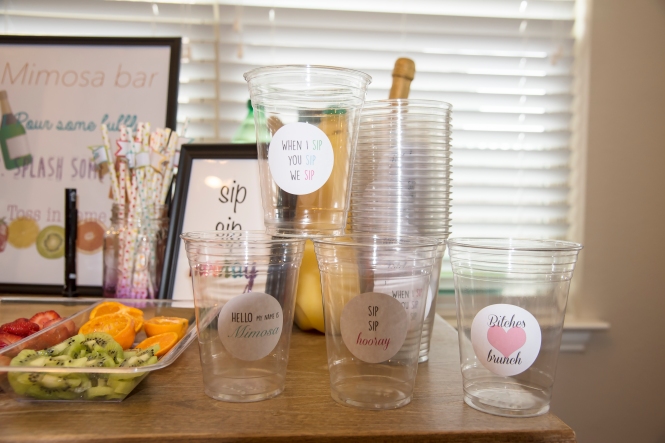
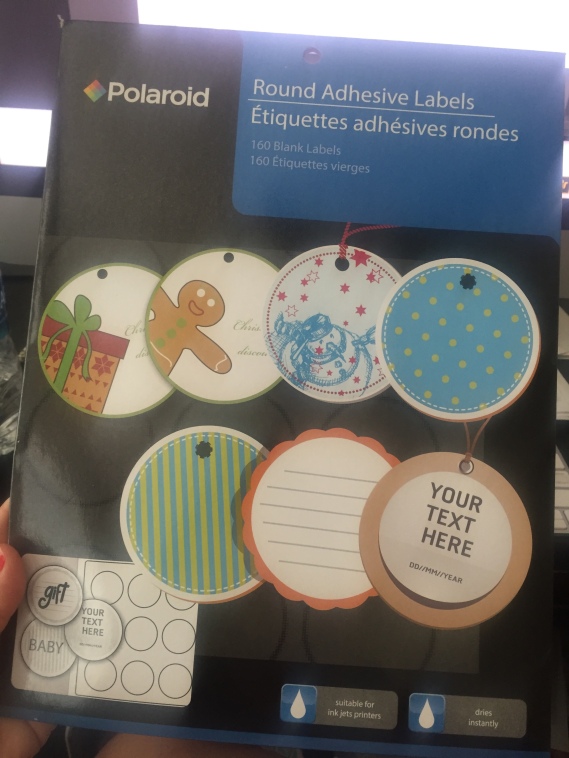
I originally set out to order custom cups but couldn’t find them in a small enough quantity (I was only expecting about 10 guests), plus, I was having a hard time committing to a single saying, I thought it would be fun to have different cup options.  The group is called “b!#ches who brunch” (I didn’t name it) and I kinda wanted to incorporate that but the mom in me didn’t want it all over EVERYTHING!  lol  So, instead, I bought cheap clear plastic cups at walmart and a package of round adhesive labels at dollar tree.  I downloaded the template online and used photoshop to add cute little sayings, printed, and stuck right on to the cups.  The girls had fun picking a cup and cute paper straw.  I chose polka dot paper straws with cute little flags to write everyone’s name on so we didn’t get our cups mixed up.

image.jpg

I set up a separate table with bags for everyone to take home their favorite things and a bowl to put everyone’s name in.  Everyone set their favorite things here when they came in.  When it was time, we took turns standing and presenting our favorite things, then drawing a name and giving that item away.  It was super fun, and we got some great goodies!  I purchased the brown paper bags at michael’s, printed out the label at home, and attached it with glitter washi tape.

_LLP5062.jpg

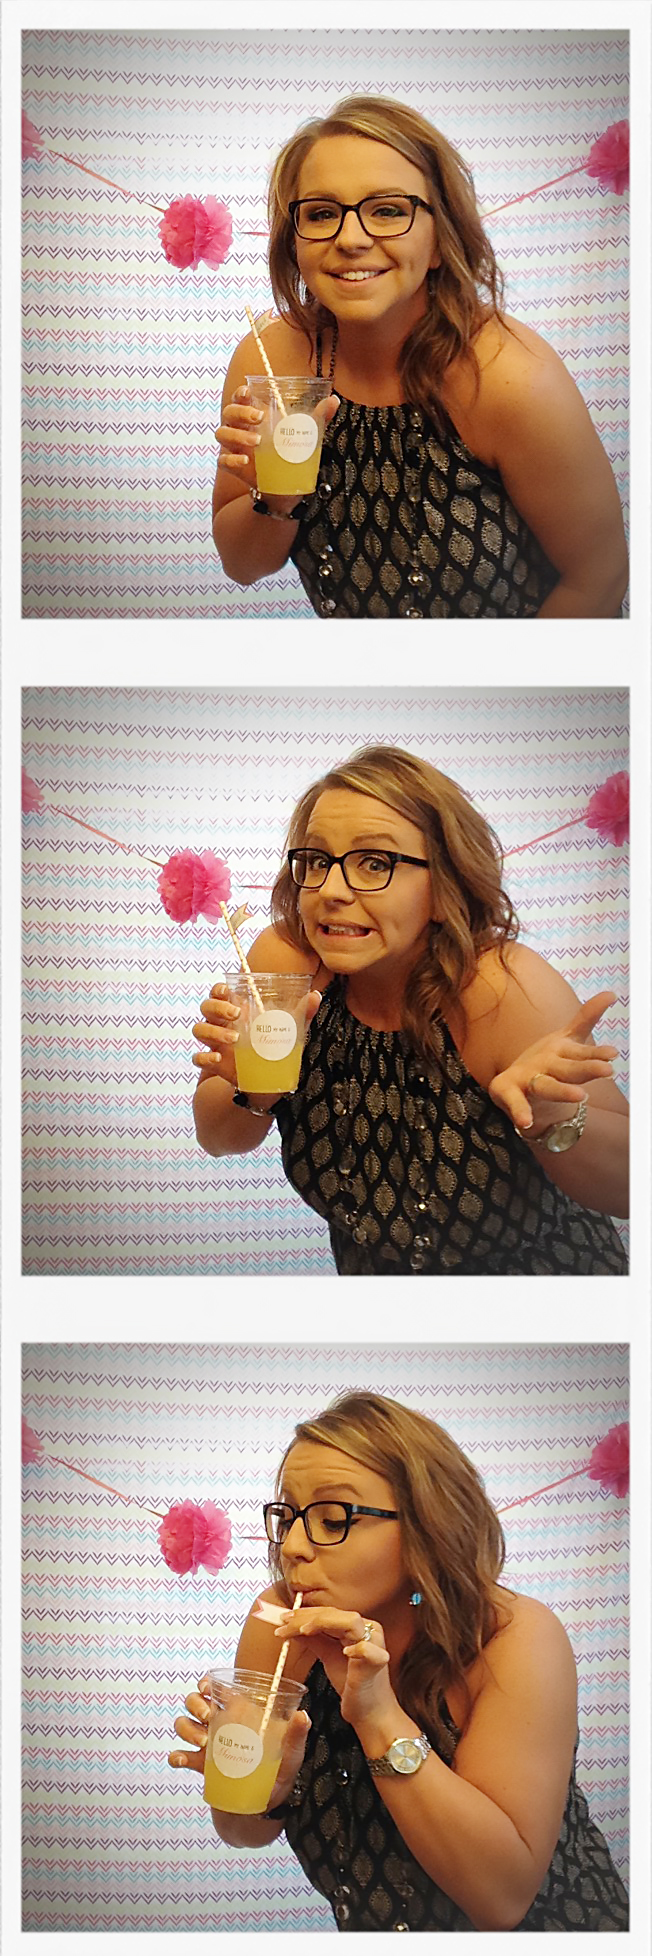
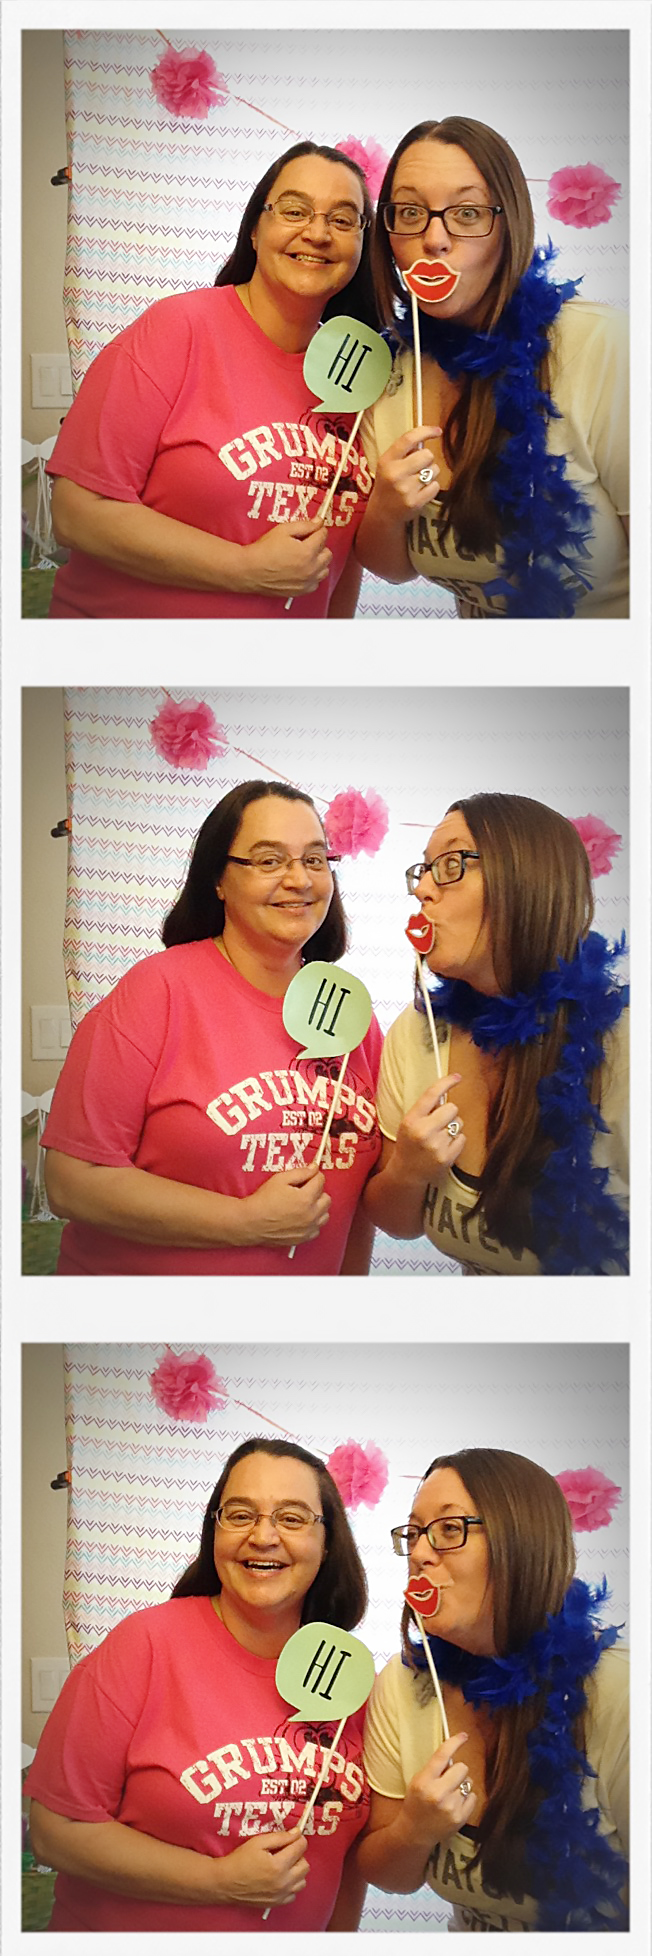
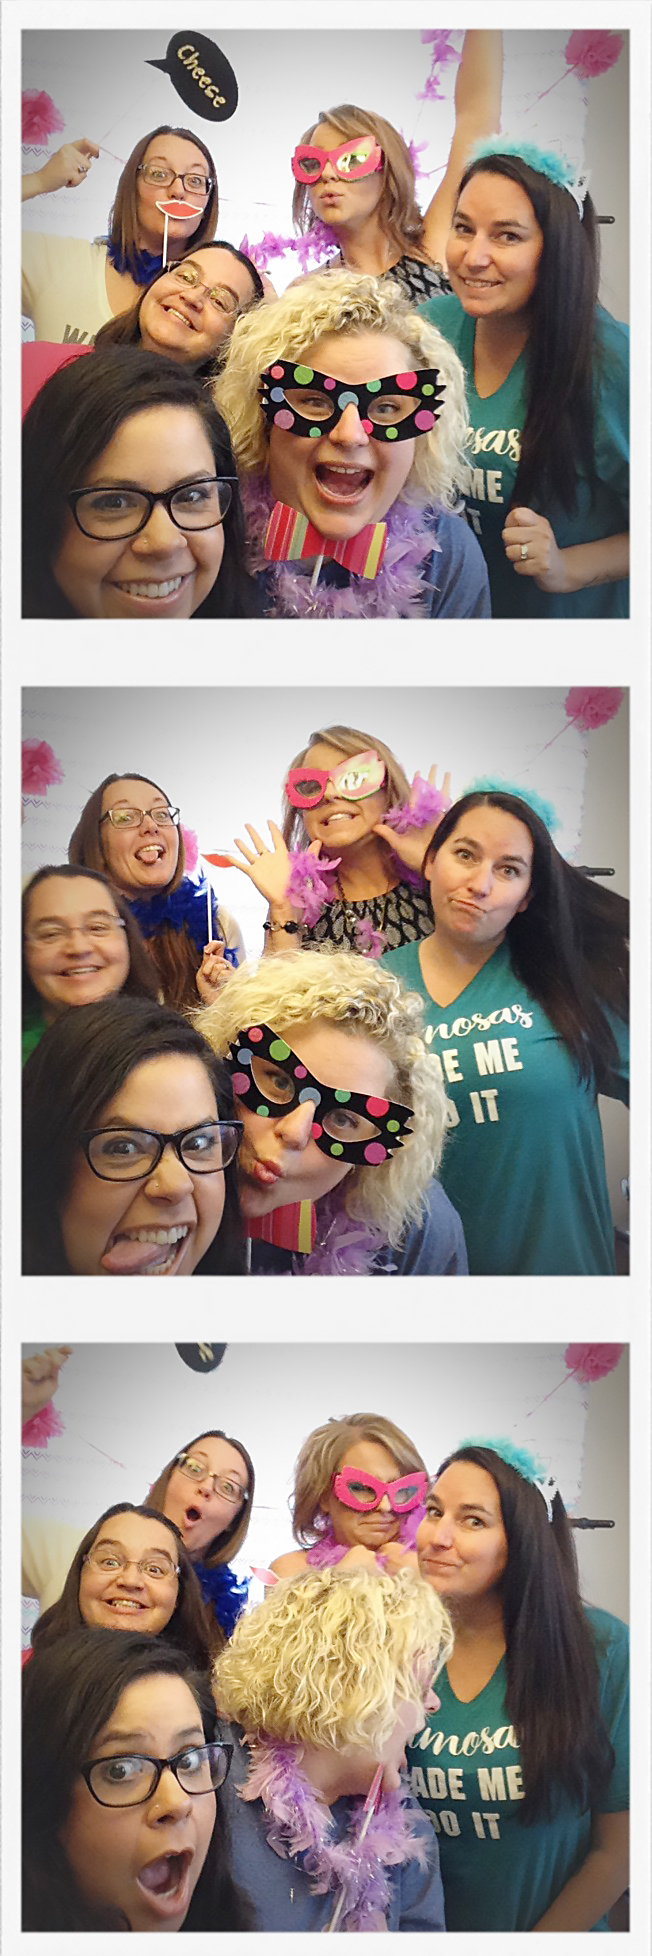
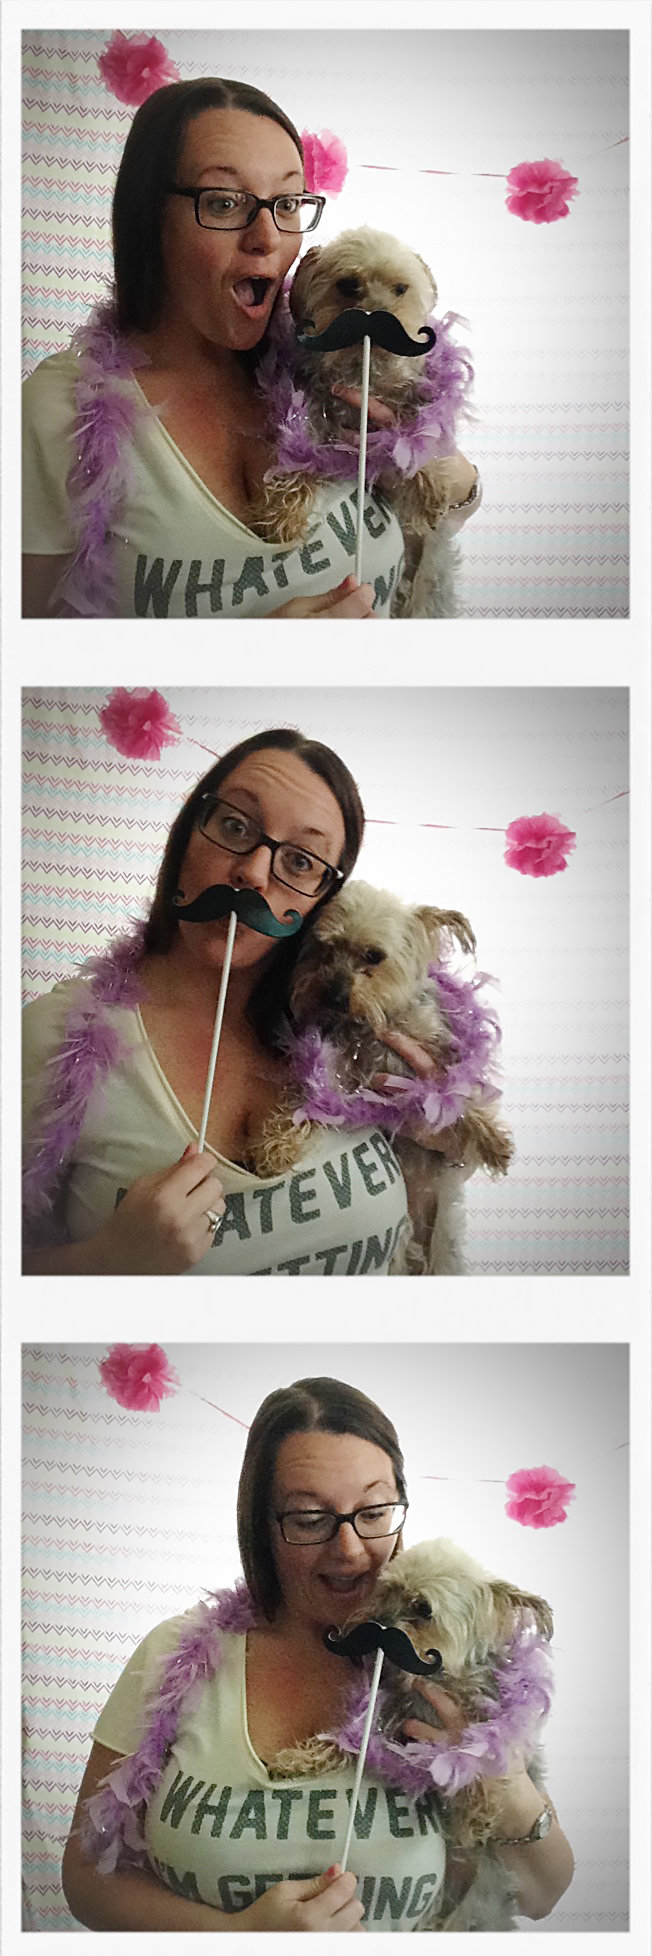
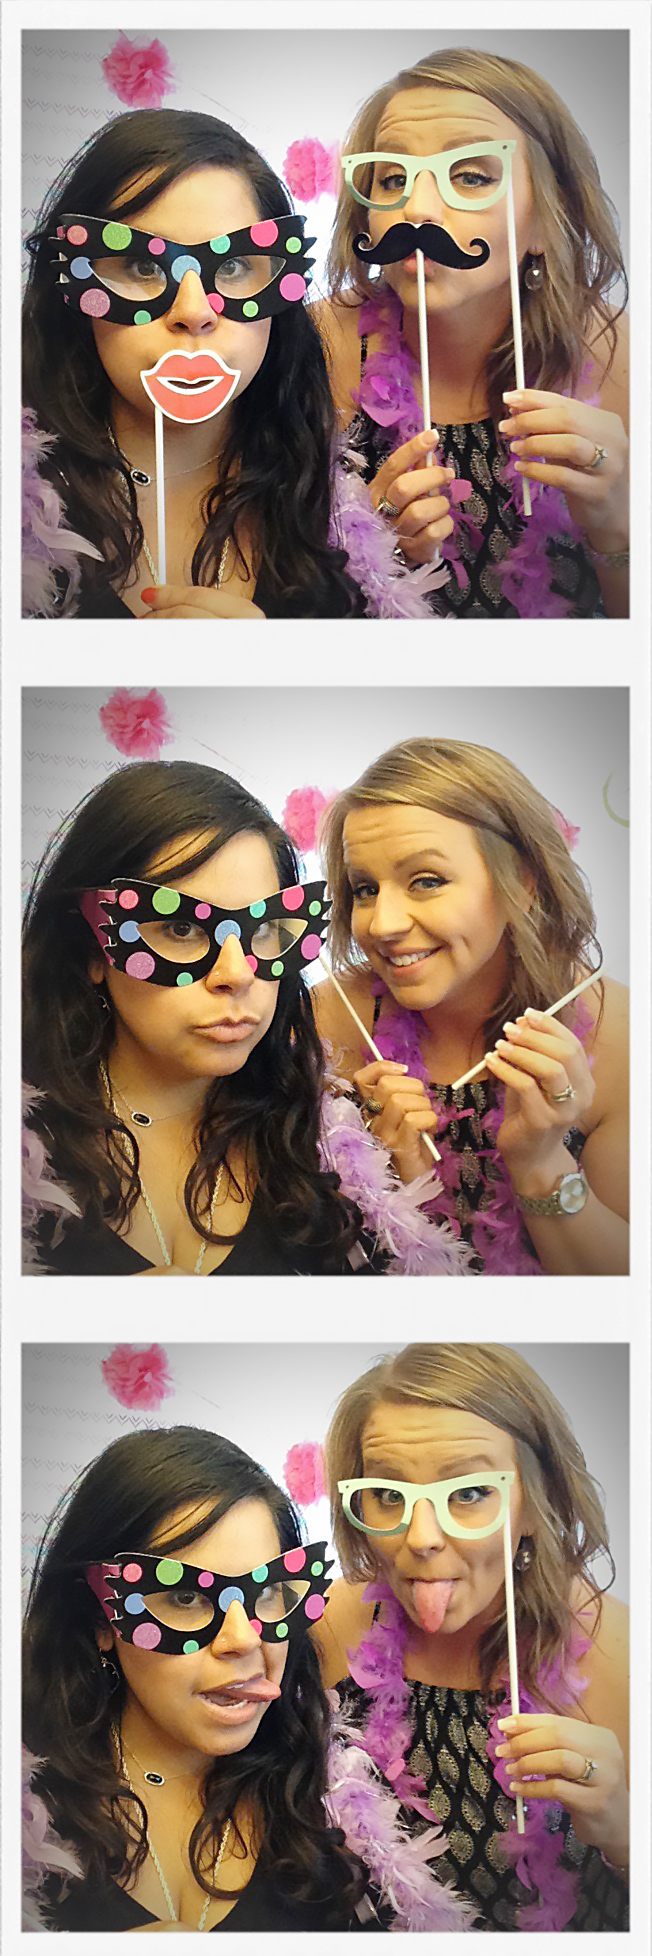
It was a little different planning a party for moms and not kids.  I had a hard time wrapping my head around the fact that I didn’t need to plan a bunch of activities or games!  lol  We just ate, drank, visited, and did lots of laughing.  In addition to the favorite things exchange, I set up a Photo Booth area in the front living room with props.  We may have had a little fun with that too.

IMG_0484IMG_0490IMG_0492IMG_0496IMG_0497

We had lotsa fun, can’t wait to do it again!  I’m going to attach the table decor signs, even a few I didn’t actually end up using.  No sense in them just sitting lonely and un-used on my computer.  Hope you get some use of them!  I don’t ask anything in return but that if you use them, use the hashtag “dysfunctionaldomesticdivablog” when you post to instagram so I can see how you used them!  It’s so fun to see different takes on something!  ❤

sipsipsign (This was created to be a 5×7)

dipsign (5×7)

morning mimosa (8×10)

bitchesbrunch (8×10)

boozeless (8×10)

favoritethings (8×10)

mimosa bar (11×14) I had this one printed as a photo by my print company

bag tags (printed as a standard 8.5×11)

brunch cup labels (these were printed on those dollar tree stickers)

I used glue and glitter to make some of the signs sparkle after they were printed, but that’s totally optional.  I got most of the frames I used at dollar tree too.


Advertisement

Apple pie and baked apple cups

Everyone is always raving about my apple pies so thought I would share my process with y’all. The greatest part is, you can use your leftovers to create an additional goody: baked apple cinnamon cups. Yummmm!

I think everyone is going to be shocked by how easy this is. Seriously, everything I make is easy and quick even if it doesn’t look like it at first glance.

I do sometimes make my own crust but I’ll be honest with you, I despise rolling it out. It frustrates me beyond belief. This is also why I hate working with fondant when I make a cake.

IMG_6778.PNG
Sorry, couldn’t resist! Anywho, more often than not, it’s pilsbury to the rescue! My OCD really loves how the crusts are perfect circles when you roll them out unlike my own hand rolled crust. But I digress…

You’ll need:
-1 box of refrigerated pie crust (2 crusts per box)
-4 apples. I use 4 different kinds of apples: Granny Smith, golden delicious, red delicious, and gala. You can use any combination of apples you so choose or all the same kind if you prefer. I personally like the different tastes the variety provides.
-1 pie tin
-1 small mixing bowl and 1 larger mixing bowl
-cinnamon, brown sugar, sugar, apple pie spice
-vanilla flavoring and caramel flavoring
-1 stick of butter

IMG_7292.JPG

Preheat your oven according to your pie crust packaging instructions for 2 crust pies. Usually 375.
Peel and core your apples and slice them as thinly as possible. I put the slices in the large bowl as I cut.

IMG_7290.JPG
Line the pan with the first pie crust and trim edges with a knife or kitchen shears if needed. I use my hands to mix up the apple slices so that the different types are evenly distributed. Once mixed well, fill your pie crust and place the stick of butter in the small mixing bowl.

IMG_7291.JPG

Microwave butter for about 45 seconds or until fully melted. Add about 1 tbsp of sugar, 5 tbsp brown sugar, and a sprinkle of each cinnamon and apple pie spice. Mix it well and pour about half of the mixture over the apples.

IMG_7317.JPG

IMG_7299.JPG

Lay out your second crust on a cutting board and use cookie cutters to make a design or cut the crust into strips to make a basket weave design if you want. Place the crust on top of the apples, press firmly all around and trim edges if needed. I like to put the crust cutouts back on top. Looks nice and the crunchy crust pieces are the hubby’s favorite part. I then take a fork all around the edge and sprinkle top with cinnamon.

IMG_7302.JPG

Ovens will vary but you’ll need to bake it for about 20-30 mins or until your crust looks golden brown.

IMG_7312.JPG

IMG_7314.JPG
It’s best served warm with a scoop of vanilla bean ice cream on top. 🙂

Now, I usually have some leftover crust trimmings, sliced apples, and buttery filling on my hands. We don’t let that go to waste! Take an extra apple, (I used a golden delicious here) and use a knife to cut around the core. Use a spoon to dig the insides out. I rinse the apple and pour a little of the butter mixture inside it. I twist it around to make sure the inside is coated. I line a pan with foil and place the apple on it. I then take a handful of leftover apple slices and dice them before placing a handful on the pan. Drizzle a little buttery/sugary goodness over the apples and mix around. I use the cookie cutters to cut out a few shapes from the pie crust trimmings and place them in the pan as well.

IMG_7309.JPG
I bake the apple next to the pie for about 10 minutes or until it’s nice and soft and the pie crust shapes are nice and flakey. Place the hot apple on a plate or in a bowl, place a scoop of vanilla bean ice cream inside and top with baked cinnamon apples. I sprinkle a dash of cinnamon over the top and add a pie crust shape for garnish.

IMG_7313.JPG
Grab a knife and a fork and enjoy! Delicious!

BBQ bacon cheddar balls

Going to quickly share one of our favorite quick easy meals with you. My kids can smell these a mile away and always get super excited when I make them.

You know the drill, gather your supplies:
-1 lb lean ground turkey
-Shredded cheddar cheese (about 1/4 cup)
-BBQ sauce of your choice. (About 1/2 cup). I use sweet baby rays sweet and spicy sauce. It’s ah-maze-ing!
-about 1/2 cup of bread crumbs, crushed crackers, or oatmeal (I used bread crumbs here)
-bacon bits jarred or fresh
-1 egg
-seasonings of your choice (optional). I use my old trusty garlic powder and onion powder.

We often choose asparagus and white rice or cauliflower rice as our sides. I start by chopping the ends off of the asparagus and laying it out on a cookie sheet. I then drizzle some coconut oil and squeeze a small lime wedge over the top and use my hands to toss and coat it. I then sprinkle a little pepper and sea salt and toss them in the oven at 425 degrees.

IMG_7279-0.JPG

While those are busy getting extra delicious in the oven, toss all your meatball ingredients in a mixing bowl. Only use about 1/4 cup of the BBQ sauce and save the rest for the pan. Mix well.

IMG_7278-0.JPG

IMG_7282.JPG
Pour the remaining BBQ sauce into a pan, add a little water, and mix around before turning the heat on medium. While your sauce begins to warm, use your hands to roll meatballs and drop them into the sauce.

IMG_7283.JPG
You can add more sauce and water if needed/desired. Turn meatballs often for even cooking and sauce coating.

IMG_7284.JPG

While these are cooking, you should start on your rice. I don’t think you need an instruction on how to make instant white rice do you? Lol

By now your asparagus should be perfect. Remove it from the oven, serve it all up, and enjoy!

IMG_7285.JPG

Super scrumptious sangria

So a few months ago, I was a little grumpy cruising through HEB gathering food for the family when a really irritating voice came over the loud speaker. This woman was just too darn chipper about rotisserie chicken. You know how when you’re in a bad mood and people are extra happy you kinda want to slap them? No, am I the only one who feels that way? Hahahaha I digress. Anywho, a few moments later, I ran into said chipper rotisserie pusher and just when I was about to snack her she asked if I would like a sample. I like rotisserie chicken as much as the next guy but this my friends was not a rotisserie chicken day, this was a day for booze! So imagine my sheer glee when she holds up a tiny little shot glass type sample cup and said “I’ve got sangria”. I wanted to hug her! I took the tiny teaser cup and tasted the yummy sweet yet kinda tangy fruit juicy deliciousness and then quickly began to stockpile all the necessary supplies to go home and indulge in a full glass. Or two. Or 5 but whose counting?!?!? Of course I added a few twists from the original because well, have you
met me?!?!? I don’t do things the easy way! Needless to say I’ve been making it for family and visiting friends weekly since and it’s such a huge hit so I thought I should share it with you lovely people!
Gather the goods:
You’ll need:
– a bottle of moscato (or two or three if it’s been a rough week)
– frozen fruit of your choice. Heb lady used just a generic mixed fruit bag but I buy individual bags of pineapple, peaches, and strawberries because some of the fruit in the mixed fruit bag tasted dreadful when I ate it afterwards. I’m not saying my way is better, but well, it is! 😉
– lemon, lime, mandarin orange (like a cutie or halo). This is again an add on that heb lady did not use.
– 1 bottle of Italian soda in flavor of your choice. I actually use 2 different flavors for an extra kick of deliciousness but that’s me.

I like to wash my citrus fruits with soap and then slice them. I also cut up my frozen fruit into smaller bites but this is totally an un-necessary step if you want to skip it. I just find it easier to eat in the end.

20140401-191303.jpg

I then put it in ziplock bags and freeze it if I’m preparing in advance. I keep these babies on hand all the time in case I just want one glass.
>

20140401-191550.jpg

Meanwhile, grab your wine and soda and of course a fabulous diva-caliber wine glass!

>

20140401-191655.jpg

Put your fruit in then fill about halfway with wine. Fill the other half with soda or alternating sodas. I use this lovely berry kind as well as a blood orange. The original only called for the orange kind. I’ve also tried pomegranate which is pretty tasty too!
>

20140401-191855.jpg

Now enjoy! Cheers!>

3 cheese spinach lasagna wraps

Yummmm! Super quick post that I promised to a friend a month ago! 😁
Round up your ingredients:
-lasagna noodles (I used these lovely whole grain noodles)
-frozen spinach
-fresh grated mozzarella
-ricotta cheese
-cream cheese
-marinara sauce
-salt, pepper, onion powder, garlic powder
-cherry tomatoes for garnish (optional)

Preheat your oven to about 425 and break your noodles in half to boil

20140321-130159.jpg

While your noodles cook, add your frozen spinach to a microwave safe bowl and warm until defrosted. Toss in your grated cheese, your ricotta, and your cream cheese and season with salt, pepper, onion powder, and garlic powder. The amount you use will obviously depend on how many roll ups you intend to make. You know me, I’m no good with exact measurements. You’ll have to eye ball it and use your own common sense and judgement. 😉 mix well until it’s a nice creamy paste. I will say you need plenty of seasonings as the mixture is creamy but not real flavorful without the garlic/onion/salt.

20140321-130558.jpg

Your noodles should be about done by this point so drain them and lay them out flat on a cutting board. Spoon in your cheesy spinach mixture starting at the bottom. Begin rolling towards the top and place in an oven safe pan (which you’ve sprayed with cooking spray).

20140321-131006.jpg

Top with marinara sauce and a quick sprinkle of cheese and bake that bad boy until your noodles have a slight crisp to them and the cheese is nicely melted. Use as much sauce as you would like. I’m not a huge sauce fan so did just a dab.

20140321-131148.jpg

Dice up some cherry tomatoes for garnish, serve, and enjoy!

20140321-131222.jpg

Dorito salad

Last summer while visiting my cousin, the girls and I were introduced to our favorite salad. I’ve been making my own variation ever since and it’s as big a hit as ever! Thanks for the idea Becky, I took that sweet baby and made it my own and it’s pretty life changing!!! Hope you don’t mind me sharing, the world needs to know! Lol

You know the drill, gather your ingredients: you’ll need:
-bag of Doritos (Becky used regular Doritos, I typically prefer baked unless they’re nowhere to be found.
-1 lb lean ground beef
-garlic powder, onion powder, chili powder, cumin, and ground red pepper (cayenne)
-shredded cheese
-plain Greek yogurt (Becky used sour cream but I always substitute yogurt for sour cream)
-salsa (I used pace because it’s what Dave had laying around already but you pick your own brand and heat)
-iceburg lettuce
-tomato
-1 can black beans (optional-they weren’t used in the original but I like them)
-corn (I use frozen sweet corn. Again this is optional, Becky didn’t use it)
-black olives (once again an optional add on)

Step 1: brown your ground beef and add seasonings (just a pinch of everything really or you could even use pre mixed taco seasoning I’m sure)

20140320-140607.jpg
Take your corn and black beans and heat them in a small pot. While that’s simmering, take your Greek yogurt and salsa and combine them in a blender until it’s a lovely pinky peach color. You’ll want to use equal parts salsa/yogurt.

20140320-140757.jpg

Grab your Doritos and crush them up with your hands or a fork in the bottom of your bowl and then add a nice solid layer of lettuce followed by a layer of ground beef. Add your corn/bean mixture, and drizzle your yogurt/salsa sauce over the top. Add some shredded cheese, cilantro, tomatoes, and olives and enjoy!

20140320-141518.jpg

20140320-141525.jpg

20140320-141533.jpg

Easy, quick, delicious! Yummmm!

BBQ turkey meatloaf

Bear with me here because I just kinda made this up as I went so I didn’t take a ton of pictures because I wasn’t 100% positive if it would be worth ever making again. Ummmm… Yeah, definitely worth making again!!! ALL of my kids loved it and asked for seconds. Yep all THREE of them! Usually 1 loves it, 1 tolerates it, and 1 hates it so when I hit a home run with a meal that all 3 love I make sure to add it to the meal archives! I had some lean ground turkey in the fridge that HAD to be used today but I had no idea what I was going to do with it! I vaguely remembered someone talking about BBQ chicken something or another on fb the other day and so I thought to myself, why couldn’t I make a turkey meatloaf?!?!? The greatest part about it is it’s a quasi healthy dinner!
Preheat your oven to 425 and gather your supplies.
You’ll need:
1 lb lean ground turkey
1 egg
Oatmeal (about 3/4 cup)
BBQ sauce

20131028-201446.jpg
I didn’t take a picture when I started but I just so happened to have another lb of ground turkey in the freezer so I brought it out for visual purposes! I’m 100% confident that you could find a healthier BBQ sauce option but this was all I had on hand thanks to my grillin’ fool of a hubby! I’m not a huge BBQ sauce fan so I wouldn’t know for sure however this sauce was darn tasty and had 70 calories per serving & 0 fat although thanks to the honey I’m sure the sugar was higher. Next take your oatmeal and toss it into a food processor or blender and blend until it’s fine like flour. You can use saltine crackers as well I’m sure just like in regular meatloaf.

20131028-202303.jpg
In a mixing bowl, beat 1 egg and add your lean ground turkey and your oatmeal. I tossed in a little garlic and onion powder and then about 4 tbsp of BBQ sauce and mixed well. Form into a “loaf” and put in an oven safe dish. Put it in the oven and begin to smell the deliciousness almost immediately!

20131028-202828.jpg
Ovens will differ but mine was mostly done by about 15 mins and I just squirt a little more sauce on top and spread it around before putting it back in about another 5 mins. Before I started on the loaf, I had started some brown rice and it was done about this time.

20131028-203047.jpg
My friend Mallory also suggested a really delicious sounding broccoli recipe (I’m obsessed with broccoli!) sadly, I was out of coconut oil, I only had limes no lemons, and I didn’t have any Parmesan cheese for it like she recommended but I kinda improvised the same concept and yuuuuummmm! I’m going to have to hit up the grocery store for all those other things so I can try it the way it’s supposed to be ASAP!!! I lined a cookie pan with foil then lay the broccoli florets on top. I drizzled it with probably no more than 2 tsp of olive oil and then squeezed the juice of half a lime on top too! A sprinkle of mrs dash table blend and then I found this white cheddar popcorn seasoning in my cupboard and the label on the lid caught my eye “try me on veggies” well, okay, don’t mind if I do! So I sprinkled some of that on too and threw it in the oven too!

20131028-203911.jpg
I sprinkled a little fat free mozzarella on the kids broccoli and then served it all up!

20131028-204034.jpg
I added a dollop of extra BBQ sauce to the kiddos plates but left it off my own. They pretty much licked their plates clean. T didn’t eat her broccoli but she hates broccoli any way I serve it! I will DEFINITELY be making this again soon! Maybe with a baked sweet potato on the side next time! Nom nom nom!

Peach Salsa Chicken

I’m always experimenting with food. I’m pretty much never organized enough to plan a meal so I usually just improvise and throw things in a pan on a whim. It’s never steered me wrong and my experiments often lead to some favorite family meals!
Several years ago I stumbled upon this fabulous Central Market organic peach salsa at HEB. Yuuuuummmmm! It’s so ridiculously delicious! It’s the perfect blend of sweet and spicy, even my kids love it with some black corn chips. Nom… Nom… Nom! One night I needed to get some dinner on the table quickly and didn’t have a ton of groceries handy so I scrounged up some ingredients that I thought may compliment each other well and bam Peach Salsa Chicken was born. It’s one of Dave’s very favorite meals now. He requests it often!
You’ll need:
-Chicken breast depending on the size, you’ll probably need 1 small breast per serving.
-frozen corn
-1 can of black beans
-rice (I used instant white because it was all I had but we often use brown rice instead)
-1 jar of Central Market Organic Peach Salsa (I’m sure you could find a similar concoction at your local grocer)
-1 jar of regular salsa of your choice
-Garlic Powder
-Onion Powder

20131014-001324.jpg
You’ll want to start by dicing your chicken breast into small bite sized cubes and then season with your garlic and onion powder. The amount of salsa you use will depend on the amount of chicken you’re cooking but you’ll want it to be about a 4:1 peach to regular salsa ratio.

20131014-001856.jpg
Mix well and simmer chicken on medium heat while you make rice according to package directions for the appropriate serving size you desire. Add your corn to a small pot with a bit of water and a tablespoon of butter or margarine. When it’s almost completely done, add your black beans and stir.

20131014-002355.jpg
Once everything is fully cooked, remove from heat and began serving in layers. Rice, then corn/bean mix, then chicken. I like to drizzle a little bit of extra salsa on top and my kids like a little sprinkle of cheese added to theirs too!

20131014-002712.jpg
Stick a fork in me I’m done! My favorite! You can add additional spices while you cook your chicken for a little extra umph! We like to add cayenne pepper and red chili powder to make it a little spicier but I’ve also added a sprinkle of brown sugar to make it sweeter. The possibilities are endless!

Taco wraps

When we were off shopping for a few essentials at Albertsons last week, these ginormous burrito style 10″ tortillas caught my eye.  Nope they weren’t an essential, nope they didn’t look healthy, but they sure looked like fun!  So, I grabbed a package!  I wasn’t sure what I was going to do with them but they were super thin in opposed to most flour tortillas so I thought they would make an excellent wrap of some sort.  I was right!  Mmmmm… these were so quick, easy, and delicious.  They were a crowd pleaser with everyone for sure!

You know the drill!  Gather your ingredients-you’ll need:

  • 10″ tortillas or a similar wrap/bread
  • ground beef
  • frozen (or canned) corn
  • 1 can of black beans
  • instant brown rice (or rice of your choice)
  • greek yogurt (or sour cream)
  • salsa
  • shredded cheese
  • Chili Powder, Comino (cumin), Ground Cayenne Red Pepper, Onion Powder, Garlic Powder (or pre-made taco seasoning if you choose)

image-1


In a small pot, begin to boil your rice according to the package directions and desired servings and add in your corn.  The amount you use is entirely up to you.  Simultaneously, in a large skillet, season and begin to brown your ground beef adding in the drained black beans when your meat is almost completely done.  I use about 1/2 a can per 1 lb of ground beef  but you can use more or less.  How much seasoning you use is entirely up to you but remember, you can always add spice later but you can’t take it back!  I accidentally added a bit too much red pepper and chili powder to my meat and 75% of us thought it was perfect.  My 4 year old on the other hand said “Mommy, don’t get me wrong, these wraps are delicious but they make my breath spicy and my tongue burn!”  lol  Luckily, adding a bit more greek yogurt to hers helped tremendously and she at it all up!

image-4


When we visited my cousin in Fort Worth over the summer, she made us some taco salad with some really delicious sauce that my kids and I really loved.  When I asked what was in it, I was shocked by how simple it was and have been making it since.  She used equal parts sour cream and salsa to make hers but I always substitute sour cream for greek yogurt when possible as it is a little better for you.  You can use either you would like.  I use a small personal sized blender and scoop in equal parts of greek yogurt and chunky salsa and blend until the chunks are gone and it’s a nice pinkish-peach color.

image-2

When your meat and rice are completely cooked, remove them from heat, lay your tortilla on a plate, and begin adding everything in layers.  I first added the rice/corn, then the meat/beans, I drizzled with a little sauce, and topped with some cheese.

image


Take the ends of your wrap and fold them over and then do the same with the sides rolling it as tightly as possible.  Heat a small skillet and place your folded wrap in to crisp tortilla on both sides

image-10


Remove from skillet and cut in half to serve.  They were HUGE so 1 fed both of my kiddos.  I gave them blue corn chips and a spoon full of organic peach salsa.  You’ll want to buy some of this at your closest HEB for a future recipe anyway!  😉

Mmmm… migitas!

When I was a little girl my Daddy used to make the greatest breakfasts!  His paps (or potatoes) were always a crowd pleaser but my favorite were always his migitas or migas as most of you have probably heard them called.  Now that I’m all grown up, Daddy doesn’t make me breakfast much and I’ve never perfected his breakfast papas but I’ve learned to make the perfect migas and I’m going to share how with you if you’ve never attempted it.  They’re actually super simple to make and extra delicious!

First gather all your ingredients.  You’ll need

  • corn tortillas (I use white corn but yellow corn would be just fine too)
  • tomato
  • eggs
  • onion
  • cilantro
  • garlic powder, onion powder, salt, and pepper
  • avocado (optional)
  • shredded cheese (optional)

image-9

stack your tortillas and either cut them with a knife into small squares or you can tear them with your hands if you prefer.  Once they’re all cut up, put them in a skillet and drizzle oil over the top.  You’ll want enough oil to coat all the pieces but not so much that they become super greasy and soggy.  Obviously how much oil you use will depend on how many tortillas you used.  I for instance use about 10-12 tortillas for my family of 5 and usually have leftovers.  I mix the tortillas in the pan to coat them in oil but I don’t turn the burner on just yet.

image-5

You’ll then need to chop your onion, tomato, and cilantro.  Once you’re done, crack your desired amount of eggs (usually about 1 per serving), into a bowl and add your onion, tomato, cilantro, garlic powder, onion powder, salt, & pepper.  Whisk until mixed well and set aside.  Meanwhile turn your burner on to medium heat and begin to fry your tortillas constantly mixing to ensure even cooking.

image-6

Once your tortillas are mostly cooked and a lovely golden shade, you’ll want to stir in your egg mixture.  Continue mixing making sure your tortillas and eggs are nicely intertwined until your egg is fully cooked.

image-7

Once eggs are fully cooked, remove from heat and serve.  My kids and I like ours with a little bit of shredded cheese sprinkled on the top and I usually serve it with sliced avocado as well. Dave doesn’t really like avocado so he usually sticks to drizzling his with salsa.  See?  Super simple!  Are you absolutely drooling over there?!?!?  I am just thinking about them!  May need to repeat tomorrow, enjoy!

image-8