Birthday Carnival Fun

Gosh, I’ve been pretty bad about updating here lately.  What can I say?  I’ve been a busy beaver for sure!  The holiday’s had me swamped and then it was birthday parties and traveling and out of town guests galore!  Last weekend, we hosted T’s 7th birthday party here at home.  Even though I never managed to get A’s Sheriff Callie party blogged (I better do that today too!), I thought I would go ahead and get the details for the Carnival party blogged while they were still fresh on my mind.

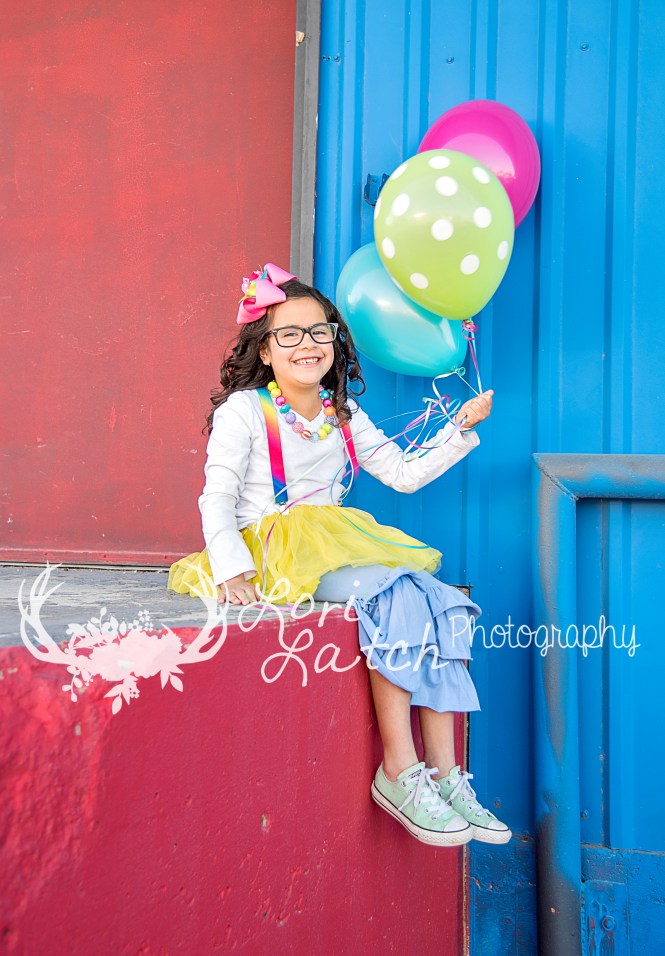
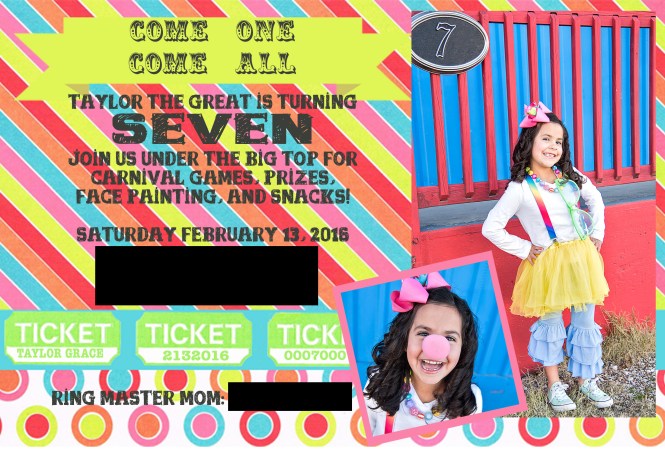
We decided about 3 months ago that we would be going with a Carnival theme and took to pinterest immediately to begin planning.  A few weeks before the party, I took her out in some colorful clown garb to snap a few photos for her invitations.  They’re pretty goofy but they’re probably my favorite pictures ever of her because they really let her silly personality shine!  Here are a few of my favorites!

pLLP_0422LLP_0383pLLP_0352p

I normally have really cute double sided photo invitations printed from my print company but, unfortunately, I procrastinated a bit and ran out of time.  Instead, I had them printed 2 to a page at my local office depot.  They had them printed and cut down to size for me within an hour and they were on their way to the post office that afternoon!

tinviteblog

Meanwhile, we begin gathering supplies and prizes for the games and sketching ideas for setup in chalk in the garage and driveway.  Haha  We decided that since A. I would be returning from camp with my oldest the night before the party and B. The party was in the afternoon that we would not serve a full lunch menu but instead opted for snacks and sweets.  While I was at camp, I enlisted my hubby and mama to transform our garage into a big top canopy by using plastic tablecloths.  We’ve used this method for many parties and it always works so well.  Gives us an ample party space while still being whimsical and colorful.  You almost forget you’re in a garage.  Thankfully, weather for both my girl’s winter birthdays has been absolutely perfect!

LLP_1348LLP_1323LLP_1307LLP_1321

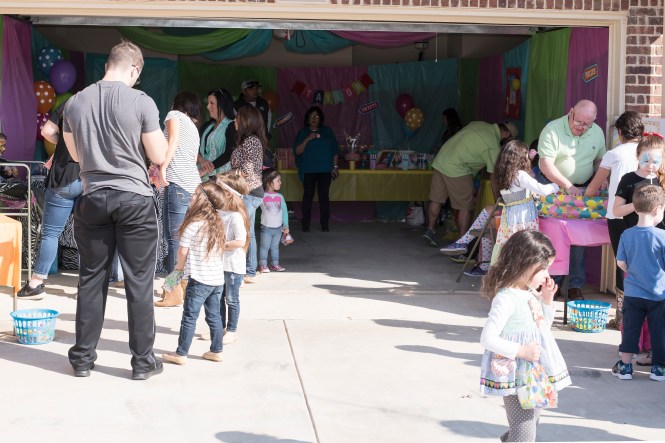
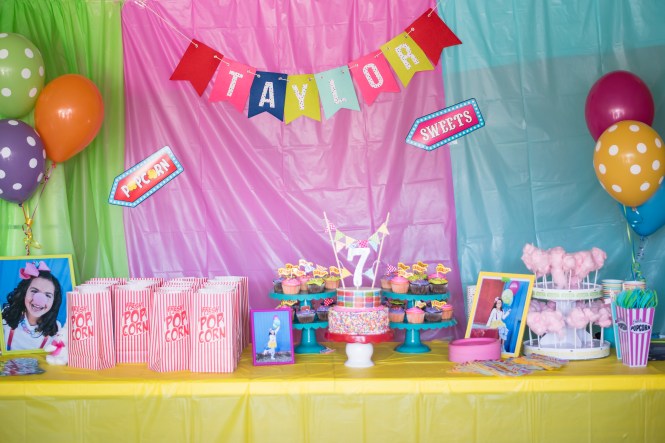
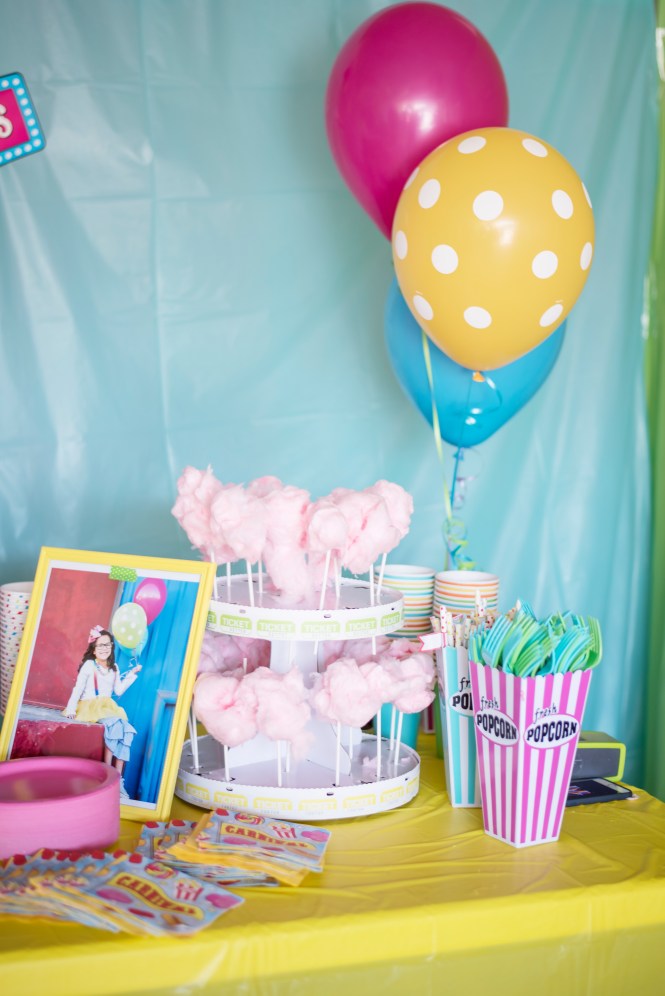
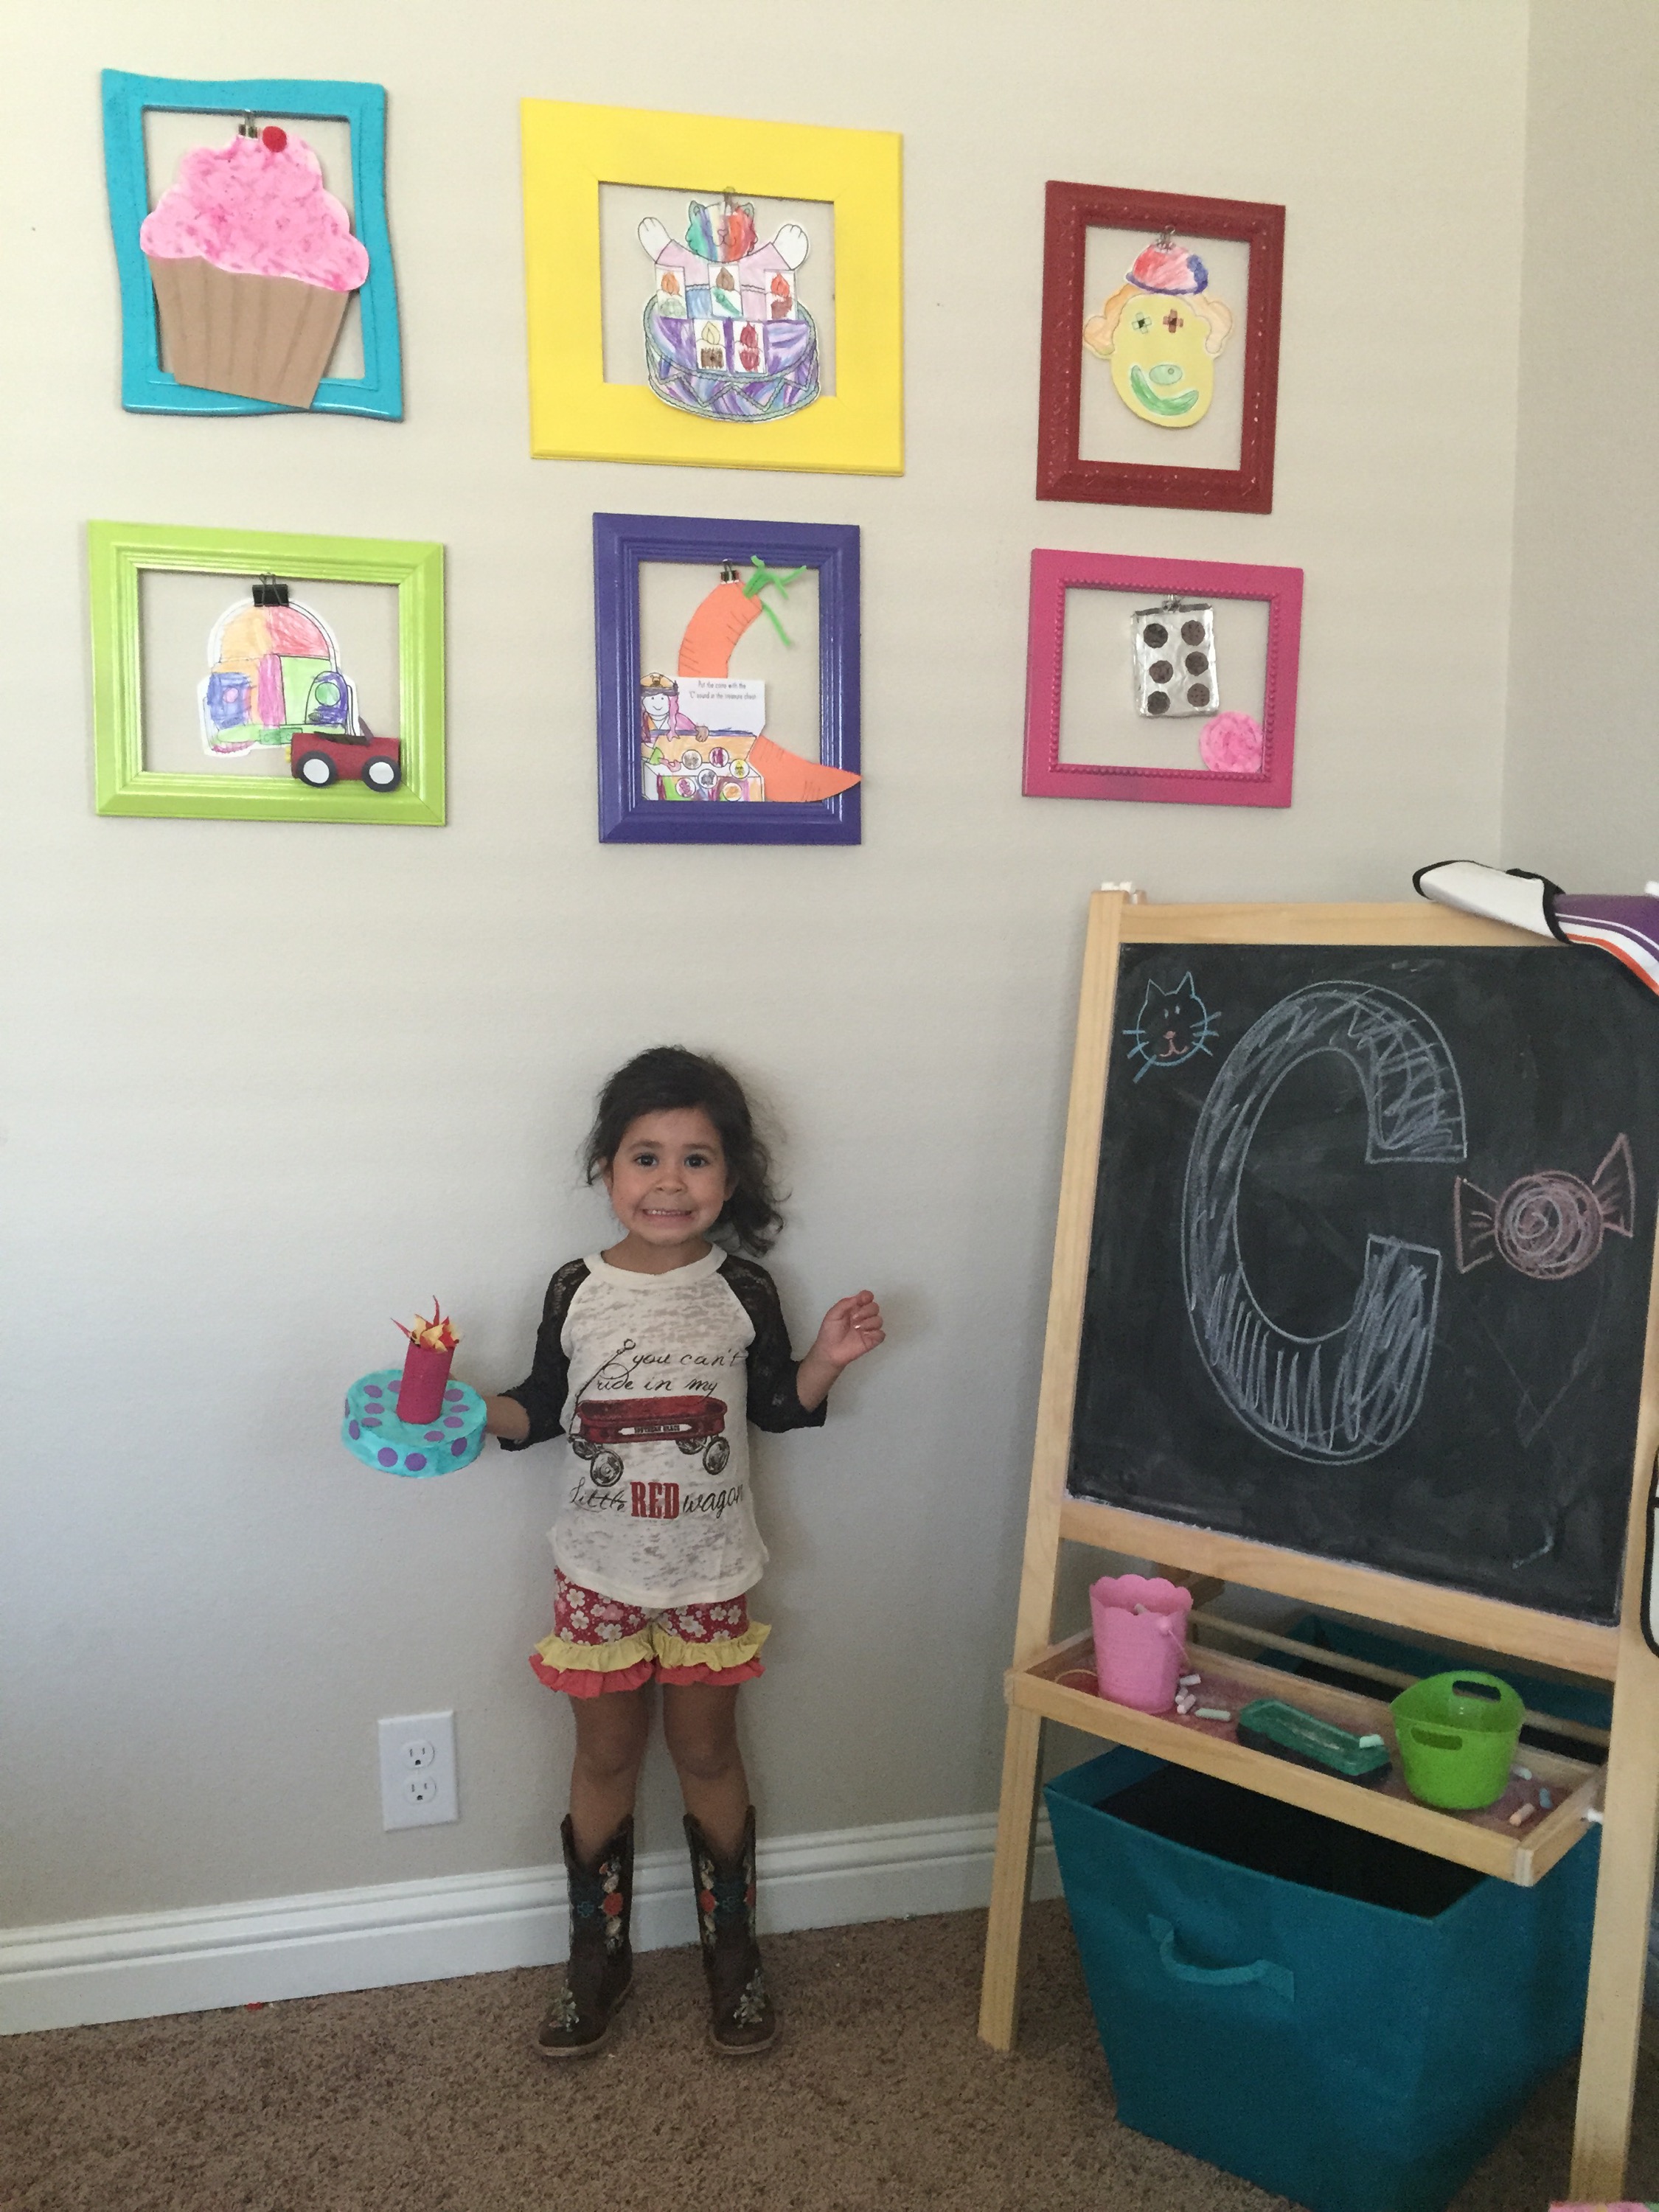
I wish I had taken a better picture of the garage because it looked super cute but you get the gist here.  We served popcorn, cotton candy, cake, and ice cream.  I got the cute little carnival napkins at Hobby Lobby, as well as the little cotton candy stand, and the marque looking signs.   Most of the other table decor came from the dollar spot at Target!  We found the colorful popcorn containers there as well as the felt birthday banner and letters, and the cute little red cake stand.  Because I didn’t have a lot of extra time or energy for cake decorating, I picked a super simple design and I’m pretty pleased with the way it turned out.  I rolled the bottom tier in sprinkles and for the top tier, I designed cute little ticket strips with her name and birthday in photoshop and then took it down to my local Wal Mart bakery for them to print on an edible image.  It was quick and easy and the image only cost about $7!  I got the little pennant banner, cupcake flags, and glitter 7 at hobby lobby too.  I bought bags of cotton candy from our local Golden Corral for $1.25 each and just divided them into small portions and put them on lollipop sticks.  They made for a cute display and kids weren’t consuming giant portions of sugar so it was a double win!

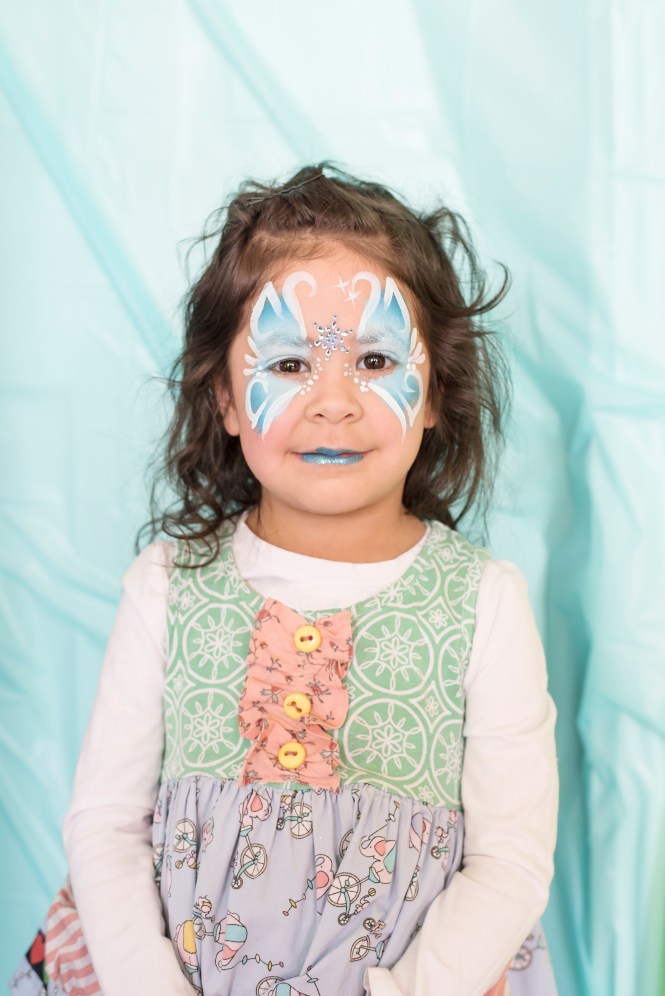
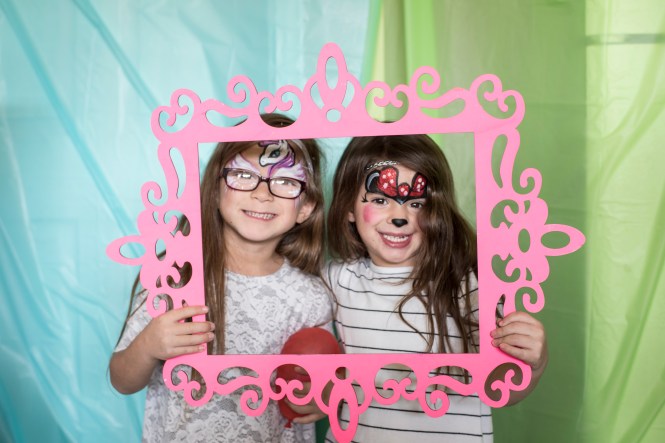
We had 5 game stations so each kid was given 5 tickets when they arrived (I got these at dollar tree!) so they each got to try each game once.  Because we had extra time and more prizes once each kid had a turn, we allowed them another set of tickets if they wanted to continue playing which most did. We also hired an amazing local face painter.  She was a huge hit with the kiddos!  Our carnival games were simple and inexpensive as were our prizes.  Most were purchased at the dollar tree with the exception of the pet fish soap which I made myself.

LLP_1308.jpg

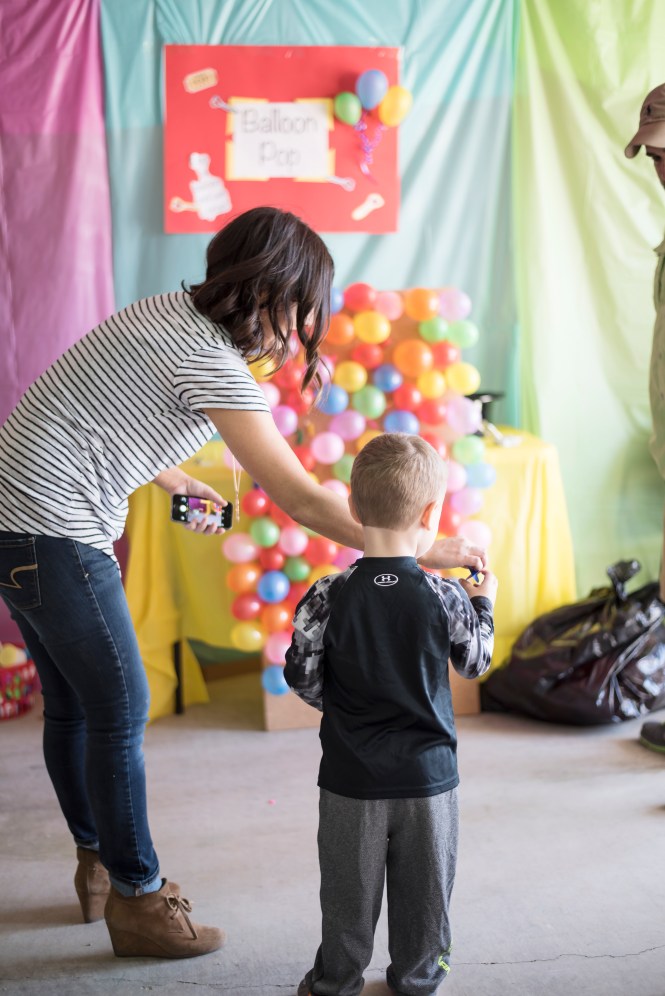
The balloon pop station was the biggest hit I think.  To assemble it, we used squares of cork board purchased at hobby lobby attached to a piece of plywood we had laying around.  We used thumb tacks to attach the balloons and darts with plastic tips for the kids to throw.  If they popped a balloon the selected a prize (bubbles or play dough) and if they missed they got a piece of candy.  They each got 3 tries per ticket.  We got the dart balloons on amazon and the darts 3 to a pk for $1.97 at Wal Mart.  We blew all the balloons up prior to the party and placed them in trash bags.  We just did a little at a time and within a couple of weeks had them all blown up!  🙂

LLP_1334.jpg

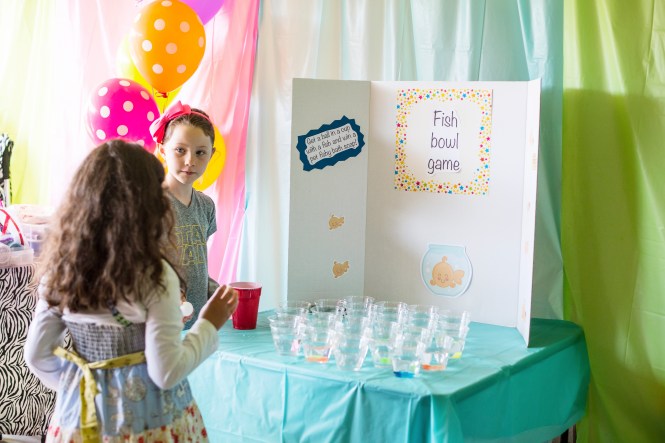
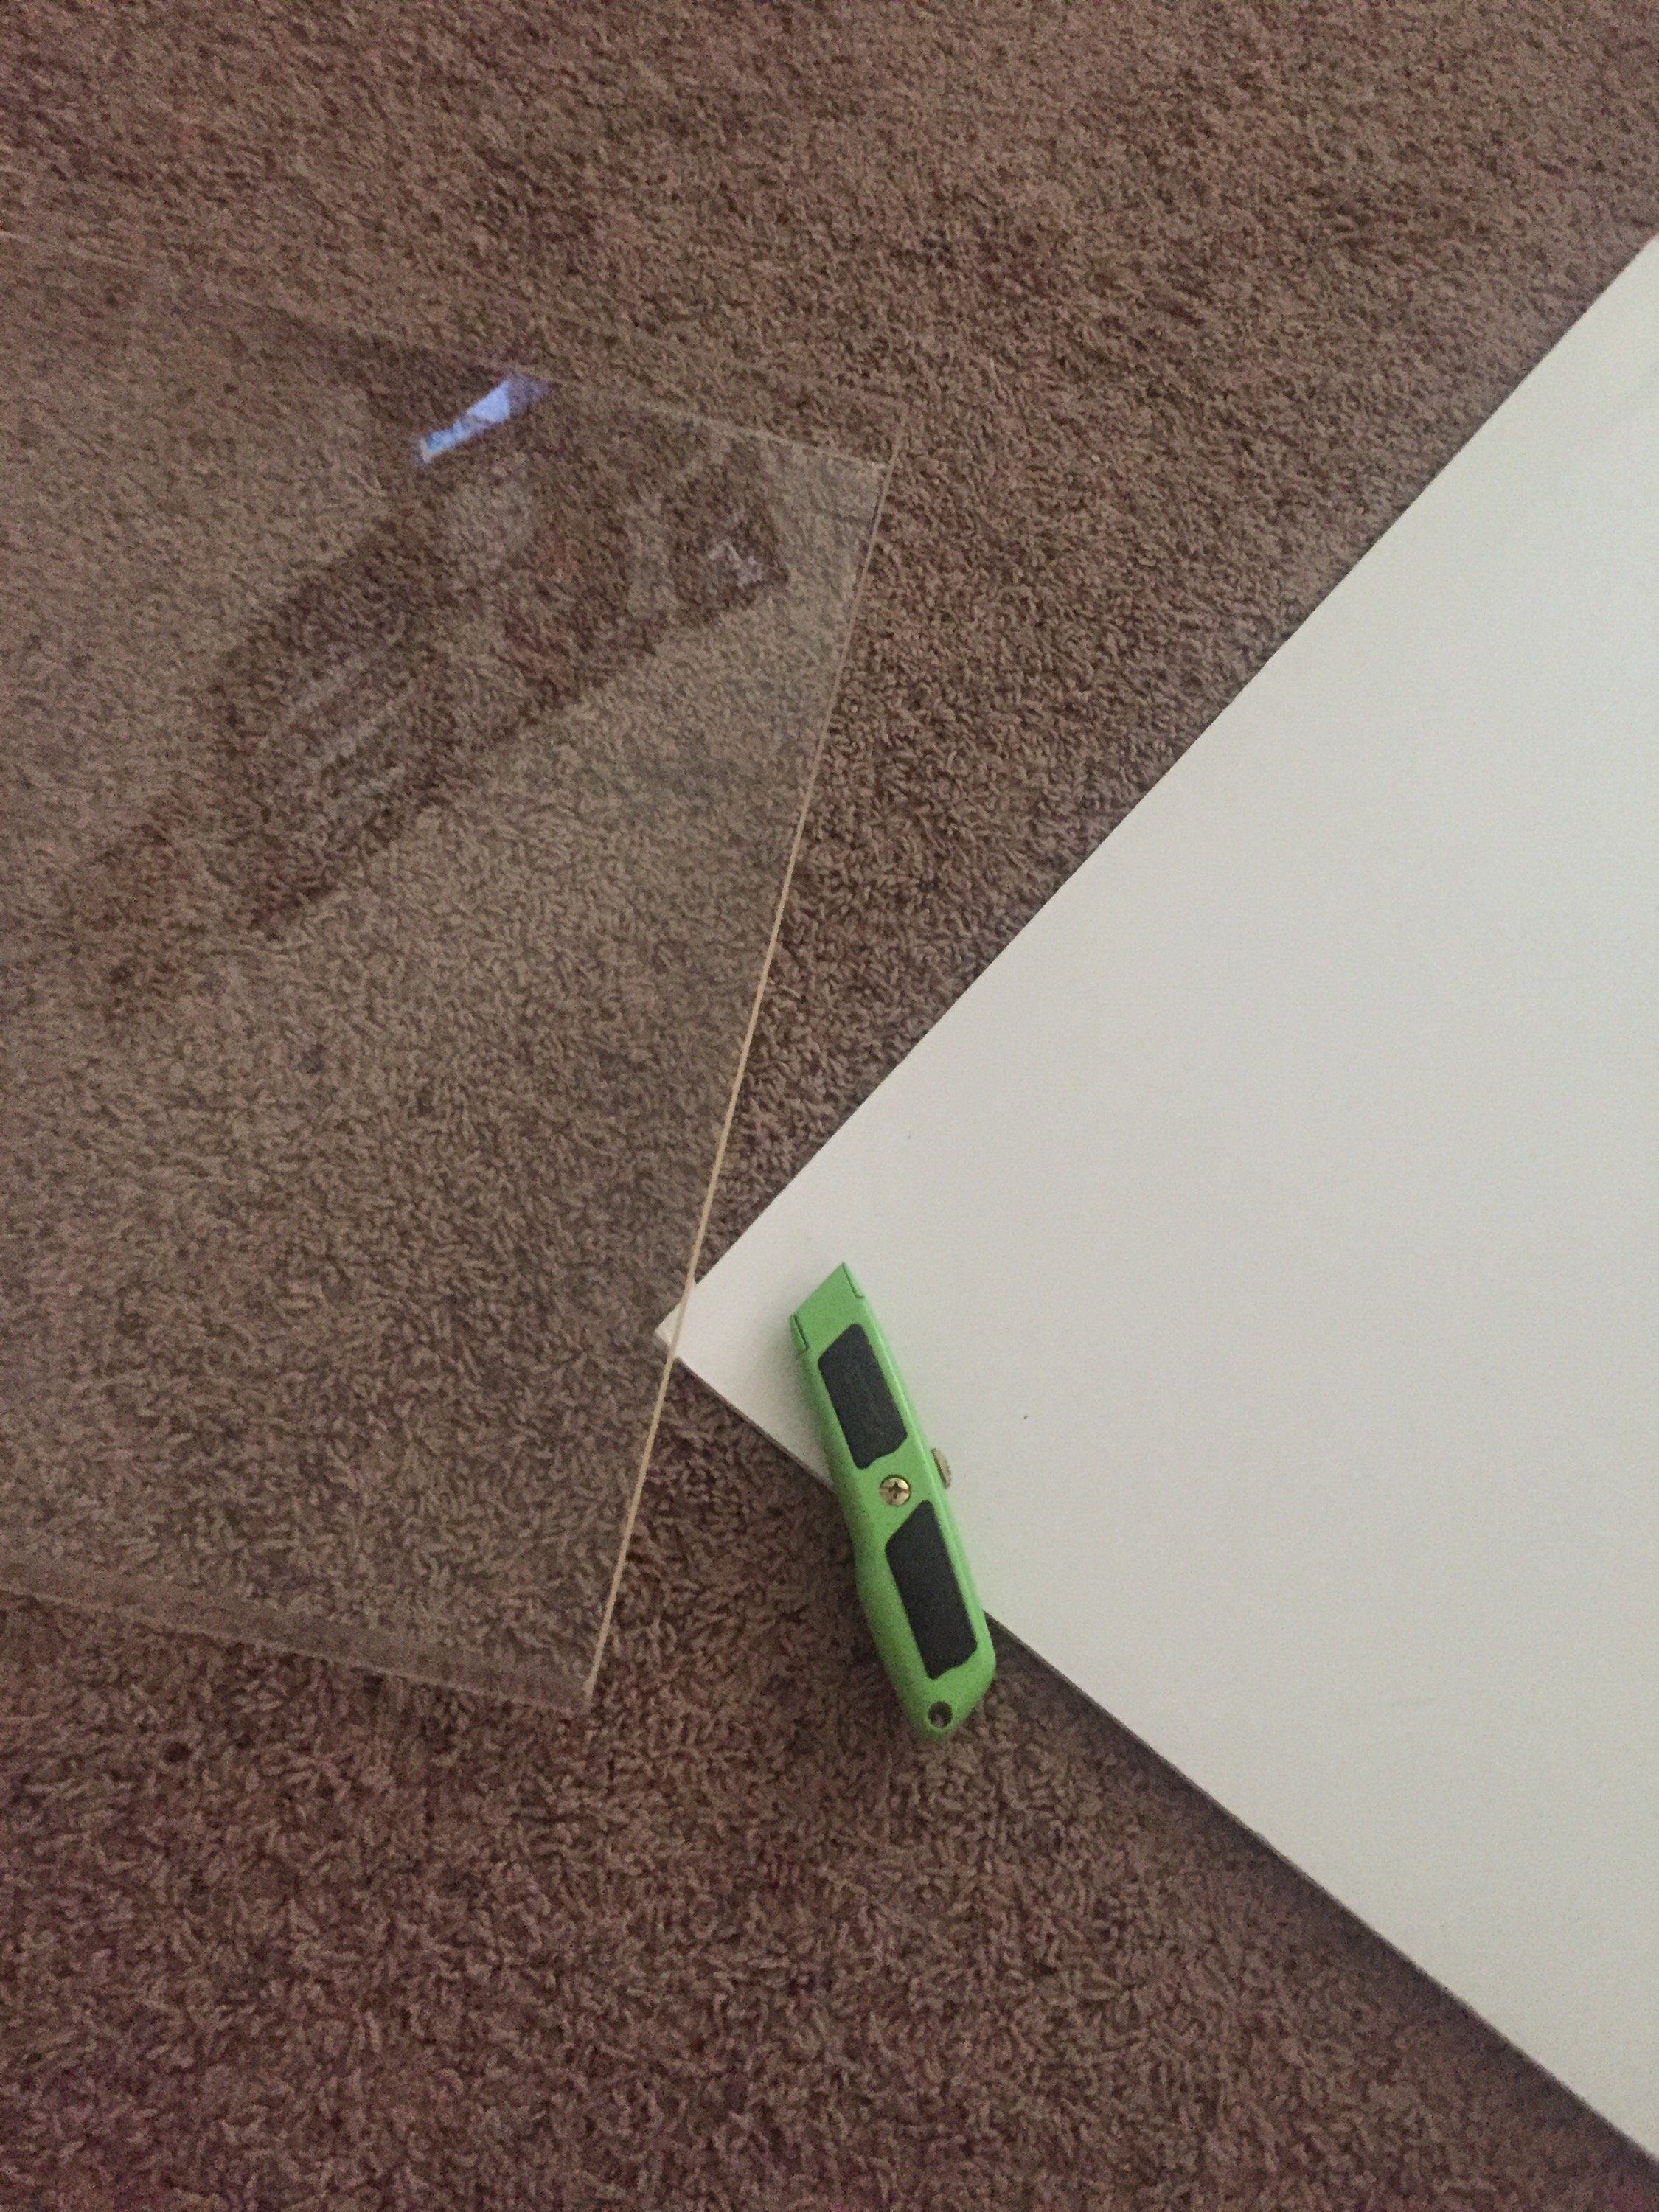
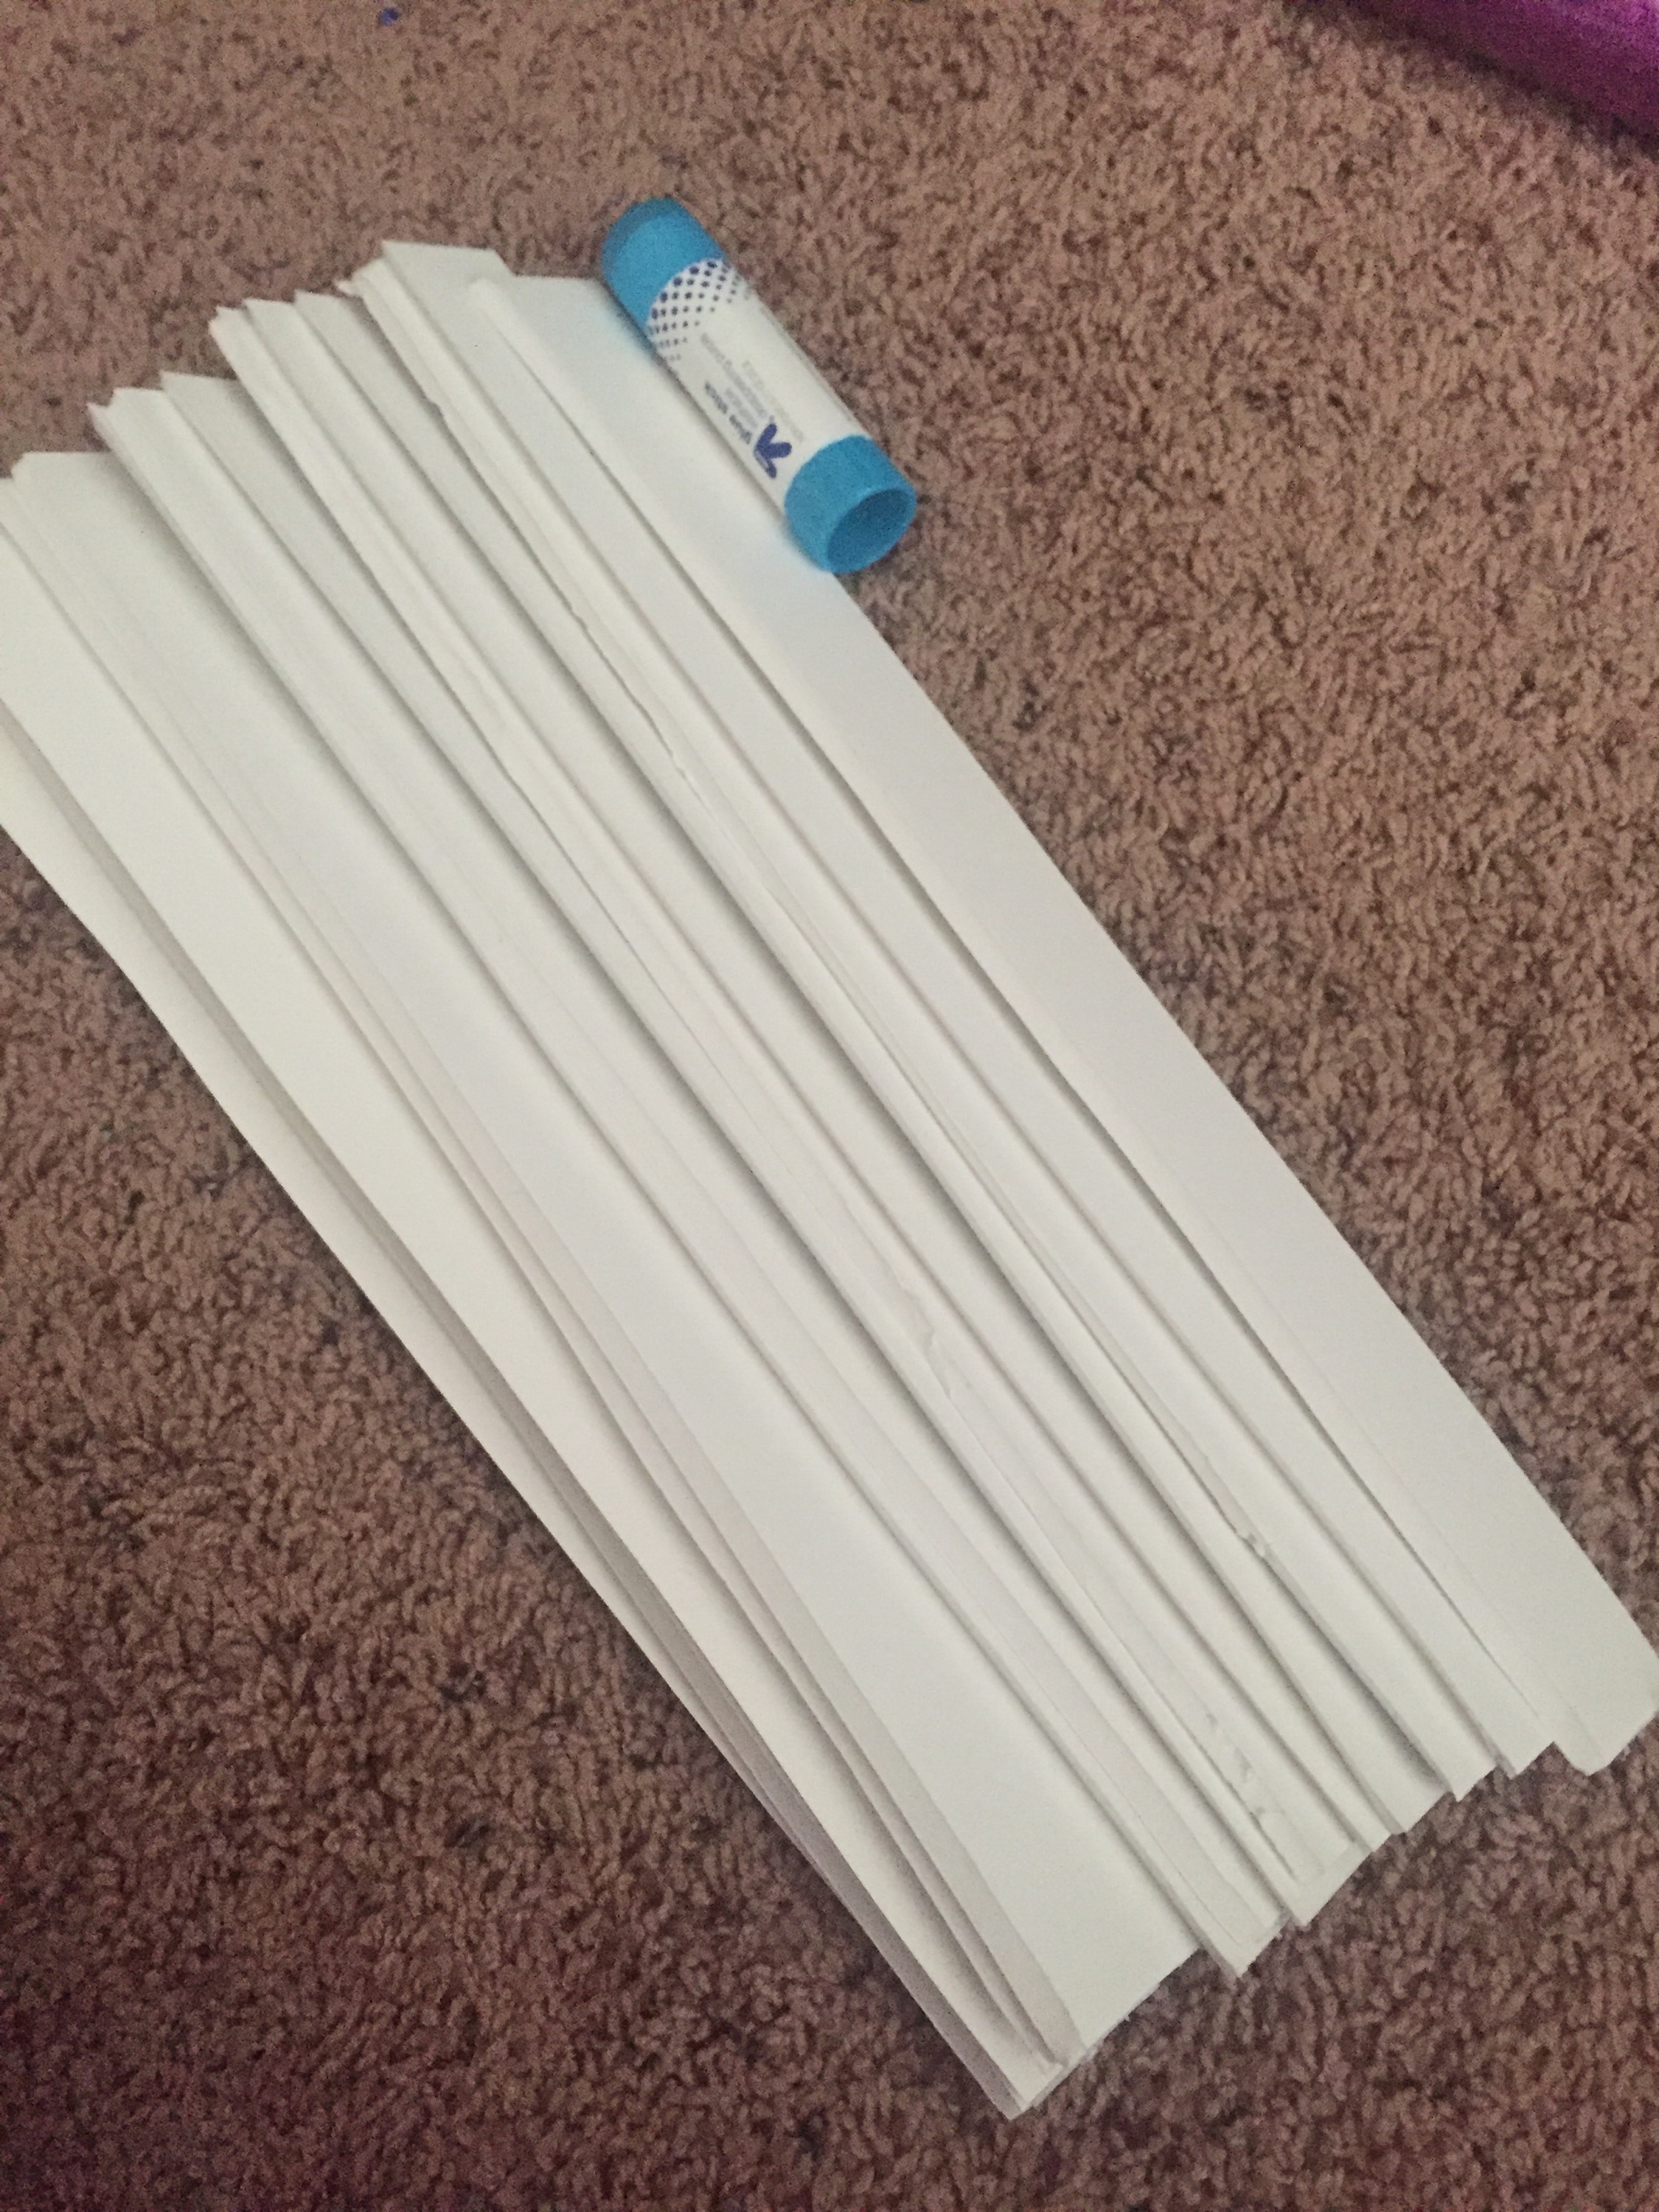
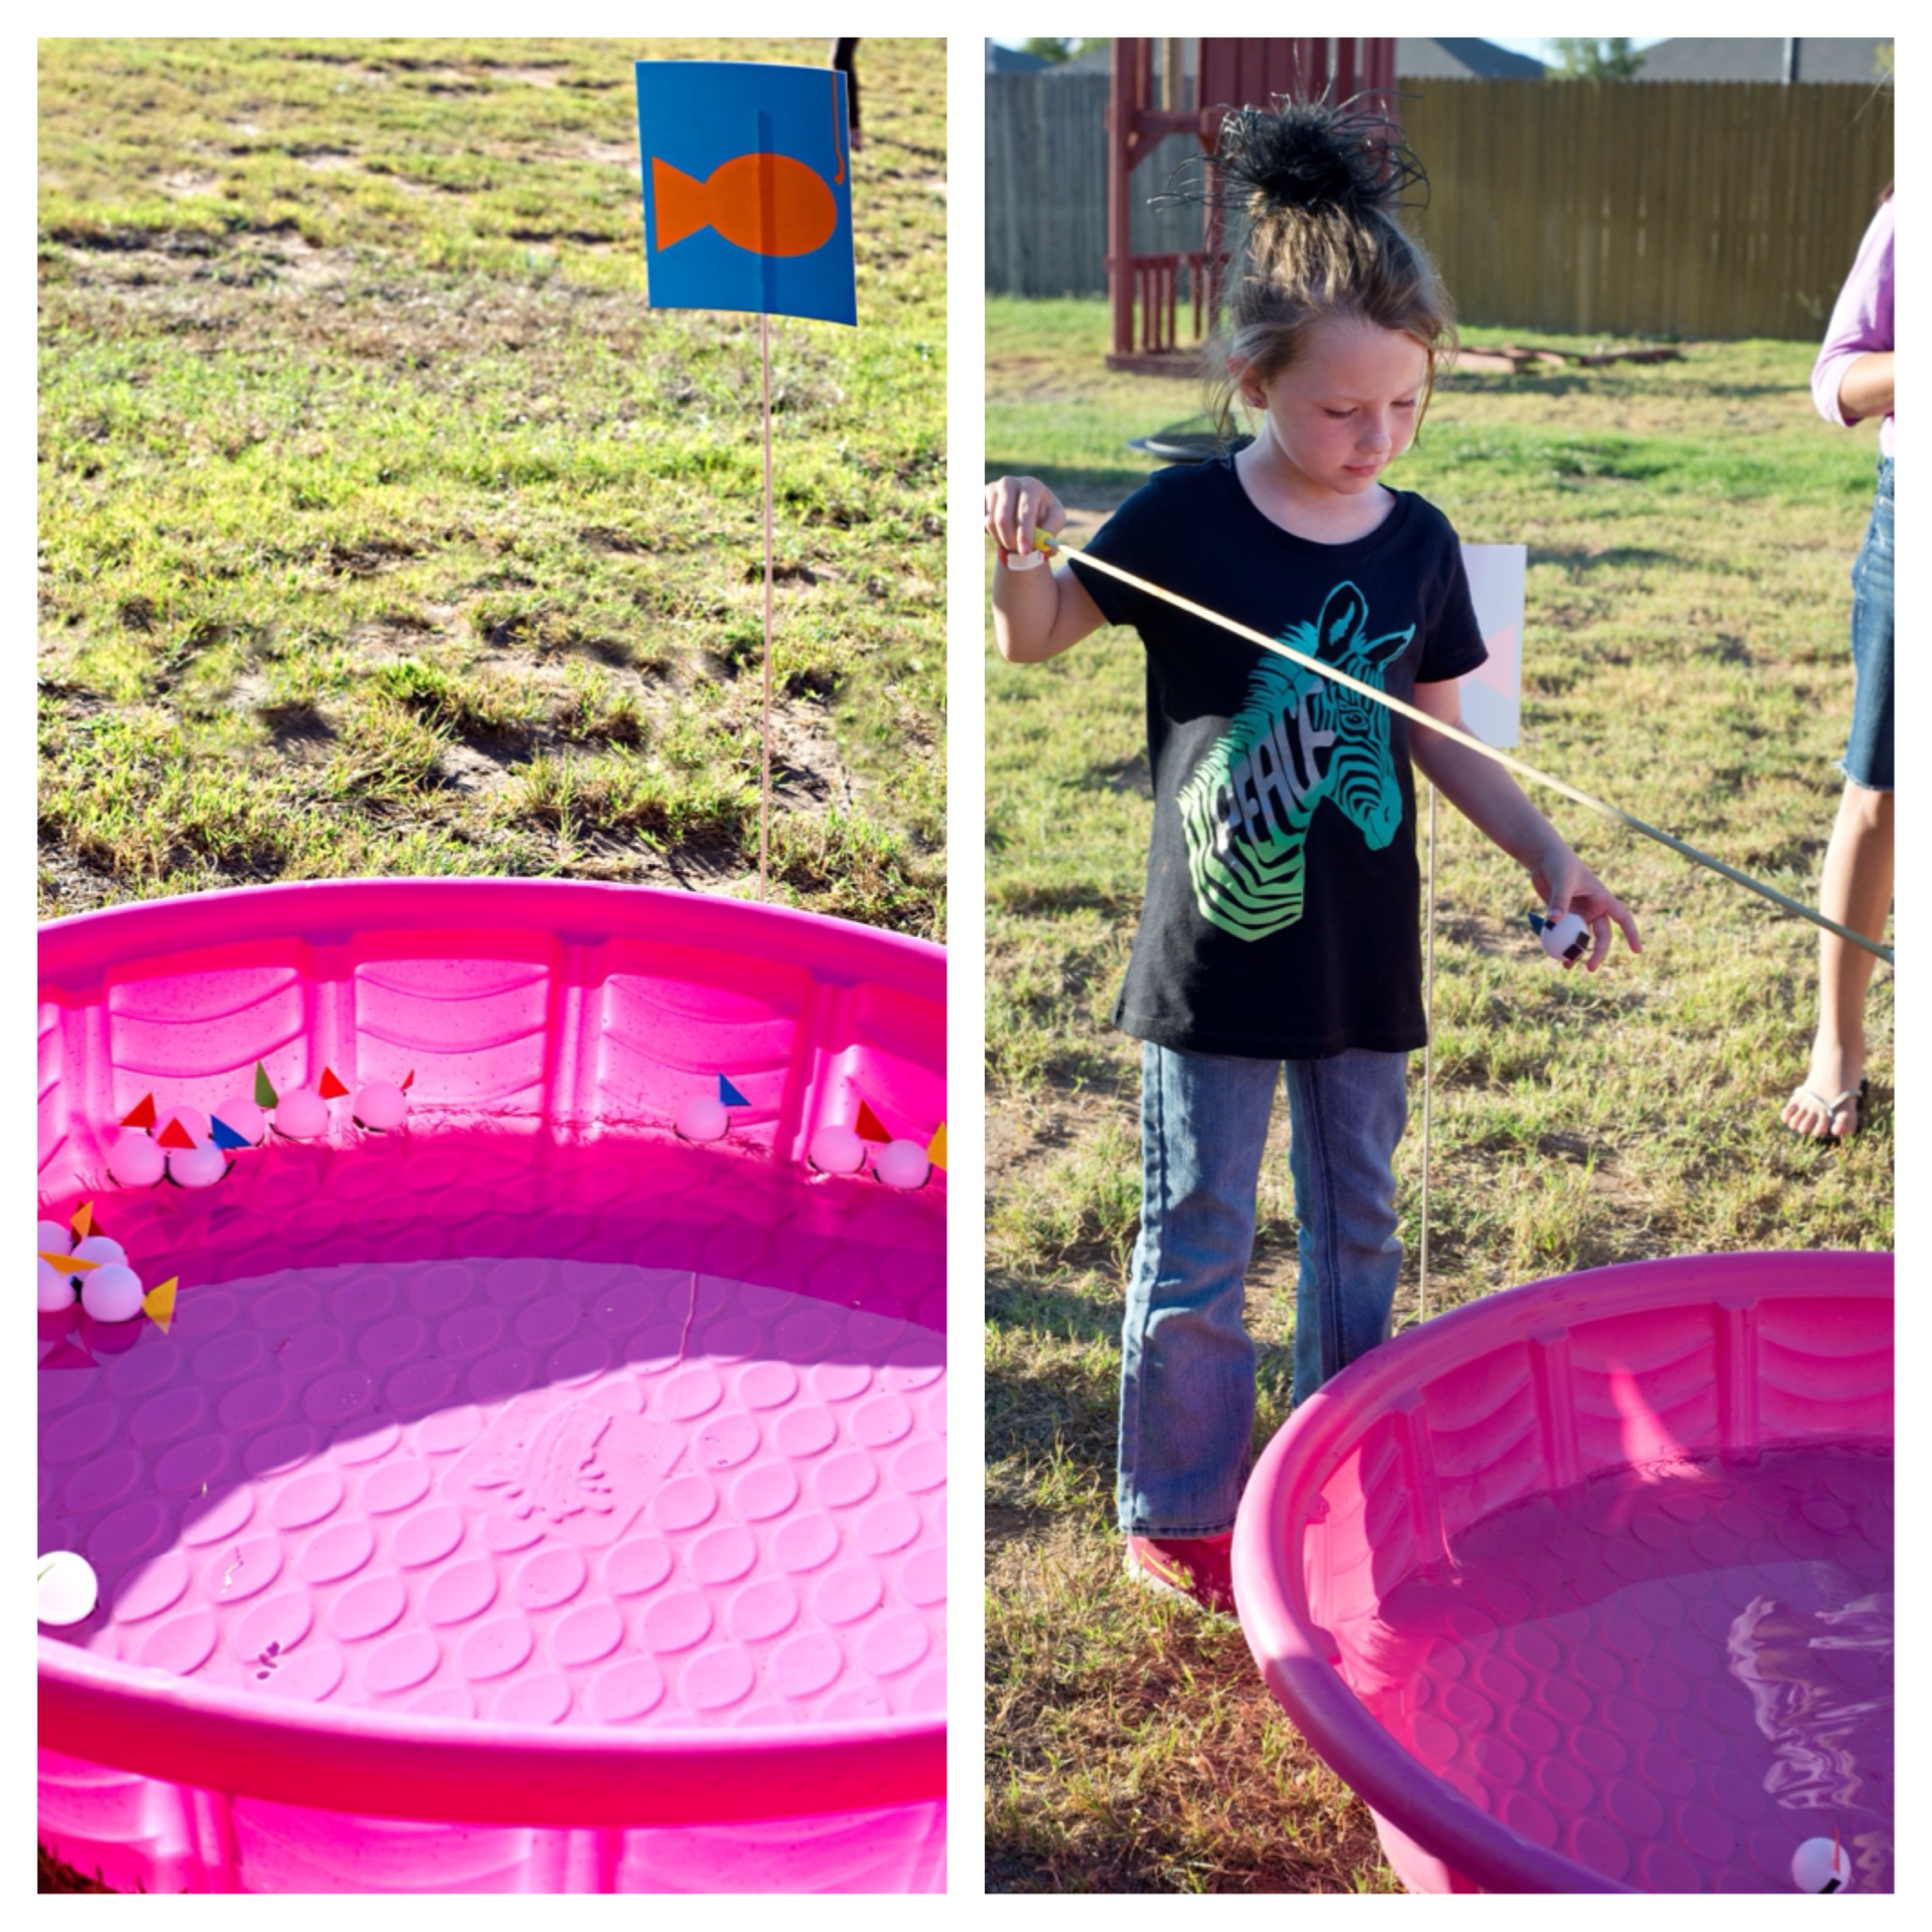
For the fish bowl game we used small clear plastic cups from walmart filled with water.  We dropped a plastic fish toy in several of the cups and kids had to toss ping pong balls into the cups.  They got 3 tries per ticket and if they got it in a cup with a fish, they got to take home a pet fishy bath soap.  I made these easily by purchasing a large block of clear glycerine soap from Michael’s with a 50% off coupon.  It totaled about $10 and I still have a ton left for a future craft!  I purchased the vinyl goldfish on Amazon.  They were so simple to make and the kids had a blast helping me.  We cut the soap into smaller pieces and placed them in a microwave safe bowl.  We melted them in the microwave and then poured the liquid into small plastic treat bags sitting in mugs.  We then moved the bags to a bowl of ice water where we used a skewer to push fish toys down into the soap as it hardened.  If you choose to add scent to your soap, mix it in with the bowl.

fish

LLP_1328

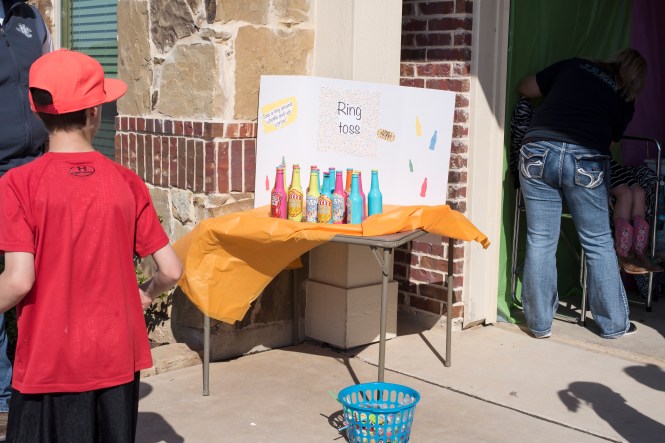
For the ring toss, we had the painstaking job of drinking beer to empty those bottles!  I gave my husband that job weeks in advance thinking they would be done waaaaay ahead of time but the week before party time, we only had 2 bottles sitting on the counter!  Luckily, we attended a Super Bowl party the weekend before and managed to collect enough!  lol  I spray painted the bottles and caps and found those super cute carnival soda labels at Hobby Lobby.  The kids each got 3 rings (which were harder to find than I imagined).

LLP_1346

For the lucky ducky game we purchased 50 rubber duckies and this inflatable pool from Amazon and glued washers to the bottom of each duck.  We painted about 12 with nail polish first.  The kids got 3 tries to pick a duck with a colored washer on the bottom to win a prize.  They got a piece of candy if they didn’t pick a winning ducky.

Last but not least we had a bean bag toss.  I didn’t get any pictures of this but it was pretty simple.  We used a lawn game set we already had from Academy and set it out side by side that way 2 kids could play at once.  Each got 3 bean bags.

LLP_1373.jpg

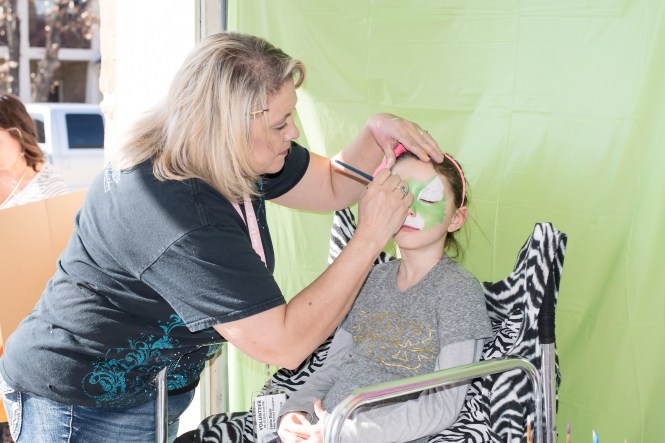
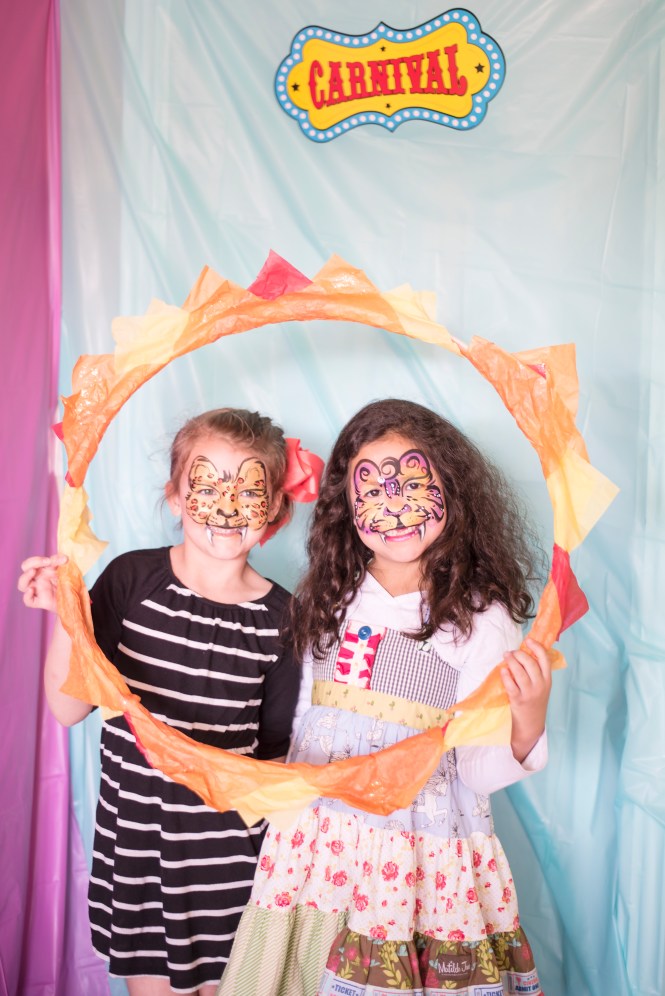
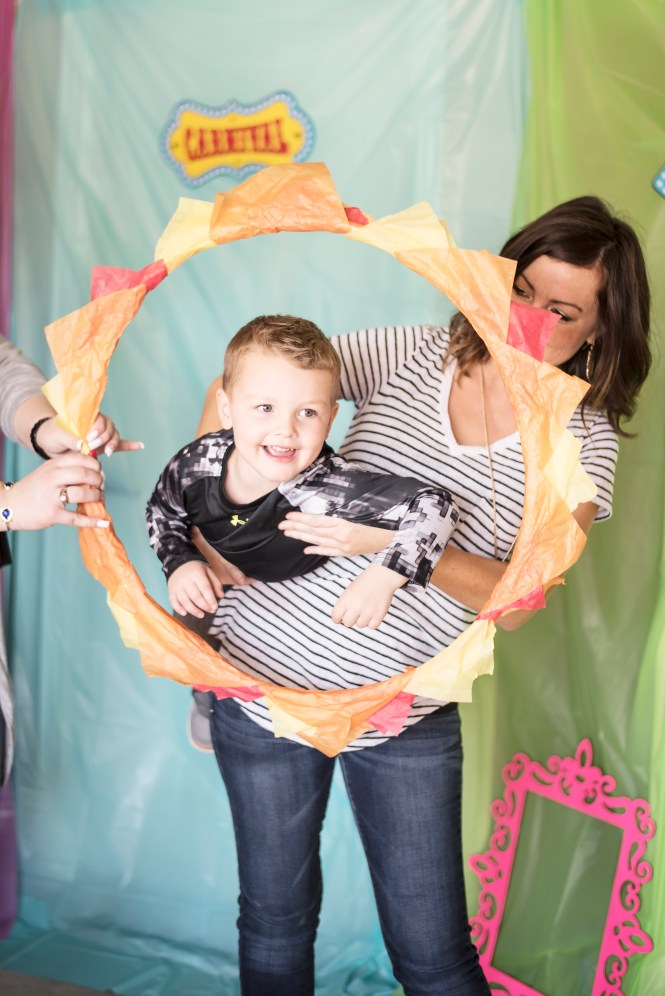
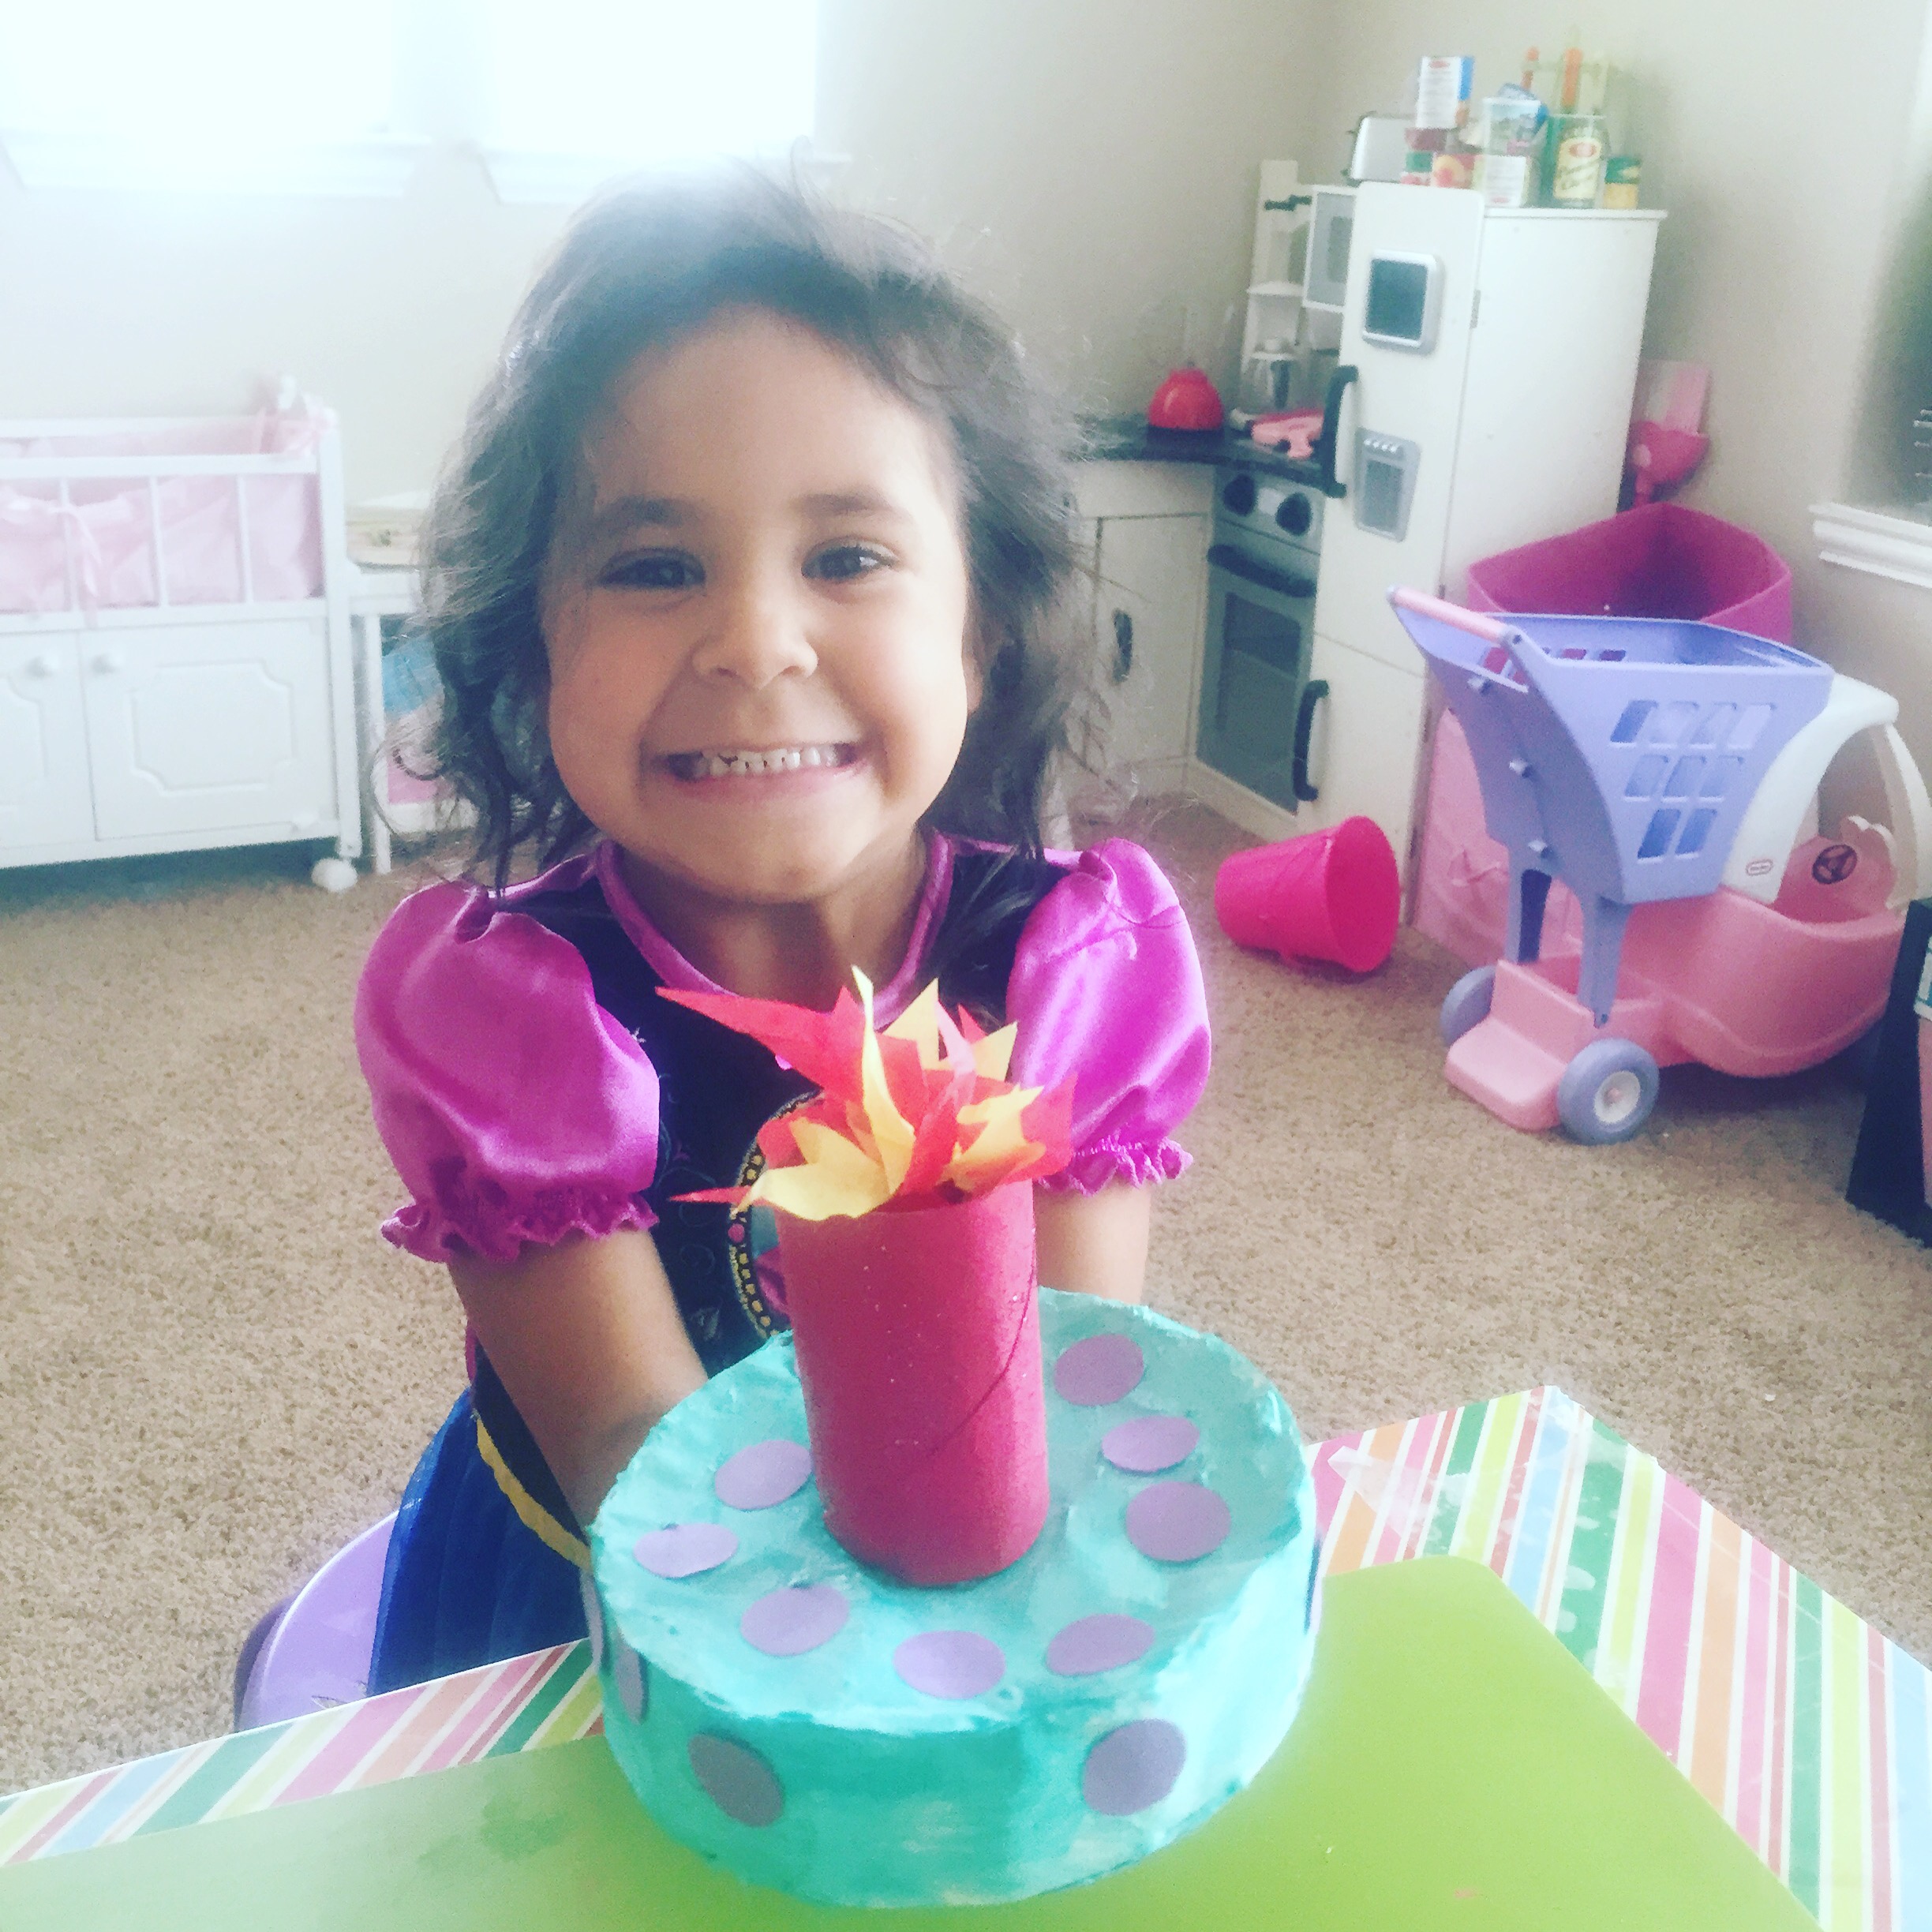
After a stop at the face painting booth, our guest were ready to have their picture taken in the ring of fire.  I had my oldest and a friend make this using a hula hoop we found at the dollar tree and red, yellow, and orange tissue paper.  Made for a cute photo prop!

LLP_1368LLP_1342LLP_1326LLP_1313LLP_1387


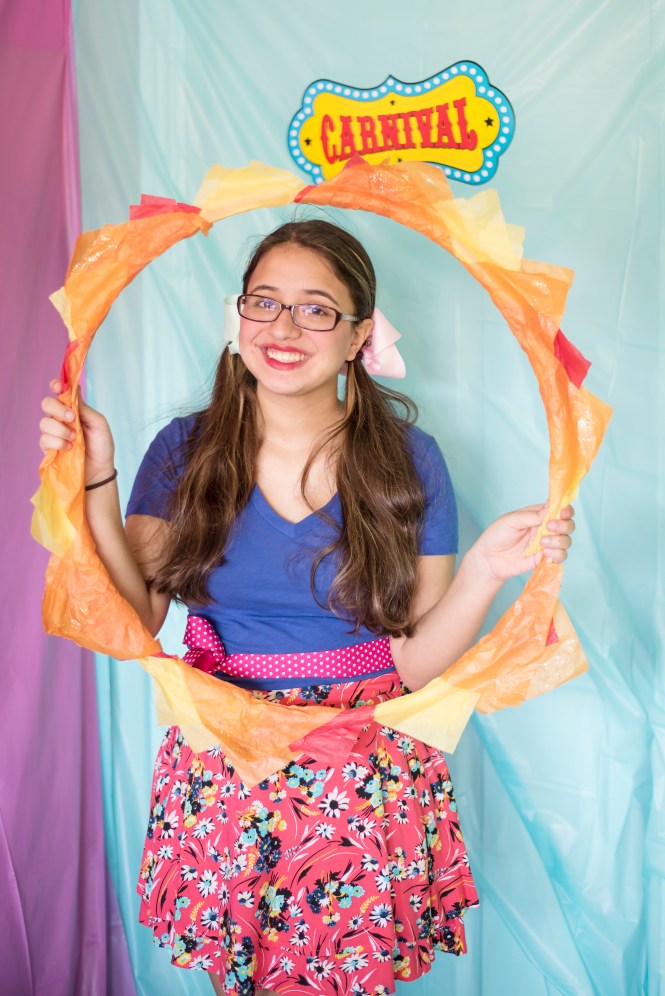
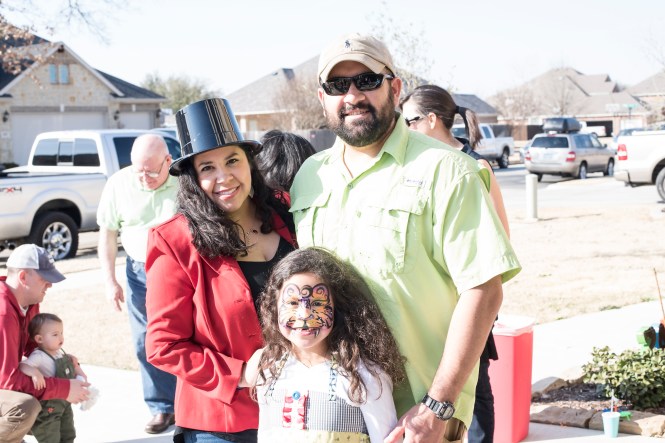
Overall, I think a great time was had by all.  Even this ole top hat wearing Ring Master!  Thanks to everyone who came to make our girl’s day extra special!

LLP_1378.jpg

Advertisement

A very shopkins Christmas

It’s happened.  I tried to fight it for a long time but I’ve finally succumbed to it.  The shopkins craze has hit our house.  For about a year now, T has asked me for shopkins every time we leave the house.  If you don’t know what shopkins are, they are tiny gumball machine prize sized collectibles which unfortunately do not have the gumball machine price tag.  They most often come in “blind baskets” so you have no idea what you’re getting.  It’s a surprise!  All my nieces in the 6-8 year age range love them and thus my 6 (almost 7) year old has jumped on the bandwagon.   This year when making Christmas wish lists, that’s all T said she wanted.  Seriously.  Anywho, if we’re going to do this shopkins thing, we’re going to do it right.  She’s my little collector so I knew I wanted to find a way to display her shopkins so that she could easily reach them to play with but see what she has at all times.  This year, we’re doing Christmas a little differently and we have gift categories to be checked off.  1 category is “made by mom”.  So for T’s gift, I decided I wanted to make a shopkins display.  I purused Pinterest for ideas but couldn’t decide then yesterday, while strolling Michael’s, I hatched a design plan!  Thought I would share it here in case you’ve got a shopkins crazed collector too!

What you’ll need:

-An acrylic box frame (any size you choose) I went big with a 16×20 

-foam core or sturdy cardboard

-box cutter

-wrapping paper

-hot glue gun

  
You can use your frame as a template and a straight edge to cut your shelves out of foam or cardboard.  I wanted 8 shelves on my display and each shelf needs to be doubled up.  So total, I cut 16 strips.  Leave them a little longer than necessary (about half an inch.  You can trim with scissors later.  

  
After cutting them, I grabbed a glue stick and began sticking them together in pairs.

  
Next, I cut 8 strips of wrapping paper to wrap around each shelf.  I had this fabulous glitter paper that worked perfectly because it won’t scratch easily, it was thicker than my others, and it seamlessly matched up when I wrapped it around without being noticeable.  You’ll want to use something similar or solid color for best match up.  You could even use printed contact paper!  I used my glue stick to secure it to each “shelf”.

  
Next, you’ll need to find a box or a book that will match your desired thickness.  I wanted her to be able to store those little baskets and bags on it too so I found a box that was the perfect width in the closet and used that as a guide.  I then used hot glue all along the back and sides of the “shelf” to secure it to the frame.  

  
Moving the box up with each shelf kept them perfectly spaced and I used a small level to double check my work.

  
I plan to cover the outside trim in ribbon that way I can hang it on her wall as well but I haven’t picked that out yet.  Next, stick your shelves with shopkins and you’re ready to go! 

 This week, Michael’s has a 50% off coupon so I used that for the frame which brought it down to about $7.50!  They also are now carrying shopkins in the store so we used to coupon again to score a 12pk set half off!  
Hope this is helpful Mamas!  I know I’m going to have a pretty happy girl come Christmas morning.  😃

Mommy’s preschool D-E-F

Here’s part 2 of our alphabet projects. Letters D, E, and F. You can see part 1 featuring letters A, B, and C HERE

Letter D:
Dinosaur
Dog
Duck
Digging
Donkey
Donut
Dad
Dirt
Dice
Dreamcatcher
Dandelion
Dolphin
Drum
Doll

IMG_6451

There were so many fun things planned for D but we ran out of time before getting to them all 😦

I’ll highlight a few of the fun ones we did get to as I’m sure you’re not so interested by the worksheets. We made a dandelion using q tips, a cotton ball, and a pipe cleaner. She simply glued the cotton ball on the top center of a piece of paper then glued the q tips around it. I made a pipe cleaner stem and we were done! We also used a paper plate to make a donut. She painted it and then glued on real sprinkles. For the duck, I cut out a D from yellow construction paper as well as a half circle wing. I made a heart shaped beak and triangle feet from orange paper. She glued all the pieces on and added some yellow tail feathers and goggly eyes.

For the dino feet, I let her paint 2 empty (okay fine, I had to empty them but we are still totally using the kleenex! lol) kleenex boxes. I free cut 4 orange triangle claws per foot and let her glue them on. We then took green construction paper cut into strips and made the hat. 2 around the head and 1 across the top. I then let her glue on green triangles all around the top. She got a kick out of this and is still parading around in this outfit today!

IMG_6253

Our favorite project for D however was the dreamcatchers. The big girls begged me to wait until they got home from school for this one and everyone had a blast! I took a cheap paper plate and cut the inner circle out. Then, using this template as a guide, we used a hole punch to create 11 holes around the outer edge of the plate. While they painted their plates, I cut long pieces of yarn for them to use. I didn’t measure, but I would guess about 3 feet just to be safe. They weaved the yarn through every 4th hole as the above mentioned blog suggested and it worked well. We finished by stringing beads and tying feathers to 3 small strips of yarn and then tying them to the 3 bottom holes. They turned out so cute!
IMG_6264
IMG_6266

IMG_6265

IMG_6267
IMG_6265
IMG_6267

For our cooking project that week we made Dirt cups. She mixed up the chocolate pudding mix, crushed up double chocolate oreos for the “dirt” and added a gummy worm. She loved making AND eating this one! lol
IMG_6377

Letter E:
Egg
Elephant
Ear
Earth
Eyes
Earring
Eagle
Envelope
Eskimo

IMG_6565

For the eskimo I sort of just free sketched the body, hair, mittens, and boots. They don’t have to be perfect. We used a coffee filter as the fur around her head, and cotton balls as fur accents on her coat.

We printed and cut out this eagle template from construction paper and then traced her hands for the wings. Simple and so cute!

For the elephant mask, she painted a paper plate and I cut out eye holes. I cut the ears and trunk out of construction paper and she glued them on. We also added a large craft stick (can be seen by lifting the trunk) so that she could hold it up to her face. The giant eye balls were printed from here and then glued onto paper plates. We then glued the eyes onto a strip of construction paper so they would stay together and hang easily.

My favorite E project though was the earth. We made this by coloring random patches on a coffee filter in green and blue. A then took a water spray bottle and sprayed it over the filter (I set an old towel under the filter so it didn’t wet the table). Within seconds the colors started merging together with a sort of tie dye effect. We traced her hands to hold the Earth and then read the creation story to tie in the scripture “In the beginning God created the heavens and the Earth” Genesis 1:1
12027272_1194392863920528_7226194017042267347_o

We dyed eggs with a kit I had leftover from Easter as our cooking craft.

Letter F:
Frog
Fish
Flamingo
Flag
Football
Feather
Flower
Fox
Food
Fly
Fireman

IMG_6832

We used a few F worksheets we had in our file so I don’t have links for those. We made the fox by folding a paper plate into fourths. She then painted it and glued on the eyes and a puff ball nose. She wanted a girl fox so I cut 2 small triangles and a circle and let her make a bow out of them. We cut triangle ears from construction paper and glued them inside the folds of the plate then glued the whole thing shut.

IMG_6706

We printed and cut this fireman template and then A colored it (rainbow of course, it’s always rainbow lol). We then glued it onto a toilet paper roll.

IMG_6709
I cut the stars and stripes from construction paper and let her glue them on. I used a scrapbooking shape cutter for the stars and it was super quick!

I cut the flamingo’s body for a free hand sketch then we traced her hand for the tail feathers. She glued it all together with a goggly eye and some real pink feathers. Super cute! Her favorite project was the frog though. I just cut a toilet paper roll in half and then traced one end on a piece of construction paper for the mouth. I then cut out a larger green circle for the face. I let her select her eyes and then cut circles a little larger than the eyes for the top. I free sketched and cut the legs. We grabbed a pink rubber band and cut it so that it was one long strip. We tied a black puff ball to the tip and glued it inside the mouth. We glued a strip of green construction paper over the body as well to cover the cardboard. When the glue was dry, she was able to move the “tongue” in and out of the frogs mouth to eat the fly. 🙂

Mommy’s preschool A-B-C

A and I have been working on a letter of the week project since the big girls started school. We’ve done really well with keeping up with it thus far and I love that she’s learning AND having a blast doing it. I’ve spent hours scouring pinterest for letter activity ideas and thought I would share some of the things we’ve been working on thus far with you guys. We will start the letter Ii next week so I’ll get you that far then add more letters as we complete them in case you want to start working with your little too. I’m going to do 3 letters per blog post that way you can easily find inspiration for just a specific letter you need without scrolling through the entire alphabet at once. I’ll give you a list of words we came up with for that letter (we didn’t use all the words but you may come up with something for them), I’ll show you what we worked on some, and give you some ideas for snacktivities too. We created a display wall of brightly painted picture frames with binder clip hooks to display her work each week near her chalkboard. Hope this helps! I tried to plan worksheets, crafts, and a cooking project for each letter.

A few ideas for craft supplies we keep around at all times that you may consider stocking up on: Construction paper, toilet paper and paper towel rolls, cheap coffee filters, cheap paper plates, craft sticks, goggly eyes, tissue paper, feathers, glitter, paint, cheap shaving cream. We got most of our supplies at dollar tree!

Letter A:
Apple
Alligator
Ant
Arrow
Astronaut

11953423_1178241518868996_5351651662948594105_o

You can find the Alligator A coloring sheet we used here: Alligator coloring sheet

I was very fortunate that a friend’s mom gave me a box of preschool goodies organized by letter when P was this age and I’ve used it with all 3 girls now! It’s so special re-living each letter with A and remembering how the other girls did it a little different. I’m not much help with letter A as it was our first letter and I wasn’t all that prepared and original with our work 😦 For our cooking project that week we made an A-A-Apple crumble. Simple and yummy!

11917557_1177076812318800_4366250135826492569_o
For this, we used an apple slicer on the apple and then cut those thin slices in half. For the crumble we used about a tablespoon of steel cut oats, a dash of cinnamon, a sprinkle of coconut flour, and about 1/2 a teaspoon of brown sugar per 1 apple. We arranged the apple slices in a single layer on a baking sheet and sprinkled with our crumble. We baked them at 350 if I remember correctly for a few mins until the apples were soft.

Letter B:
Boots
Banana
Ballerina
Bat
Baseball
Bath
Bike
Boat
Bear
Butterfly
Blue
Bee

IMG_5953

We found a nice printout of a clown holding some balloons and I wrote B on each balloon and let her color it.

The boot was one of my favorite projects, because well, TEXAS! lol We used this template. I printed it and cut out each piece individually on construction paper. Then I let her glue all the pieces on and decorate it with stickers. I drew the stitching on with a marker. But you could just print this and have your little decorate it instead if you wanted to save a few steps.

For the bird I cut out 2 large circles from construction paper. We cut one of the circles in half for the wings. I cut the feet and beak out of construction paper and let her glue on goggly eyes to finish. Super quick, easy, and cute!

11940133_1181553338537814_4479306018813843535_o

We used the B for bat coloring sheet also from education.com (same place as the A alligator one). You can create an account for free and have access to all sorts of goodies! B for bat

I got the template for the ballerinas HERE
unfortunately, the whole blog is in spanish but you get the idea. I printed the ballerina templates, traced them onto paper (I planned to use construction paper, but A wanted to color them herself instead), we cut them out, glued them onto large craft sticks then added a cupcake liner as a tutu. She loved these!

IMG_5774

We used an egg carton to create the bumble bee. I cut to little cups off and hot glued them together for the head and body then let A paint it. We glued on goggly eyes, pipe cleaner legs and antenna, and paper wings. So cute!

We made banana pudding as our cooking project that week.

Letter C:
Cactus
Cat
Caterpillar
Cookie
Cupcake
Cow
Campfire
Carrot
Car
Clown
Cake
Crab

IMG_6228

We made a giant cupcake out of construction paper. I just free drew and cut it then we used shaving cream mixed with pink paint as “frosting”. She sprinkled the top with tiny seed beads while it was still wet. I don’t know why we had never used shaving cream to paint before because it was super fun! We used it to frost our “cake” the next day too. To make the cake, I cut out 2 large circles from construction paper. I cut up toilet paper rolls to line the bottom circle (we save these for spirit sticks for cheer and they make terrific craft supplies!). I then glued on the top circle and then cut a strip of paper to cover the sides. A then painted the icing on and added paper polka dots for decoration. She wanted a candle on it so I let her paint another slightly trimmed toilet paper roll for that then I let her tear tiny pieces of tissue paper and stuff them in for the flame.

IMG_6036
IMG_6043

I cut tiny cookies out of brown construction paper and let her draw on chocolate chips with a black crayon. We made a baking sheet out of some aluminum foil. For the carrot, I just cut out a large letter C with a pointy bottom from orange construction paper and let her stick green pipe cleaners in the top. We also made a car from a toilet paper roll. I cut out a top seat area leaving a tiny lip for the windshield. While she painted it, I cut out small circles for the tires and steering wheel. She loved it! For our snack we made cookies of course!

You can see letters D-E-F here

Reading nook fun

Our oldest daughter is severely dyslexic.  She’s struggled with reading for years and finally as she nears the end of 4th grade, she seems to be reading on level and actually enjoying books rather than dreading reading time.  I wanted to really nurture her newfound love of reading as well as that of her little sisters so I decided we needed a designated reading area.  I initially planned on a cute little teepee or something in the corner of the playroom with pillows and blankets (hint: hobby lobby is now carrying super cute teepees for $100 and you can use a coupon!) but our playroom looks over our living room and kitchen so it isn’t always the quietest of places.  Then it hit me!  The “secret” closet under the stairs.  The door is in the laundry room and it’s pretty quiet with the exception of the lull of the washer/dryer when it’s on.  We were using it as storage for our cleaning supplies and some boxes of Christmas decorations.  The girls and I got started on clearing it out and moving the boxes up to the attic.  We are so pleased with the way it turned out and it’s been used daily since.  Aside from the little book rack and a new rug, it cost me next to nothing as we used items we already had around the house.  

The only rules are to be quiet and have fun.  Everyone has to pick a quiet activity while in there, doesn’t necessarily have to be reading.  


The reading lounge seating is actually an old ottoman top that no longer matches my living room.  It’s padded so pretty comfy to sit on and the back is a rolled piece of foam for a bed we had laying around.  I had an extra set of queen size sheets that I used to cover  both items and I used a little duct tape to secure them to the bottom without having to actually cut or sew anything.  They’ve held up great so far!  We had the battery operated lanterns and pennant banner leftover from a party and I got the rug from garden ridge on clearance for under $20.  The cloth book rack is from Walmart.com.  It arrived in days and was inexpensive.  I used chalk pens to doodle a Dr. Suess quote on a chalkboard we already had and hung it for decor.  


I wanted some color on the walls but didn’t want to commit to paint so I was ecstatic to find the little circle decals on clearance for $4 at target.  

  
We filled the area with quiet activities like magnets and magnet boards, (an oil drip pan from the auto part store and cookie sheets from dollar tree), I-spy bottles we made a few years ago, and books.

  
We got the idea from Pinterest of course and the girls love them!  Super easy and fun project.  They’re made using voss water bottles, rice, and little trinkets from around the house.  We took photos of the items before putting them in the rice, printed them out, laminated, and numbered them and the bottles as a key.  They use dry erase markers to mark off the items as they find them.  

  
The girls aren’t allowed to have electronic devices upstairs because I like to be able to monitor anything with internet capability so we created an “iStation” with all our iPads, iPods, and innotabs.  We added headphones so that game and electronic stories didn’t disturb others enjoying the quiet space.  We had such a fun time creating this reading nook together and the girls love having a secret quiet hideaway to unwind and enjoy a good story.  Can’t believe I didn’t think of it sooner!  

My baby is 9. Yep, NINE!

Last week my baby turned 9.  She may be my oldest but she’ll always be my baby!  Try as I might, I couldn’t keep her from growing up.  I cannot wrap my head around the fact that a whole 9 years have passed since I brought this little miracle home from the hospital!  I’m so proud of the little person she is becoming.  She’s smart, beautiful, helpful, kind, and loves Jesus.  I couldn’t ask for more in a daughter.  I had her tag along on a session last week in the outfit she picked for her party because A.  She’s amazing with babies and I knew the sweet 1 year old I was working with that night would love her B.  It was a lovely wooded looking area that I though would compliment her outfit well.  She took one of her favorite American Girl Doll’s along too!

_POC0972

Several weeks ago we had 12 of her favorite little ladies spend the night for a back to school bash.  Everyone had a blast but I told her right then and there that we wouldn’t be having a huge party for her birthday this year since she got to do that.  Her birthday weekend also fell sandwiched in between 2 trips to Dallas for the American Girl Fashion Show & rehearsal, and a Bitty Baby tea party we won through House Party.  All this traveling and partying combined with school and soccer didn’t leave me much energy for another big bash.  Besides, when you have 5 girl nieces and 3 daughters, you have a built in party at every family gathering!  lol  I told P she could invite 4 friends to join her and her cousins for a camping themed party. Poor child had such a tough time narrowing down her list.  We’re so fortunate to have so many sweet girls in our lives!  When all was settled, she selected 3 school friends and 1 soccer pal and we got to work on hand delivering invitations.  We dipped oversized marshmallows in chocolate and sprinkles on skewers and drove around to present the invitations, pre-party snack, and a tiny little compass to all our cousins and 4 friends.

IMG_5332

When our guests arrived, they were asked to “Register” at the camp welcome center.  Here they would grab their “welcome packs” (goody bags), sign a frame for P to keep as a memory, and pay their “camp dues”.  P has so much of what she wants and much more than she could ever need so instead of gifts, she asked her guests to bring their spare change to donate to one of our favorite charities.  We printed out little name labels for each of our guests and used ribbon to tie them to canvas tote bags we got 2/$1 at Dollar tree.  They also had a “camp journal”, mini deco tape, a cool wooden pencil, flashlight keychain, scratch off ticket, a little thank you note, and camping sticker scene activity.  We got the mini flashlight keychains and sticker sheets from oriental trading.  The flashlight and tape are “doll sized” which is perfect for my little AG lovers.

IMG_5328

The girls snacked on mini pretzel dogs and cheeto puffs and drank their “bug juice”.  It was lemonade that I added strawberry flavoring and green food coloring too.  Then we froze plastic bugs in muffin tins to use as ice.

IMG_5330

IMG_5322

I had cute little chevron printed paper treat bags set up near a pink tackle box full of candy “bait”  and cups full of different flavored teddy grahams and gummy bears for the girls to make their own sweet trail mixes.

IMG_5324

Then we moved on to our table to do a few crafts and the scratch off tickets.  We passed out lucky pennies and the girls got a kick out of them.  The winner got a bigger backpack style “camping pack” filled with a nifty journal, flashlight, sports bottle, stickers, etc.  I got all of this stuff at Michael’s in the fun finds section.  Nothing I bought including the bag were over $1!  After the winner got her goodies, we moved on to arts and crafts.  I got these cute little peace, love, and s’mores kits at oriental trading  ($6/12pk) and they were the perfect addition to a girly camping party.  We also made s’more necklaces out of polymer clay.  We LOVE polymer clay!

IMG_5327

The kids also enjoyed the “fishing hole” and visited it on and off throughout the party.  We got a few packages of ping pong balls at dollar tree and hot glued foam tails and magnets on them.  We used dowel rods with fishing wire and a large washer on the end for fishing poles and a plastic kiddie pool I borrowed from my bestie for the pond.  The girls paired up and raced to see who could catch the most fish in 1 minute.  The winners got to pick a prize from the prize box (sticker sheets and more Michael’s fun finds).

IMG_5329

After fishing, the girls all climbed into the tent we had set up with their dolls and played with the doll sized s’mores and campfire we had made before the party.  We made the s’mores using polymer clay and toothpicks for doll sized skewers.  The fire we made using a scrap piece of cardboard for the base.  We traced LED tea lights we got at the dollar tree and cut a space out on the cardboard for them.  I sent my kiddos on a scavenger hunt for small rocks and twigs and used hot glue to secure them.  It was a hit!  We set up the doll tent inside the real tent with some adorable doll sized sleeping bags my mother made.  P had one of her dolls giving horseback riding lessons to the other dolls too!  hahahaha  She might be my kid!

IMG_9321_POC1178

While the girls played in the tent, Dave and I hid plastic bugs I got at dollar tree around the yard.  I used a sharpie to write “winner” on 4 or 5 of the bugs before we hid them.  When we were done, the girls had to find 3 bugs each.  Those who found winning bugs got a prize from the prize box.

After all the fun, Dave lit the fire pit while we finished our remaining crafts and the girls got to enjoy their s’mores.  We had 2 different kinds of chocolate, 2 different kinds of graham crackers, and 4 different kinds of marshmallows to choose from!  It was fun watching the girls make different s’more creations.  They grabbed their skewers and had a great time laughing and roasting marshmallows together.  We had cupcakes earlier in the evening so I limited the girls to 2 s’mores each so they wouldn’t be bouncing off the walls for their mothers later!  lol

IMG_5325

IMG_5331

When the s’mores were done and the moon was out we handed out glow sticks and let the girls run free in the yard with their flashlights and lanterns before it was time to go home. I have to say it was nothing super fancy, but it was by far one of my favorite parties we’ve hosted!  I kinda wanna do it all over again!  Hope all the girls had fun too!  On top of all that, our generous friends and family raised about $100 for charity and brought P some goodies too!  She got some great books, a guitar, the rainbow loom thingy she’s been dying for, and her first bow and arrow set from her grandparents.  She’s dying to get to the ranch and get some lessons from Grandpa!  Love my sweet girl and hope she had a great birthday!  Have lots of camping themed printables I will probably upload later in case anyone is interested 🙂

In the perfect ending to a great weekend, we participated in the baby dedication at church the next morning and even better, P got baptized!  What an incredible moment it was watching my Daddy baptize my daughter!

_POC1271_POC1272