Not my problem…

It’s been entirely too long since I sat down to put my thoughts and ramblings into words for this blog.  Life in the Latch home is extremely hectic with school activities, sports, running my photography business, and my husband’s hotshot company.  Seems like there’s always something to be done and very little time for anything extra.

I wanted to touch bases with you on a subject that’s been weighing on me for quite some time now.  I may even rant a little bit, forgive me.  I want you to for a moment consider the biggest problem in life right now.  Now, I want you to consider the biggest problems of others in the world for a minute.  How do your biggest problems stack up to those of the world?  We spend a lot of time dwelling on issues that don’t really matter in the grand scheme of things and completely neglect some real BIG problems facing those around us.  We forget to be grateful for what we have because what we don’t have clouds our judgement.  We live in a constant state of oblivion to our fellow man. We don’t concern ourselves for others because their issues are NOT OUR PROBLEM!  We’ve become a culture that completely lacks empathy for others.  We sit in our little box casting judgement on everyone, focusing on the mundane day to day of our sheltered lives, and complaining about what is wrong with the world.  News flash!  WE are what’s wrong with the world!  If you’re not a part of the solution, you’re a part of the problem!

Did you know that 1 in 4 children suffers from malnutrition worldwide?  Probably not because it’s not your problem.  Here’s something you may not know, according to dosomething.org, 1 in 6 people in America suffer from hunger.  Let’s think about that for a second.  Envision your 6 closest friends.  Now imagine that 1 of them doesn’t have the food they need to thrive.  Hits a little closer to home doesn’t it?  If you knew your neighbor didn’t have enough resources to properly nourish their children, would you step in to help?  Imagine the desperation those parents must feel.   When was the last time you were really hungry?  We joke and say we’re hangry when we haven’t eaten for a few hours but we don’t stop to consider that there are children across the world, across the nation, and even in our very own backyard who haven’t eaten in days!  It’s not our problem right?  But, what if it were you?  Would you want someone else to make it their problem and step up to help you out.  To help your kids get the nourishment they so desperately need?

There’s the man who got laid off and is searching for a job but can’t seem to find one.  He’s working odd jobs to pay the bills but it’s not enough.  He can’t provide for his family, not for lack of trying, but it’s not your problem.  The kid on the baseball team who has a single mom trying her hardest to get him where he needs to be because even though she’s run completely ragged, she doesn’t want him to miss out on anything.  She can’t drive him to practice sometimes because of work so he walks, sometimes miles to get there but that’s not your problem.  The teenage girl who so desperately seeks the attention of every male she meets because nobody taught her she’s beautiful, loved, and cherished.  She finds herself a mother when she too is just a child and she needs help desperately.  She needs to feel loved and worthy of real love desperately but that’s not your problem!

There’s a lot of controversy surrounding the Black Lives Matter movement.  I think a lot of us who are not black, don’t fully grasp the concept that racism is alive and thriving in our own backyard.  Why?  Because it’s “not our problem“.  It doesn’t directly affect us and our family and thus we turn a blind eye to the fact that it actually IS a problem for someone.  It’s a very real problem for our neighbors, co-workers, friends, and our children’s schoolmates.  Don’t believe me?   I have a very good long time friend who happens to be black.  Yesterday, as her children rode the bus to school, a white kid pulled a knife out on her daughter and threatened to stab her, her brother, and the other black children on the bus.  Yes, but you’re right, racism no longer exists here.  I’m absolutely shaking with anger and frustration for her family even as I type this.  As much as I want to get my belt after the behind of that child on the bus, I want to ring the neck of his parents even more because Racism is a learned behavior.  Do all lives matter?  Absolutely!  Are we saying by supporting Black Lives Matter that we don’t believe that ALL lives matter?  Absolutely not, but let’s get real honest, when was the last time your life was threatened or your intentions questioned for strolling through your neighborhood at night just because of the color of your skin?

My point is, be a part of the solution!  You can’t solve all the world’s problems, but you can certainly help with some.  The bible tells us to love our neighbor as ourselves.  Are you truly loving others as you love yourself?  Because loving others fully sometimes requires taking their problems and making them our own.  Working together to find solutions instead of creating more division.  If you see someone that needs help, roll your sleeves up and get in there to help!  If we aren’t helping those with needs big or small, and we aren’t teaching our children to be a part of the solution, our future is doomed and that IS OUR PROBLEM!

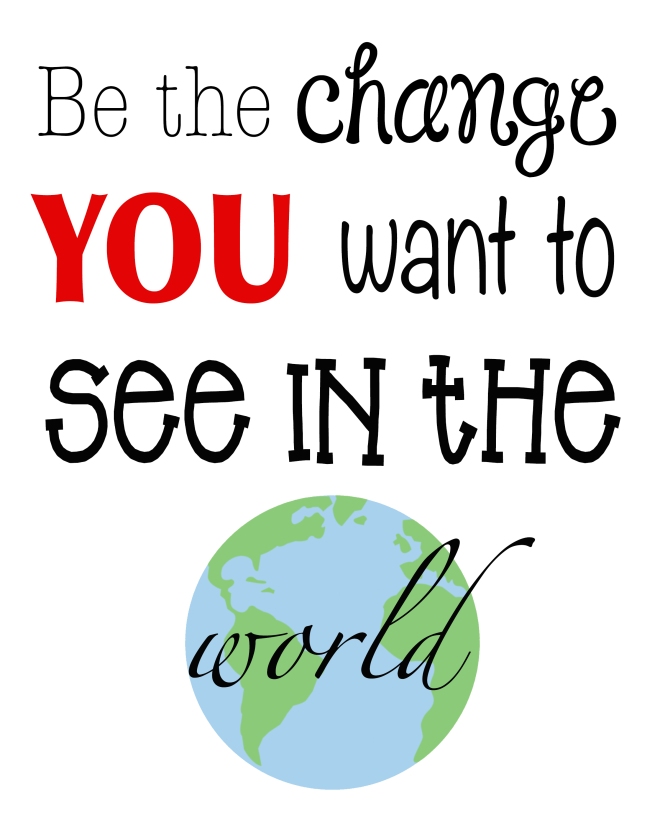
I leave you with a FREE printable to frame for your home and remind you daily to be kind and help others.  It’s formatted to an 8×10 just click the link below the image to download and print.

“Be the change you want to see in the world”-Gandhi

bethechange

bethechange


Advertisement

Favorite things brunch

I’ve seen favorite things parties all over pinterest and I had been dying for a reason to throw one for quite some time.  Naturally, when I saw that a ladies brunch group I’m a part of was in need of a May hostess, I jumped at the chance to finally put this together.  The party itself wasn’t super fancy so I wasn’t sure that I was going to share or not, I’m not used to planning adult parties!  I did however, create several printables and I thought someone else may be able to put some of them to use so decided to do a quick share.  Because it’s just a Facebook group I didn’t create tangible invitations but instead opted for a group event page.  The party info read this:

13087862_1333413256685154_734787581445927424_n

Brown paper packages tied up with strings
These are a few of my favorite things…

Here’s the skinny, purchase 5 of your favorite things (under $5). This can be anything at all you love! An awesome lipgloss or chapstick, a cool face mask, awesome markers, candy, snack, lotion, you get the idea. When you arrive, you’ll write your name 5 times and place them in a bowl. We will take turns presenting our favorite things and then drawing a name from the bowl to give each one away. By the end, we will each have 5 NEW favorite things!

When guests arrived, they grabbed a plate and piled on the grub and mixed themselves a drink.  I set out grapefruit juice, pineapple juice, orange juice, and orange mango juice with several bottles of champagne for those who wanted mimosas.  I also set out olives, vodka, bloody mary mix, and the fixings for that.  I had water too but not much of that was consumed!  haha

_LLP5054.jpg

_LLP5047.jpg

I didn’t go super crazy with food, I chose mini pancakes with syrup dipping cups, donut holes, sausage balls, cheese, crackers, chips, salsa, and 2 different quiche options.  I was worried it wouldn’t be enough food but we were all pretty stuffed.  It was a pretty cost effective menu.  The donut holes were about $1.50 per dozen at my local donut shop, I got a big bag of pre-made mini pancakes at walmart for under $5, and the little individual containers for the syrup at dollar tree (10/$1).  I made the quiche(s) myself, they’re super easy and delicious!

_LLP5049_LLP5055

I originally set out to order custom cups but couldn’t find them in a small enough quantity (I was only expecting about 10 guests), plus, I was having a hard time committing to a single saying, I thought it would be fun to have different cup options.  The group is called “b!#ches who brunch” (I didn’t name it) and I kinda wanted to incorporate that but the mom in me didn’t want it all over EVERYTHING!  lol  So, instead, I bought cheap clear plastic cups at walmart and a package of round adhesive labels at dollar tree.  I downloaded the template online and used photoshop to add cute little sayings, printed, and stuck right on to the cups.  The girls had fun picking a cup and cute paper straw.  I chose polka dot paper straws with cute little flags to write everyone’s name on so we didn’t get our cups mixed up.

image.jpg

I set up a separate table with bags for everyone to take home their favorite things and a bowl to put everyone’s name in.  Everyone set their favorite things here when they came in.  When it was time, we took turns standing and presenting our favorite things, then drawing a name and giving that item away.  It was super fun, and we got some great goodies!  I purchased the brown paper bags at michael’s, printed out the label at home, and attached it with glitter washi tape.

_LLP5062.jpg

It was a little different planning a party for moms and not kids.  I had a hard time wrapping my head around the fact that I didn’t need to plan a bunch of activities or games!  lol  We just ate, drank, visited, and did lots of laughing.  In addition to the favorite things exchange, I set up a Photo Booth area in the front living room with props.  We may have had a little fun with that too.

IMG_0484IMG_0490IMG_0492IMG_0496IMG_0497

We had lotsa fun, can’t wait to do it again!  I’m going to attach the table decor signs, even a few I didn’t actually end up using.  No sense in them just sitting lonely and un-used on my computer.  Hope you get some use of them!  I don’t ask anything in return but that if you use them, use the hashtag “dysfunctionaldomesticdivablog” when you post to instagram so I can see how you used them!  It’s so fun to see different takes on something!  ❤

sipsipsign (This was created to be a 5×7)

dipsign (5×7)

morning mimosa (8×10)

bitchesbrunch (8×10)

boozeless (8×10)

favoritethings (8×10)

mimosa bar (11×14) I had this one printed as a photo by my print company

bag tags (printed as a standard 8.5×11)

brunch cup labels (these were printed on those dollar tree stickers)

I used glue and glitter to make some of the signs sparkle after they were printed, but that’s totally optional.  I got most of the frames I used at dollar tree too.


Sheriff Callie Party

I know I’m a little behind on sharing A’s December birthday party but I figured while I’m on a roll, I may as well back track!  She requested a Sheriff Callie party and I’m typically pretty opposed to character parties but I thought I could probably run with a cowgirl theme so I agreed.  Of course our first step was to snap some photos for her invitations.  I stumbled upon the cutest little flea market outside of town that looked like a mini old west town from the outside so we loaded up and took advantage of the scenery.

12182466_1213939121965902_9062488487293502400_o12183975_1213938948632586_6029924938854189326_o12185582_1213938665299281_3220505073454221304_o

I designed a quick and colorful invitation in photoshop and sent it off to my print company.  The above photo was the back and the front was this:

ainviteblog

We used our trusty ole tablecloth trick to transform our garage into the ole west.  We picked a blue color to look like sky and my mother had the idea to use cotton to make clouds.  The result was pretty adorable!  I knew early on that I wanted to make an old west town out of appliance boxes for the party so I called me local Lowe’s and asked them to save me a few refrigerator and washer/dryer boxes.  They called within days saying they had a few and we went to work cutting and painting them.  We made a bank, Ella’s saloon, Uncle Bun’s store, and of course the Sheriff’s station and jail.  I had my husband cut a walkway between a refrigerator box and a dryer box so that we could connect them.  That way when the Sheriff had to throw someone in jail, they had to go through the station door.  We used a box cutter to make the bars and tin foil to give them a metallic look.

12304129_1229405167085964_2251264644273695482_o

12314507_1229404990419315_5373660943051839464_o

We took pictures of her stuffed animals and added them to wanted posters in photoshop then printed them in sepia tone and taped them inside the sheriff’s station and the outside door.  I used scrapbook paper that looked like old distressed wood from Hobby Lobby for the bank and sheriff’s station doors.  We bought fake money at dollar tree for the kids to play with in the bank, plastic cups and pitcher (also from dollar tree) for the saloon, and brought out some play kitchen foods and shopping bags for the general store.  It’s amazing how much fun kids can have in cardboard boxes!

12309876_1229405043752643_1548588514958694158_o

As our guests arrived, we got them all fitted in bandanas, cowboy hats, and deputy badges. We got the foam hats in black and brown at dollar tree and the bandanas at Hobby Lobby.  Because they were so large and the majority of our guests were under 5, we cut each bandana into 4th’s.  This was cost efficient and they fit much better on little ones.  The deputy badges came from Hobby Lobby as well.  We also gave each guest a little drawstring canvas bag from oriental trading to keep their gold nuggets in from the panning for gold station.

12322535_1229405003752647_5064823667188731418_o copy

Because our party was in the afternoon, we served sweet snacks rather than an actual meal.  We choose flavored popcorns from a local gourmet popcorn shop and put them in little cow print favor bags from Hobby Lobby.  We also made s’more pops by putting large marshmallows on a skewer, dipping them in melting chocolates, and then covering in sprinkles.  These were a huge hit as were the chocolate coins. I raided our American Girl collection and thought this Our Generation horse stable was the perfect addition to our table.  We used it to hang onto our snacks.  12322645_1229405073752640_166357767555459773_o

I found those awesome fabric garlands on clearance at Michael’s for around $3 each and knew I couldn’t pass them up.  We found the tissue fans at Dollar Tree for an extra pop of color.

12322468_1229404623752685_6256342437617259332_o.jpg

Kids colored Sheriff Callie sheets and “roasted” their marshmallows over the “fire”.  I found that adorable inflatable campfire at oriental trading and it was a big hit!  I printed the coloring sheets directly from the disney jr. website.

12310672_187047958307117_7697245316801534665_n

My niece, nephew, and girls tried out the panning for gold station before the party started.  For quality assurance purposes of course.  To make this, we purchased a small bag of decorative rocks from Dollar Tree and spray painted them gold.  We then took a large long plastic bin and filled it with sand purchased from Home Depot and sprinkled the “golden nuggets” all around burying them in the sand.  We added water to the top and added some shovels and other sand toys we already had.  We used foil pie tins which we hammered holes into the bottom so the kids could scoop and sift.  Whatever nuggets they found, they got to take home in their little pouches.  There was a steady flow of children here the whole party.  HUGE hit even with the older kids!

12322975_1229404827085998_6484540091270112386_o12345428_1229409463752201_3992132753195760829_n

Another huge hit was the Photo Booth area.  To make this, I just took an image of a wanted poster I found online (I’ll link it if I can find it again) and enlarged it in photoshop. I then printed it off in quarter sections.  We cut it out, burned the edges with a lighter to give it an aged look and then glued it to a piece of cardboard that was left over from our cardboard box town renovations.  We used a box cutter to cut out the center and thumb tacks to secure the edges and look like fancy nails.  We used a long thick piece of leftover cardboard to create a stand and then placed it in a small bucket filled with sand and rocks to steady it.    The kids had fun with this but honestly, I think the adults had more fun with it!  haha

12304413_1229404437086037_7090691863260207442_o12309593_1229404647086016_1699248556588323366_o12304452_1229404307086050_150008644779209787_o12347620_1229409477085533_5632465708333491233_n

Unfortunately, in my haste, I forgot to photograph the other 2 activity stations we had but they were inexpensive and simple and kept the kids busy the whole party long.  We took a stick horse from our playroom and stuck it in the yard by digging a small hole for the stick.  We set out hula hoops we already had and let kids try their hand at “lassoing” the horse.  It was sort of like a ring toss on a bigger scale.  We also had buckets which I had decorated with pictures of boots I had printed and colored.  We purchased plush snakes from the dollar tree and kids had to try and toss the snake in the boot.  We called it the “there’s a snake in my boot” game.  Because we’re witty like that!  😉

12314597_1229404207086060_6540267032338320195_o.jpg

The Sheriff and all her little pals had a great time and those darn boxes stayed in our garage for a month because we couldn’t bring ourselves to toss them!  lol

A very shopkins Christmas

It’s happened.  I tried to fight it for a long time but I’ve finally succumbed to it.  The shopkins craze has hit our house.  For about a year now, T has asked me for shopkins every time we leave the house.  If you don’t know what shopkins are, they are tiny gumball machine prize sized collectibles which unfortunately do not have the gumball machine price tag.  They most often come in “blind baskets” so you have no idea what you’re getting.  It’s a surprise!  All my nieces in the 6-8 year age range love them and thus my 6 (almost 7) year old has jumped on the bandwagon.   This year when making Christmas wish lists, that’s all T said she wanted.  Seriously.  Anywho, if we’re going to do this shopkins thing, we’re going to do it right.  She’s my little collector so I knew I wanted to find a way to display her shopkins so that she could easily reach them to play with but see what she has at all times.  This year, we’re doing Christmas a little differently and we have gift categories to be checked off.  1 category is “made by mom”.  So for T’s gift, I decided I wanted to make a shopkins display.  I purused Pinterest for ideas but couldn’t decide then yesterday, while strolling Michael’s, I hatched a design plan!  Thought I would share it here in case you’ve got a shopkins crazed collector too!

What you’ll need:

-An acrylic box frame (any size you choose) I went big with a 16×20 

-foam core or sturdy cardboard

-box cutter

-wrapping paper

-hot glue gun

  
You can use your frame as a template and a straight edge to cut your shelves out of foam or cardboard.  I wanted 8 shelves on my display and each shelf needs to be doubled up.  So total, I cut 16 strips.  Leave them a little longer than necessary (about half an inch.  You can trim with scissors later.  

  
After cutting them, I grabbed a glue stick and began sticking them together in pairs.

  
Next, I cut 8 strips of wrapping paper to wrap around each shelf.  I had this fabulous glitter paper that worked perfectly because it won’t scratch easily, it was thicker than my others, and it seamlessly matched up when I wrapped it around without being noticeable.  You’ll want to use something similar or solid color for best match up.  You could even use printed contact paper!  I used my glue stick to secure it to each “shelf”.

  
Next, you’ll need to find a box or a book that will match your desired thickness.  I wanted her to be able to store those little baskets and bags on it too so I found a box that was the perfect width in the closet and used that as a guide.  I then used hot glue all along the back and sides of the “shelf” to secure it to the frame.  

  
Moving the box up with each shelf kept them perfectly spaced and I used a small level to double check my work.

  
I plan to cover the outside trim in ribbon that way I can hang it on her wall as well but I haven’t picked that out yet.  Next, stick your shelves with shopkins and you’re ready to go! 

 This week, Michael’s has a 50% off coupon so I used that for the frame which brought it down to about $7.50!  They also are now carrying shopkins in the store so we used to coupon again to score a 12pk set half off!  
Hope this is helpful Mamas!  I know I’m going to have a pretty happy girl come Christmas morning.  😃

New years resolution. Yep I made one, yep I’m keeping it. So far anyway…

If you know me personally, you know I am simultaneously the most organized and the most unorganized person you will ever meet.  lol  Let me explain, I love my label maker, organizing bins, color coding, and labels that all face the same direction but I can never remember what time to take what kid to what sporting event or party.  I’m always losing papers and I have a stack of mail on my kitchen countertop that I’m confident will reach the ceiling soon if I don’t deal with it.  Unfortunately, 3 kids haven’t always allowed me to be as organized as I would like. I was so tired of being late, missing events, and forgetting where I put things that I vowed to get more organized in 2015.   I had been toying with the idea of putting A in a mother’s day out program 2 days a week for a while but she’s my last baby and I was hesitant.  When they called in December to tell me they had an opening for her, I decided to take the leap and enroll her.  Figured it would be good for both of us and i’m so glad  I did.  She’s still adjusting to not being with me 24 hours a day but the extra time I’ve had to get organized has done wonders for my sanity.  It’s definitely a work in progress.  I’ll share in a later blog how I organized every nook and cranny of my house but today I’m going to share how I’m organizing my life.

I’ve always been a fan of planners, organizers, and journals but my problem is, I’ve never really committed to them or carried them around with me at all times to fully utilize them.  I would write something down on a post it, toss it in my purse, and forget to transfer it to my planner when I got home.  Rather than my usual pick up a planner at Target bit, I decided to jump on the Erin Condren Life Planner bandwagon as recommended by many friends.  I’ll be honest, my main appeal was (and still is) the interchangeable covers.  On the inside it’s much like any other ole’ planner but the cover switching helps keep it fresh in my head I think.  You always like to use new things so switching them out every so often should help with that in my head.  haha

When it arrived, I was immediately impressed with the packaging.  It was colorful, fun, and welcoming.  It included a little envelope of bonus stickers and gift labels.  Who doesn’t love freebies!  🙂

IMG_0343

I selected a cute and colorful paisley-ish cover.  I didn’t put too much time into customizing it because I knew I would work my own magic with it later.

IMG_0395

The tabs and all the pages are very colorful and cheery and I love that!

IMG_0692

I picked up several goodies to help me make my planner manageable including a cute little bag (probably meant to be a cosmetics case) at Michael’s for $4, China markers for the laminated inserts (stays better than a dry erase marker in my opinion), and washi tape in assorted colors and prints.  The EC planner came with several sheets of these cute colorful stickers and I opted to customize a few extra sheets for an additional $5.  The weekly menu insert was an additional purchase from EC and the errands tab I added myself.  I’ll show you how and attach a printable you can use too later.

IMG_0680

I also ordered a package of erasable markers off of amazon.  Yep, I said erasable markers!  Are you as excited as I was?  They are by far the greatest thing since sliced bread and I think I need more ASAP!

IMG_0678

You can find them here

http://www.amazon.com/Pilot-Frixion-Colors-Erasable-Marker/dp/B00F9MYPCS/ref=sr_1_1?ie=UTF8&qid=1423074830&sr=8-1&keywords=frixion+erasable+markers

Here’s what the pages look like from monthly and weekly views.

IMG_0677

IMG_0676

If you’re not the do it yourself type, you can purchase additional covers directly through EC for around $10.  You can also find some cute ones on Etsy.  To make my own cover, I selected a cute scrapbook paper combination and scanned them into my computer.  I used photoshop to scale it to size, add text and/or shapes, and then printed them.  I upload mine to office depot because their colors are so much more vivid than my printer at home but you can do it however you choose.  While I was there, I used their straight cutter to trim the covers to size, place pages back to back, and then have them laminated on thick lamination.  Be sure and tell them to laminate it in the center so you have room to cut and make your binder holes on the side.  I then used the straight cutter again to cut the laminated cover down to size leaving an edge all along the sides.

Once home, I lay the new cover over the top of the planner and used a sharpie to mark where the holes would need to be quickly.  I then used a handheld small hole punch to make holes all down the side.  Once that is done, you take your scissors and make a slit through the center of the hole.  Now the cover is ready to click right into your planner.

IMG_0679

IMG_0681

We’re only in February and I’ve already created 2 optional cover sets.  I have commitment issues.  haha

I also created a few printouts to help me with my little goal oriented organization.  I kept seeing the 52 week savings challenge on pinterest and was dying to try it for our next Disney trip spending money stash so I added a checklist for that as well as a little mason jar weight loss page.  I’ve been keeping up with the 52 week savings challenge thing but I will plead the 5th on the weight loss page!  It’s not my fault, it’s those darn girl scouts I tell you!  😉

IMG_0402 IMG_0403

You can laminate these and insert them the same way as the covers if you so choose but I just glued them over some of the additional memo pages in the back that I will likely never use.  I used little heart stickers to symbolize the about of lbs I wanted to lose this year and then as I lose them, I’ve moved them to the other lbs lost mason jar.  Sadly, there are many more hearts in the lbs to go jar than there are in the lbs lost jar!

IMG_0401

Overall, I’m really loving my planner and the fact that it’s large enough for me to see and really write in yet compact enough to toss in my handbag.  I think I’m officially an EC believer!  Ready to get started?  You can follow this link to start your own account and create your very own Erin Condren Life Planner

https://www.erincondren.com/referral/invite/loriannelatch0107

Now here are some of the goodies I made for my planner.  I’ve removed my name for you so that you can add your own and print if you so desire.  Hope you enjoy!

plannerfrontandback1  This one can be used for the front and back of your planner.  Just add your name.

plannerinside

plannerinside1

plannercamera1

plannercamerainside

plannerchevron2

plannerchevronback

Obviously, once you print, you can arrange them any way you want them, this is just how I did mine.  Here are the mason jar printable, errands bookmark style insert, and the 52 week savings challenge to match.

52weeksavings

plannererrands  Just print this, cut it, place it back to back, laminate, punch holes, cut, and insert like the covers

weightloss

Hope you get some use out of these printables.  Have you used any of my printables in the past?  Would love some feedback.  Did they work out for you?  How did you use them?  Keep them coming?  Comment here or email me at dysfunctionaldomesticdiva@gmail.com

Thanks!  Happy organizing!  ❤

A space of my own

When we bought this house, I got very excited about all of the exciting possibilities the front office held.  I thought maybe it could be a studio someday but I’m not a huge fan of studio work so scratched that.  We decided to leave it an office for the time being but I had visions dancing through my head of a craft room as well.  5 months later, it had become more of a storage room for boxes I didn’t feel like dealing with at the time.  Our computer desk and filing cabinet were in there as well as some cube shelving that I needed to organize but had yet to find the time or desire to do so.  This week, I decided it was time for me to begin scrapbooking photos from our Disney World trip.  I began to rummage through boxes looking for paper, stickers, and trimmers but I soon became overwhelmed with the disorganization of it all.  I decided it was time to whip this space into shape once and for all.  So my friends, I began a 3 day extensive overhaul of this small room  to turn it into something fun and colorful yet inspirational and functional at the same time.  If you know me at all, you know I would rather spend a fortune on designer shoes, handbags, and children’s clothing than expensive home decor.  I get bored easily and I like knowing I can change the look of something on a whim and not worry about how much I spent on it.  Welcome to my new office and craft space.  Come on in and have a look around!

IMG_0412

I wasn’t even sure where to begin with this huge project but I knew I needed a craft desk to be the heart of the room.  A place where I could spread out whatever crafty project I was working on at the time and not worry about having to move it out of the way to eat or something like my current workspace (the kitchen table).  Years ago, before I married Dave, I did cakes out of my tiny apartment.  I needed more counter top space and so I built some using cube shelves and plywood.  I had seen this done on a larger scale many times on pinterest so figured it was probably my best bet.  This way I could make it the perfect size for my space and store craft supplies in the sides.  I moseyed on over to my friendly local Target and picked up two 9 cube shelving units.  These are super affordable normally but I was pleasantly surprised to find 2 on clearance for only $25.88 each!  They were easily enough assembled with detailed instructions and I probably only spent about 30 mins on both of them using only a screwdriver and a hammer!  I spaced them apart accordingly and then measured for the top.  At home depot I decided on a smooth piece of plywood for around $25 as well and had them cut it to a 3×5 tabletop for me.  I had to purchase the whole sheet so still have leftover wood for a future project!  I purchased black paint for the top to match the shelves but haven’t yet completed that task!

picstitch


I also knew I wanted easy access to my stickers, pens, ribbons, and other craft supplies and I thought pegboard would be a great option.  Craft stores sell pegboard and accessories specifically made for craft supplies but I wasn’t fond of the price tag on those!  Instead, while at Home Depot, I snagged 3 sheets of plain pegboard at $7.97 each.  I asked an employee to cut one of the sheets in half for me to fit a thinner space and they did so at no extra charge.  I also stocked up on pegboard accessories while there.  Each long peg was about 90 cents and then I purchased a package of baskets (2) for $9.99, and 2 packages of mixed hooks (probably about 15 per pkg) for under $4.  The assorted hooks and pegs also came with screws to mount the pegboards to the wall!  I swiped some colored paint samples from the paint section for under $2 each while I was there because who likes boring ole white pegboards?  I painted them with a small roller brush made for trim without incident.

IMG_0411


Then came the fun part of filling the pegs and organized my goodies!

IMG_0406IMG_0407

The little pails I actually stole from my children’s playroom closet.  They were from Easter or other holidays mostly purchased in the dollar spot at Target.  We later found some others at Michael’s as well for more storage fun!  I used the thinner cut pegboard to designate a special “kids section” of crafty supplies and goodies they’re actually allowed to touch.  I used the other half as a gift wrapping area with ribbon, tape, scissors, and gift bags.  I’ve been using this old upside down $2 garage sale stool as a wrapping paper caddy for years so it went perfectly over in the gift wrap corner!

Now it was time for some Wall decor.  I had this big ole black frame sitting in the garage.  My mother gave it to me a few years back.  It had a really old fashioned flower print in it originally but I saw potential in that frame.  I spray painted it lime green and then grabbed some rainbow ribbon trim, nails, and tiny clothespins to create a fun way to display my instagram photos.  Did you know Walgreens will print your instagram photos in an hour?!?!?  I don’t normally advocate supermarket photo printing services but they’re just insta photos not fine portraiture so I made an exception.  I nailed the ribbon trim to each side of the frame and then clothes pinned the photos across it.  I need to lift that bottom string a little but for now it’s fine.

IMG_0409


I found the giant buttons on clearance at Hobby Lobby for $4.  They were green and pink originally but it was nothing a coat of spray paint couldn’t fix!  The canvas my oldest daughter painted and I just used a paint pen to add the word “create” to it because I love the colors so much!

I found the turquoise bulletin board at goodwill for $1  brand new in the package and pinned some pages I cut out of an Anne Taintor coffee table book to it.   I looooooooove Anne Taintor!  I found this fabulous magnetic frame and the magnetic ransom letters at Tuesday morning and the little magnetic containers at Michael’s.  The frame was on clearance for $3, the letters were $3.99 per package, and the little containers were $1.50 each.

IMG_0414


I needed somewhere to keep myself organized with to do projects, calendars, etc.  I picked up these pizza pans at dollar tree for $1 each and spray painted them bright colors.  I secured a strip of ribbon to the back of each using E6000 and then nailed them to the wall.  I used sticky back magnetic paper to create some fun magnets of funny ecards and photos as well as some sticky notes and slapped them up there too.

IMG_0410


I had originally gone into goodwill looking for an old filing cabinet.  I saw one on pinterest somewhere that had been painted in chalkboard paint and I thought that would be a fun addition to the room.  I didn’t find one but I found something even better!  This large commercial type scrapbook organizer is structurally in great shape.  It was only $5.50!!!!!  So excited!  It needed a good cleaning and has a few chips in the top and bottom but they will easily be filled with wood filler later and then the whole thing will likely be painted.  I put the kids to work color coding my papers.  Solids on one side and the corresponding print on the other!  So in love with this!!!

IMG_0405

I found these 2 fun colorful artwork prints at Garden Ridge.  Each one was under $12 and I love them!

IMG_0401

I used this shutter by my garage door in the old house to store the girls backpacks and hang onto the many many party and event invitations that came our way.  Now that we have a hall closet for backpacks, I moved it into my office to hang my many many cameras.  The shutter was originally purchased for $4 at a thrift store and I added the hooks to the bottom and spray painted it.  The hooks were under $4 each.  The peacock I painted at a painting party with friends.  Artist I am not but it’s a fun little piece anyway.

On top of my scrapbook paper organizer, I have a plastic drawer system to catch still useable paper scraps and I added some fun things to the top.  LOVE these cameras and the pink lightbulb!  Got the camera on the black stand at Home Goods last year and that huge new metal camera at Ross yesterday for $10!  The pink glass lightbulb came from Michael’s as did the giant green clothespin.  Can’t wait to pin something on it!  The dream bigger block also came from Michael’s for only $3.  Last year I helped my mother’s friend with some computer work and she made me this cute little cross stitched “God is Love” sign as a thank you.  I switched it to a pink glittery frame and it’s perfect!

IMG_0413

I took my computer desk out of the room to use as an accent table in the front living area and decided I only needed a small area for my computer along the back wall.  I found this black unit at goodwill about 2 years ago in perfect condition for only $20.  It was a shelving originally but I found that if I removed the middle shelf it worked out perfectly as a small desk!  Got the small lamp and lampshade at Garden Ridge.  Under $15 for the lamp and the shade when it was all said and done.  Found the bronze camera at Ross yesterday for $7 and my sister bought me this cute little notepad at Pier1 years ago.  I found the porcelain paint buckets for 50% off at Michael’s yesterday and thought they would be great on my craft table to store brushes and pens.  I used a plastic storage basket that I already had to display 12×12 scrapbooks for easy access since they don’t fit in the cubes.

IMG_0415


I still need a fun colorful rug, a few finishing touches, and to paint the desktop and scrapbook organizer but this little room has come a loooooooooong way in the last 3 days.  Indeed I think I will be spending a lot of time in here!  When it was all said and done, I spent around $300 to transform this space.  Not to shabby at all!  It’s fun and it’s functional and I’m in love!  In conclusion, you don’t need a ton of money or anything fancy to create a cool place of your own.  You can do a lot with a little when you use some vision to step out of the box and sometimes a little goodwill hunting luck!  I may not be changing the world anytime soon but I’ve rocked my own space with a little spray paint, pegboard, and cube shelves!

photo

American Girl Bitty Baby House Party

If you know me, you know that I love throwing a good party and I tend to go overboard.  If you don’t know me, you probably could have figured that out all on your own!  I’m not someone who does things the easy way either.  Nope, store bought decorations, invitations, and favors have never been my thing.  Not that there’s anything wrong with store bought party stuff, just saying, it’s not my thing.  I know I have mentioned before that my children (and myself who am I kidding) love American Girl Dolls.  We share our house with several of them but one of our favorites is Lizzy, T’s Bitty Baby.  She loves to push her in her stroller, sit her in her highchair, and carry that diaper bag everywhere we go.  When baby sister got old enough to take an interest in baby dolls, she pretty much kidnapped Lizzy for good.  I had officially decided that A would be getting her very own Bitty for her 2nd birthday in December.  Now P says she wants one too of course!  Got to have 3 of everything in a house full of girls you know!  Anyhow, a couple of months ago we got wind that AG was planning to release their revamped line of Bitty Baby at the end of August.  T was ridiculous amounts of excited so we had to do a little internet research to see what changes were being made exactly.  We discovered that there would now be 11 bittys to choose from, a whole new line of story books geared towards the younger AG lovers, and lots of exciting new accessories.  We also stumbled upon the House Party website.  How on earth had I never heard of House Party before?!?!?!  My love for over the top parties and my love for free products combined into one fabulous website!??!?!  If you don’t know about House Party, you NEED to check them out at http://www.houseparty.com and sign yourself up to host your very own!  American Girl teamed up with House Party to select 1,000 or so lucky ladies to host a Bitty Baby tea party to introduce new Bitty to the world!  Naturally we signed ourselves up to be hosts and patiently waited for what seemed like forever to find out if we had been chosen or not.  I have to tell you I had pretty much psyched myself up for disappointment because I never win anything.  Seriously.  NEVER!  Imagine my joyful surprise when I checked my email on host picking day to discover that I had been selected!!!  So in about a month we will gather around with some of P & T’s favorite lil’ ladies and have a tea party to welcome our new Bitty home.

This is the new Bitty Baby.  Her face mold has been changed as well as her hairline.  She now comes with her own full color story book called “Bitty Baby and Me” and a cute little wishing star.  Her little sleeper outfit has changed too and is super cute with little ruffles.  Can’t wait to see her in person.  T is ridiculously excited!

F6254_main_2American Girl and House Party are sending us and our guests lots of goodies and naturally I had to start whipping up my own special touches immediately!  I don’t normally share my party plans pre-party because I like for my guests to be pleasantly surprised by my personal touches but I figure there are so many other host mamas who could probably benefit from my hours of computer design work too.  My husband always says nothing in this world is free but why I ask, WHY!?!?!  We mamas have braces, shoes, school, and dolls to pay for by golly.   Shouldn’t something be free from time to time?   So here you go fellow Bitty Baby House Party Hostesses some FREE downloadable printables for your own party!  I know I’ve already emailed several of you the water bottle labels and cupcake toppers but I’ve added a few other goodies for your printing pleasure here!   Just click on any of the links at the very end of this post to download whichever party goodies you would like.  When printing make sure you select “scale to fit (print entire page)” so that none of the design is chopped off.  Some printers may have you select to print at 90% instead of 100%.  Hope that make sense.

image-5To create the place cards, simply cut each one out around the solid black lines and fold at the dotted line.  I used the computer and a snazzy font for our names but you could easily handwrite them if your handwriting isn’t chicken scratch like mine.

photo-11The water bottle labels are pretty self explanatory.  Just cut them out and use tape to secure them.  If you plan to keep them in an ice bucket you may want to laminate the labels or cover them in clear tape to make them waterproof.

image-4You can cut the cupcake toppers out by hand or use a circle shape maker if you have one.  I used to have one purchased at Hobby Lobby but it was M.I.A. so I had to do them the old fashioned way.  Once they’re cut out just tape or glue a toothpick to the back.  If you’re feeling extra ambitious you can make them 2 sided by sandwiching the toothpick in between 2 circles!  I personally think the fact that I created them, cut them, and taped them at all was ambitious enough for me!

image-6To make the Bitty Baby scratch off lotto tickets you’ll need to print 1 copy of the page with the winning ticket and then a couple without.  You also need a small paintbrush, some clear packing tape or wide shipping labels, dishwashing liquid, and silver paint.  Cut your clear tape or clear shipping label to fit the scratch off area and place it over the print.  In a cup or bowl that’s okay to get paint in mix 1/2 dishwashing liquid and 1/2 silver paint (or any color of metallic paint you choose).  Paint over the labels or tape until you can’t see what’s underneath anymore.  Mix a little bit of black in your silver for a darker better coverage if you don’t want to have to do so many coats.  I did and still had to paint on 3 coats!  If you’re using the shipping labels it’ll probably be much easier to paint them before you cut them and stick them on.  It was tough to stay in the lines with the tape.

picstitch-2Once the paint has completely dried (overnight would probably be best but I was dying to try it so waited an hour), cut out the lotto cards and they’ll be ready for your guests!  You can pick anything you want big or small to be your door prize.  I will probably do one of the new Bitty books.  What a fun project!  I will definitely be doing these again!

I also created a party welcome banner to match and invitations too!  You’ll obviously have to add your own party information.  The invitations are formatted to a 5×7 size.

bittybabyinvite1

bittycupcaketoppers

bittyplacecard

bittywaterlabels

bittywelcomebanner

bittylotto

Check out the new Bitty Baby line for yourself at

http://www.americangirl.com

and don’t forget to check out

http://www.houseparty.com

I love you because…

Positive reinforcement is such an important key when dealing with our children and spouses.  Sometimes just saying “I love you” isn’t enough.  Sometimes your significant other and those precious kiddos need to know WHY you love them.  Everyone needs an extra pat on the back and a sweet little reminder of the things that make them so special and so very loved!  I saw a post on Pinterest once with this idea and although it was just a photo that lead nowhere with no link, it looked simple enough so about a year ago, I designed 1 for each of my children and they got such a kick out of them I got to thinking we might need one in our bedroom too!

photo-10

Dave may not be very pleased that I used his most recent love doodle for my blog but I don’t get them often so I would like to forever embed it into internet history!  haha  Sorry honey! I made one for the baby’s room too but she’s not old enough to appreciate it yet so I change it less often than the others and it’s more for my sweet memory.  I leave a dry erase marker by each and although I don’t change them daily,  I try to change them at least once a week.  Every once in a while, I’ll find a sweet something written just for me too!  It’s no grand gesture, just a little something that says “Hey!  You’re pretty awesome and I love you for it!”

You can make your very own “I love you because…” sign too and remind the people you love what makes them extra special to you.  All you need is a picture frame, a dry erase marker, and a printer!  I’ve created a few downloadable printable signs for you but you can create your very own to match your child’s personality or decor.  These were created in a 5×7 size so all you need to do is select the image you like best and print! There’s a little something for everyone-even the boys with legos and camo hearts!  Just click on the link to view, print directly, or save and send to your favorite online print company.  They sometimes look a little blurry when you first open the file but they don’t print that way, it didn’t for me anyway.  Enjoy!  ❤

camolove

chevronlove

cowboylove

legolove

leopardlove

lovedots

roselove

doodlelove

kisslove

USAlove

Smash booking

Before I had kids, heck, when I only had 1 kid, I loved to scrapbook. I had a bazillion shape makers, corner rounders, paper stashes, stickers, and other assorted awesomeness. I would spend hours cutting my pictures into shapes with my Creative Memories custom cutting system and then cut cute little papers for photo mats and decorative flair. P’s scrapbook is amazing with hand cut and drawn layered paper Oreo cookies to commemorate her first ever cookie. Years 1-4 are detailed, colorful, and organized. Then I had T and all my well made scrap booking plans went out the window and my bins upon bins of fabulous scrap booking tools sat and collected dust in the garage. After our 3rd little princess was born, I realized I wouldn’t have a chance to play with my scrap booking stuff again until they were all in grade school and I was all alone for a few hours daily in sweet blissful silence! But there’s still lots of stuff I want to remember in the meantime. Dates with my hubby, craft projects I made with the girls, etc.

Enter K&Company Smash books.

20130904-101849.jpg
They retail for around $15 but you can get them for less by using a Michael’s or Hobby Lobby coupon, I know I did!😃
What on earth is a smash book you might be asking…
A smash book my friends is sort of a journal, meets a scrapbook, meets a tangible pinterest! It’s a scrapbook for the creatively challenged or for those of us who are now too busy to sit down and let our creative juices freely flow! Each Smash book has a theme and is choked full of built in awesomeness and zany printed pages.
Here’s a peek at some of the many smash books I’m currently working on and some of my smash accessories stash too!
This is my own personally random, mish mash, quirky Smashbook. I doodled like a school girl on the front cover and all over the inside too and added some nifty little clearance chipboard items to the front for character.

20130904-214820.jpg
One of the features that makes the smash book so neat is the included smash stick which is a great felt tip marker on one end and a glue stick on the other end. This is great for dysfunctional, unorganized, on-the-go crafters like myself!

20130905-010818.jpg
K and Company offers a whole plethora of cute and unique accessories to give your book an added boost of fabulousness and provide some easy storage for those souvenirs and other assorted keepsakes. There’s pockets, and labels, and baggies oh my!

20130905-011317.jpg
They also have a vast variety of “smash pads” to choose from. Each smash pad is choked full of themed notes and journal prompts to help you remember every last detail of whatever event or project that you care to smash into your book.

20130905-011621.jpg
What do you put in a Smashbook? ANYTHING YOU WANT!!! I’ve got magazine clippings, random things I’ve printed from the internet, catalog clipping wish lists, ticket stubs, pictures, and other random tidbits in mine! The back of each book has a built on pocket for extra smash ability.

20130905-012140.jpg
K & Company sells fancy “smash tape” but I like a little glitter in my life so I bought a ton of Reflections brand tape at Michael’s on sale and cut slits in one of my children’s shoe boxes to make a handy little tape dispensing device. Smash tape (and other similar products) are super easy to use and add a decorative flare to items you may not want to permanently glue down. It does not tear paper and is reposition-able if you decide to move it around. It’s overall pretty darn awesome!!!

20130905-012605.jpg
I used the “wedding” themed book to create a way to store our wedding and shower invitations and momentos as well as keep a log of our anniversary celebrations over the years, special date nights, etc. I used several pockets to store pamphlets, postcards, hotel keys, and other assorted goodies I’ve collected over the years. I even had random Instagram photos printed to remember dates and venues. I love that on our 30th anniversary some day, I can look back and remember that we spent our second anniversary at the Mansion on Turtle Creek in Dallas and have the handwritten card the manager left in our room to prove it!

20130905-013317.jpg
This is just a tiny glimpse of the many memories, thoughts, and souvenirs I store in my Smash books. What will you smash into yours?

You can get your smash book in 3 different sizes at Hobby Lobby, Michael’s, Target, or Amazon.com if you’re an online shopper. In fact, if you’re in the market for one this week, I happened to notice that the books and lots of accessories are being featured on the discount site Zulily through Friday so go have a look!

http://www.zulily.com/e/k-and-company-smash-58074.html?pos=74

Happy smashing!