When we bought this house, I got very excited about all of the exciting possibilities the front office held. I thought maybe it could be a studio someday but I’m not a huge fan of studio work so scratched that. We decided to leave it an office for the time being but I had visions dancing through my head of a craft room as well. 5 months later, it had become more of a storage room for boxes I didn’t feel like dealing with at the time. Our computer desk and filing cabinet were in there as well as some cube shelving that I needed to organize but had yet to find the time or desire to do so. This week, I decided it was time for me to begin scrapbooking photos from our Disney World trip. I began to rummage through boxes looking for paper, stickers, and trimmers but I soon became overwhelmed with the disorganization of it all. I decided it was time to whip this space into shape once and for all. So my friends, I began a 3 day extensive overhaul of this small room to turn it into something fun and colorful yet inspirational and functional at the same time. If you know me at all, you know I would rather spend a fortune on designer shoes, handbags, and children’s clothing than expensive home decor. I get bored easily and I like knowing I can change the look of something on a whim and not worry about how much I spent on it. Welcome to my new office and craft space. Come on in and have a look around!
I wasn’t even sure where to begin with this huge project but I knew I needed a craft desk to be the heart of the room. A place where I could spread out whatever crafty project I was working on at the time and not worry about having to move it out of the way to eat or something like my current workspace (the kitchen table). Years ago, before I married Dave, I did cakes out of my tiny apartment. I needed more counter top space and so I built some using cube shelves and plywood. I had seen this done on a larger scale many times on pinterest so figured it was probably my best bet. This way I could make it the perfect size for my space and store craft supplies in the sides. I moseyed on over to my friendly local Target and picked up two 9 cube shelving units. These are super affordable normally but I was pleasantly surprised to find 2 on clearance for only $25.88 each! They were easily enough assembled with detailed instructions and I probably only spent about 30 mins on both of them using only a screwdriver and a hammer! I spaced them apart accordingly and then measured for the top. At home depot I decided on a smooth piece of plywood for around $25 as well and had them cut it to a 3×5 tabletop for me. I had to purchase the whole sheet so still have leftover wood for a future project! I purchased black paint for the top to match the shelves but haven’t yet completed that task!
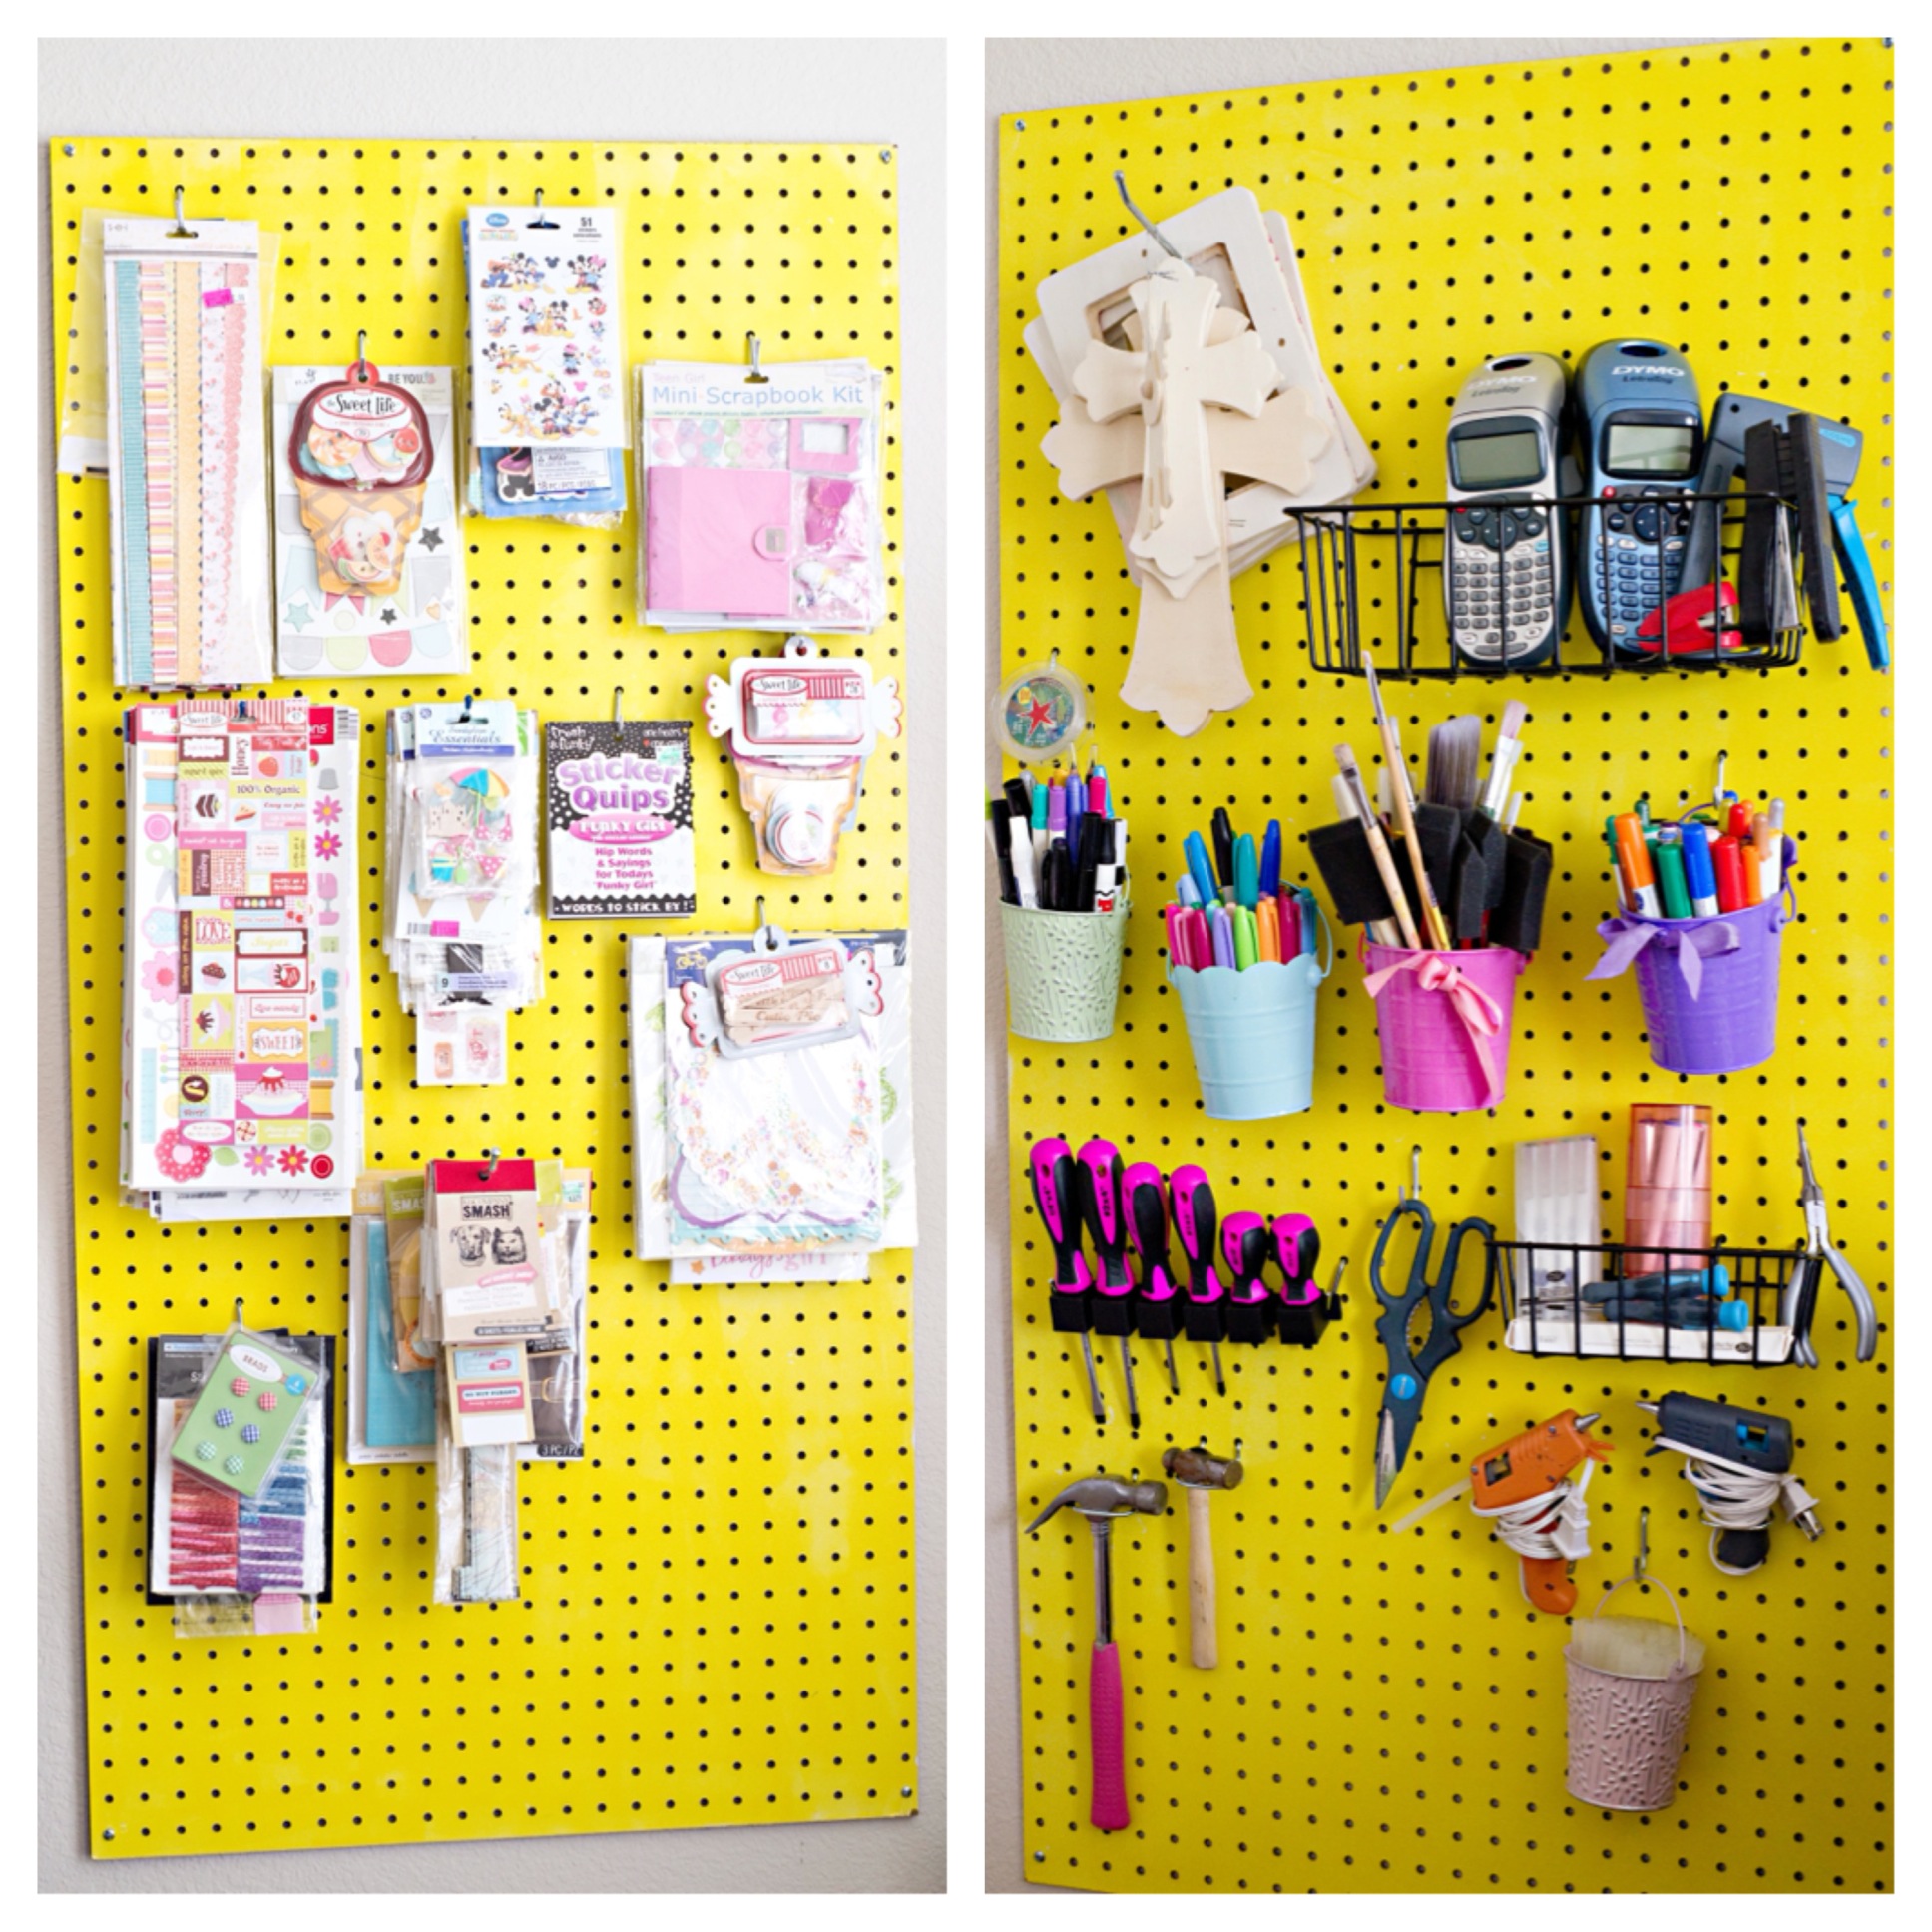
I also knew I wanted easy access to my stickers, pens, ribbons, and other craft supplies and I thought pegboard would be a great option. Craft stores sell pegboard and accessories specifically made for craft supplies but I wasn’t fond of the price tag on those! Instead, while at Home Depot, I snagged 3 sheets of plain pegboard at $7.97 each. I asked an employee to cut one of the sheets in half for me to fit a thinner space and they did so at no extra charge. I also stocked up on pegboard accessories while there. Each long peg was about 90 cents and then I purchased a package of baskets (2) for $9.99, and 2 packages of mixed hooks (probably about 15 per pkg) for under $4. The assorted hooks and pegs also came with screws to mount the pegboards to the wall! I swiped some colored paint samples from the paint section for under $2 each while I was there because who likes boring ole white pegboards? I painted them with a small roller brush made for trim without incident.

Then came the fun part of filling the pegs and organized my goodies!
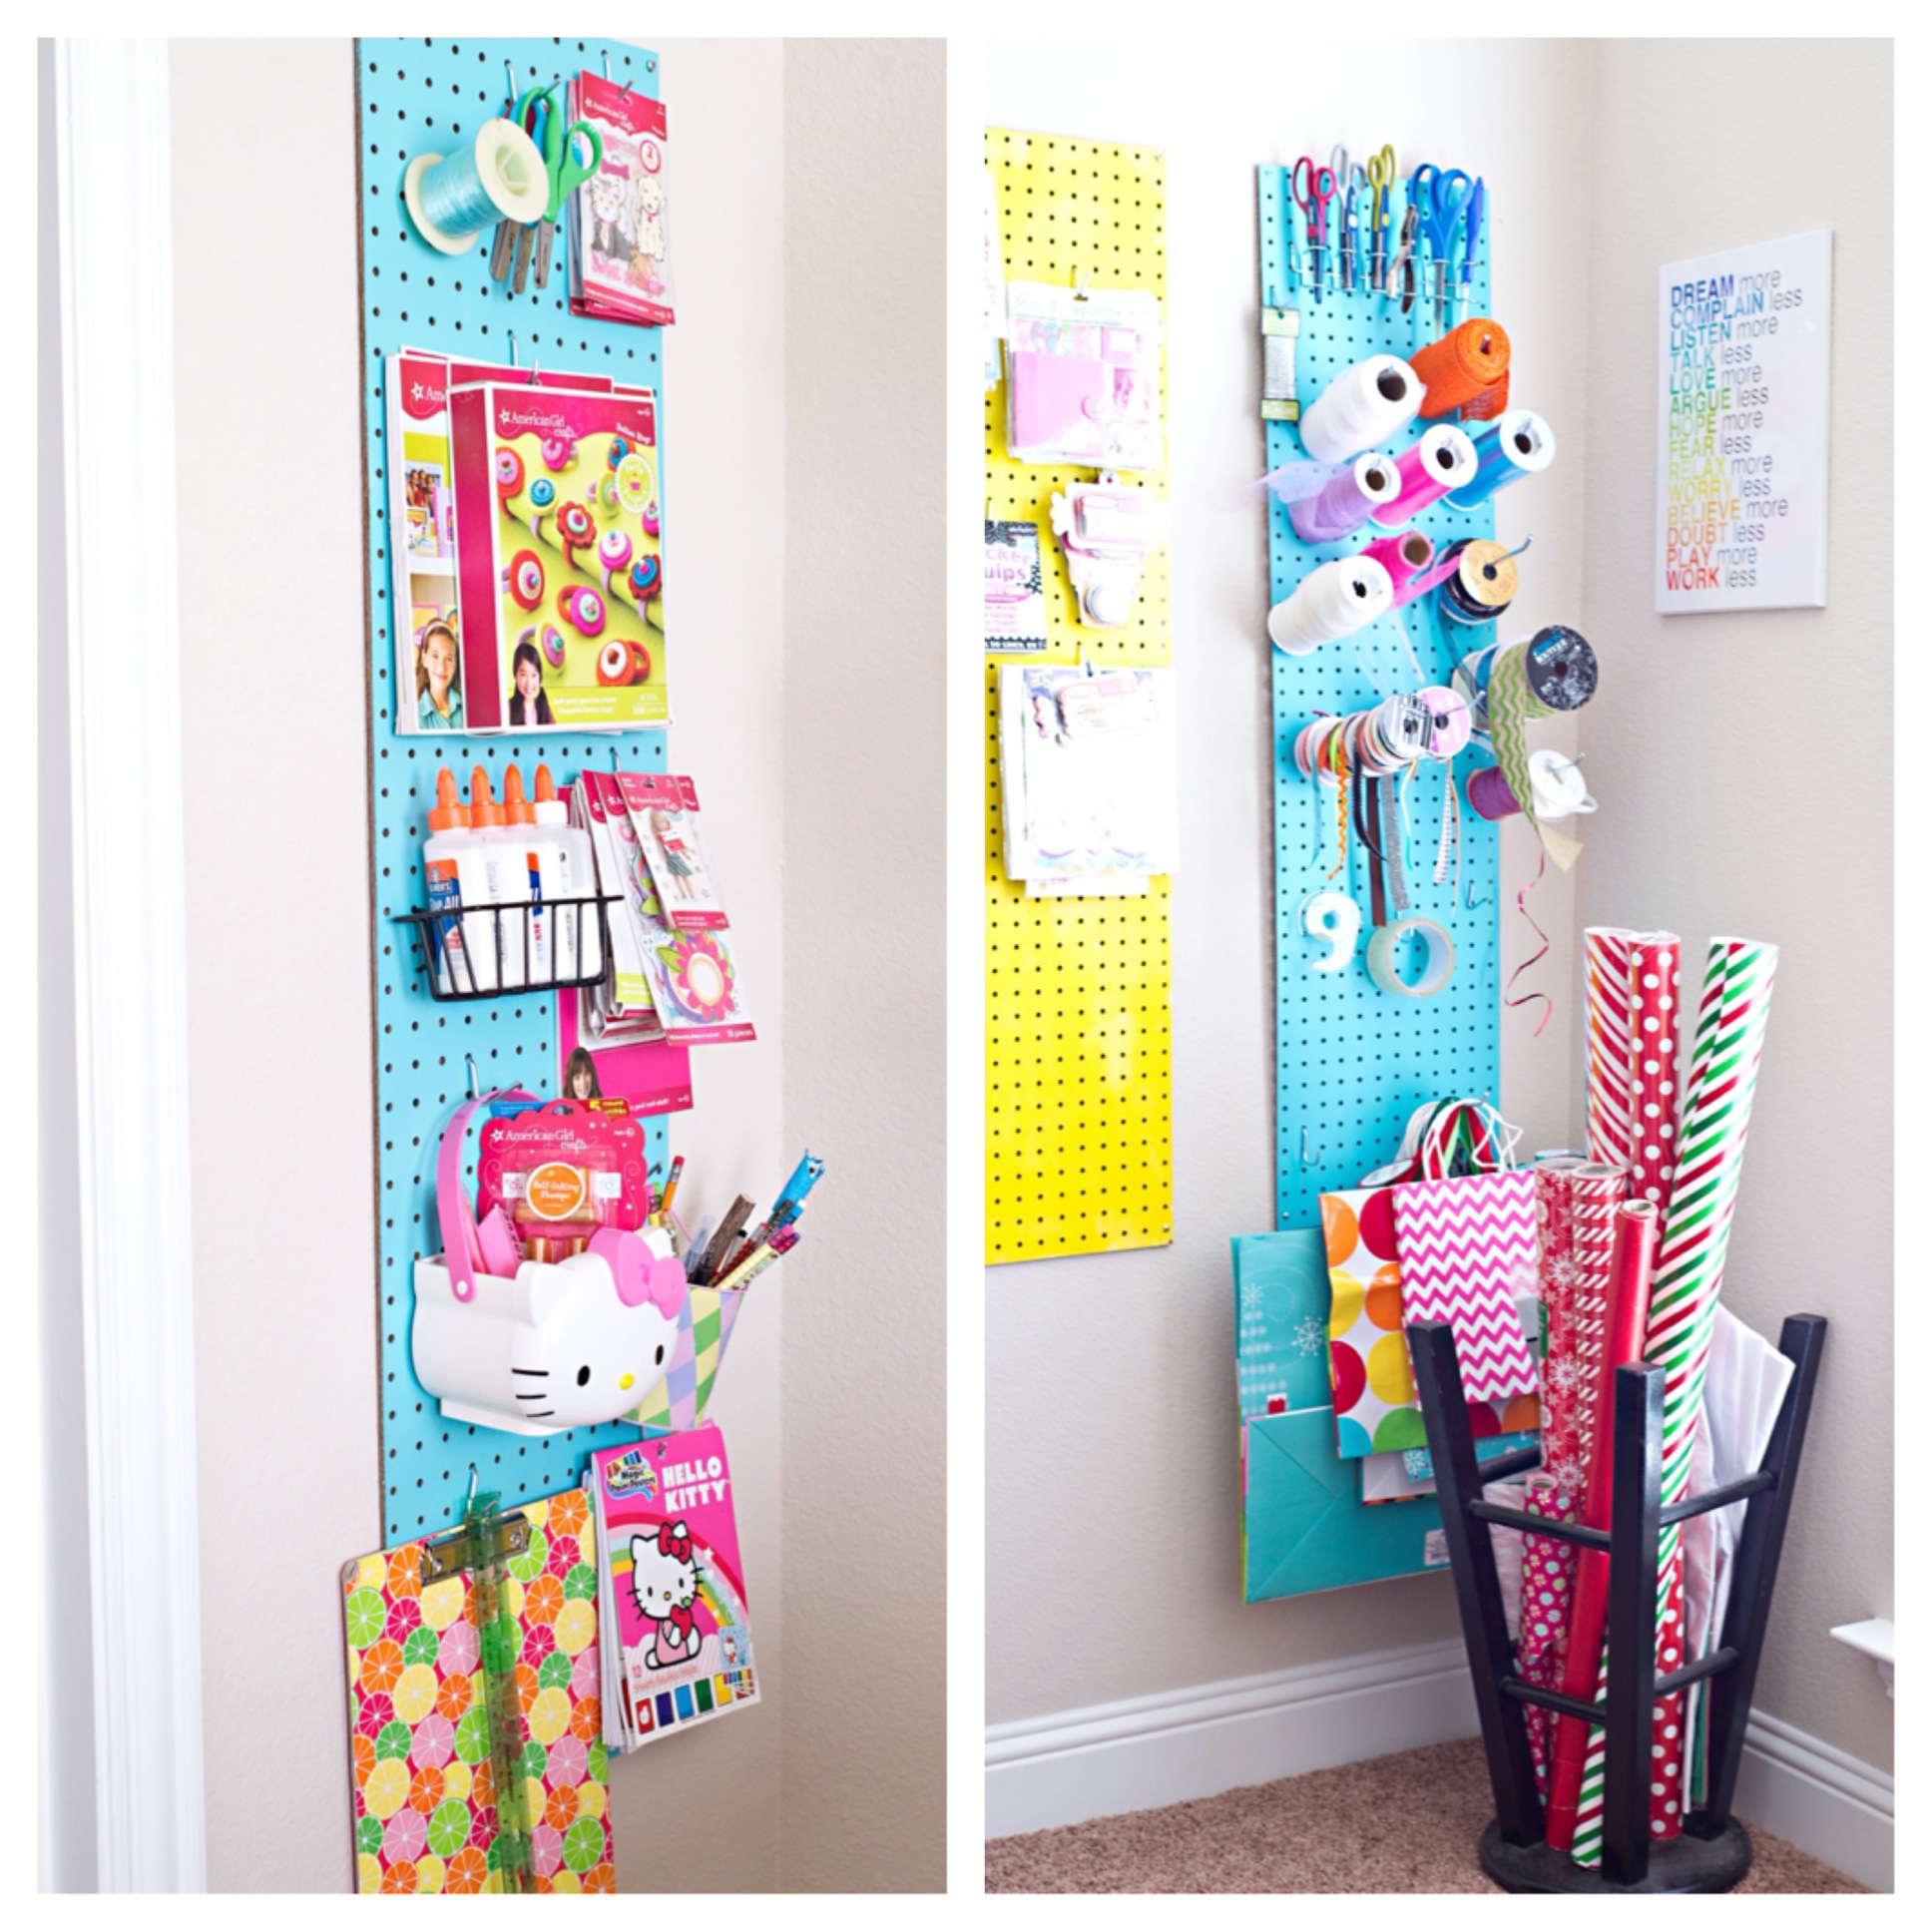
The little pails I actually stole from my children’s playroom closet. They were from Easter or other holidays mostly purchased in the dollar spot at Target. We later found some others at Michael’s as well for more storage fun! I used the thinner cut pegboard to designate a special “kids section” of crafty supplies and goodies they’re actually allowed to touch. I used the other half as a gift wrapping area with ribbon, tape, scissors, and gift bags. I’ve been using this old upside down $2 garage sale stool as a wrapping paper caddy for years so it went perfectly over in the gift wrap corner!
Now it was time for some Wall decor. I had this big ole black frame sitting in the garage. My mother gave it to me a few years back. It had a really old fashioned flower print in it originally but I saw potential in that frame. I spray painted it lime green and then grabbed some rainbow ribbon trim, nails, and tiny clothespins to create a fun way to display my instagram photos. Did you know Walgreens will print your instagram photos in an hour?!?!? I don’t normally advocate supermarket photo printing services but they’re just insta photos not fine portraiture so I made an exception. I nailed the ribbon trim to each side of the frame and then clothes pinned the photos across it. I need to lift that bottom string a little but for now it’s fine.
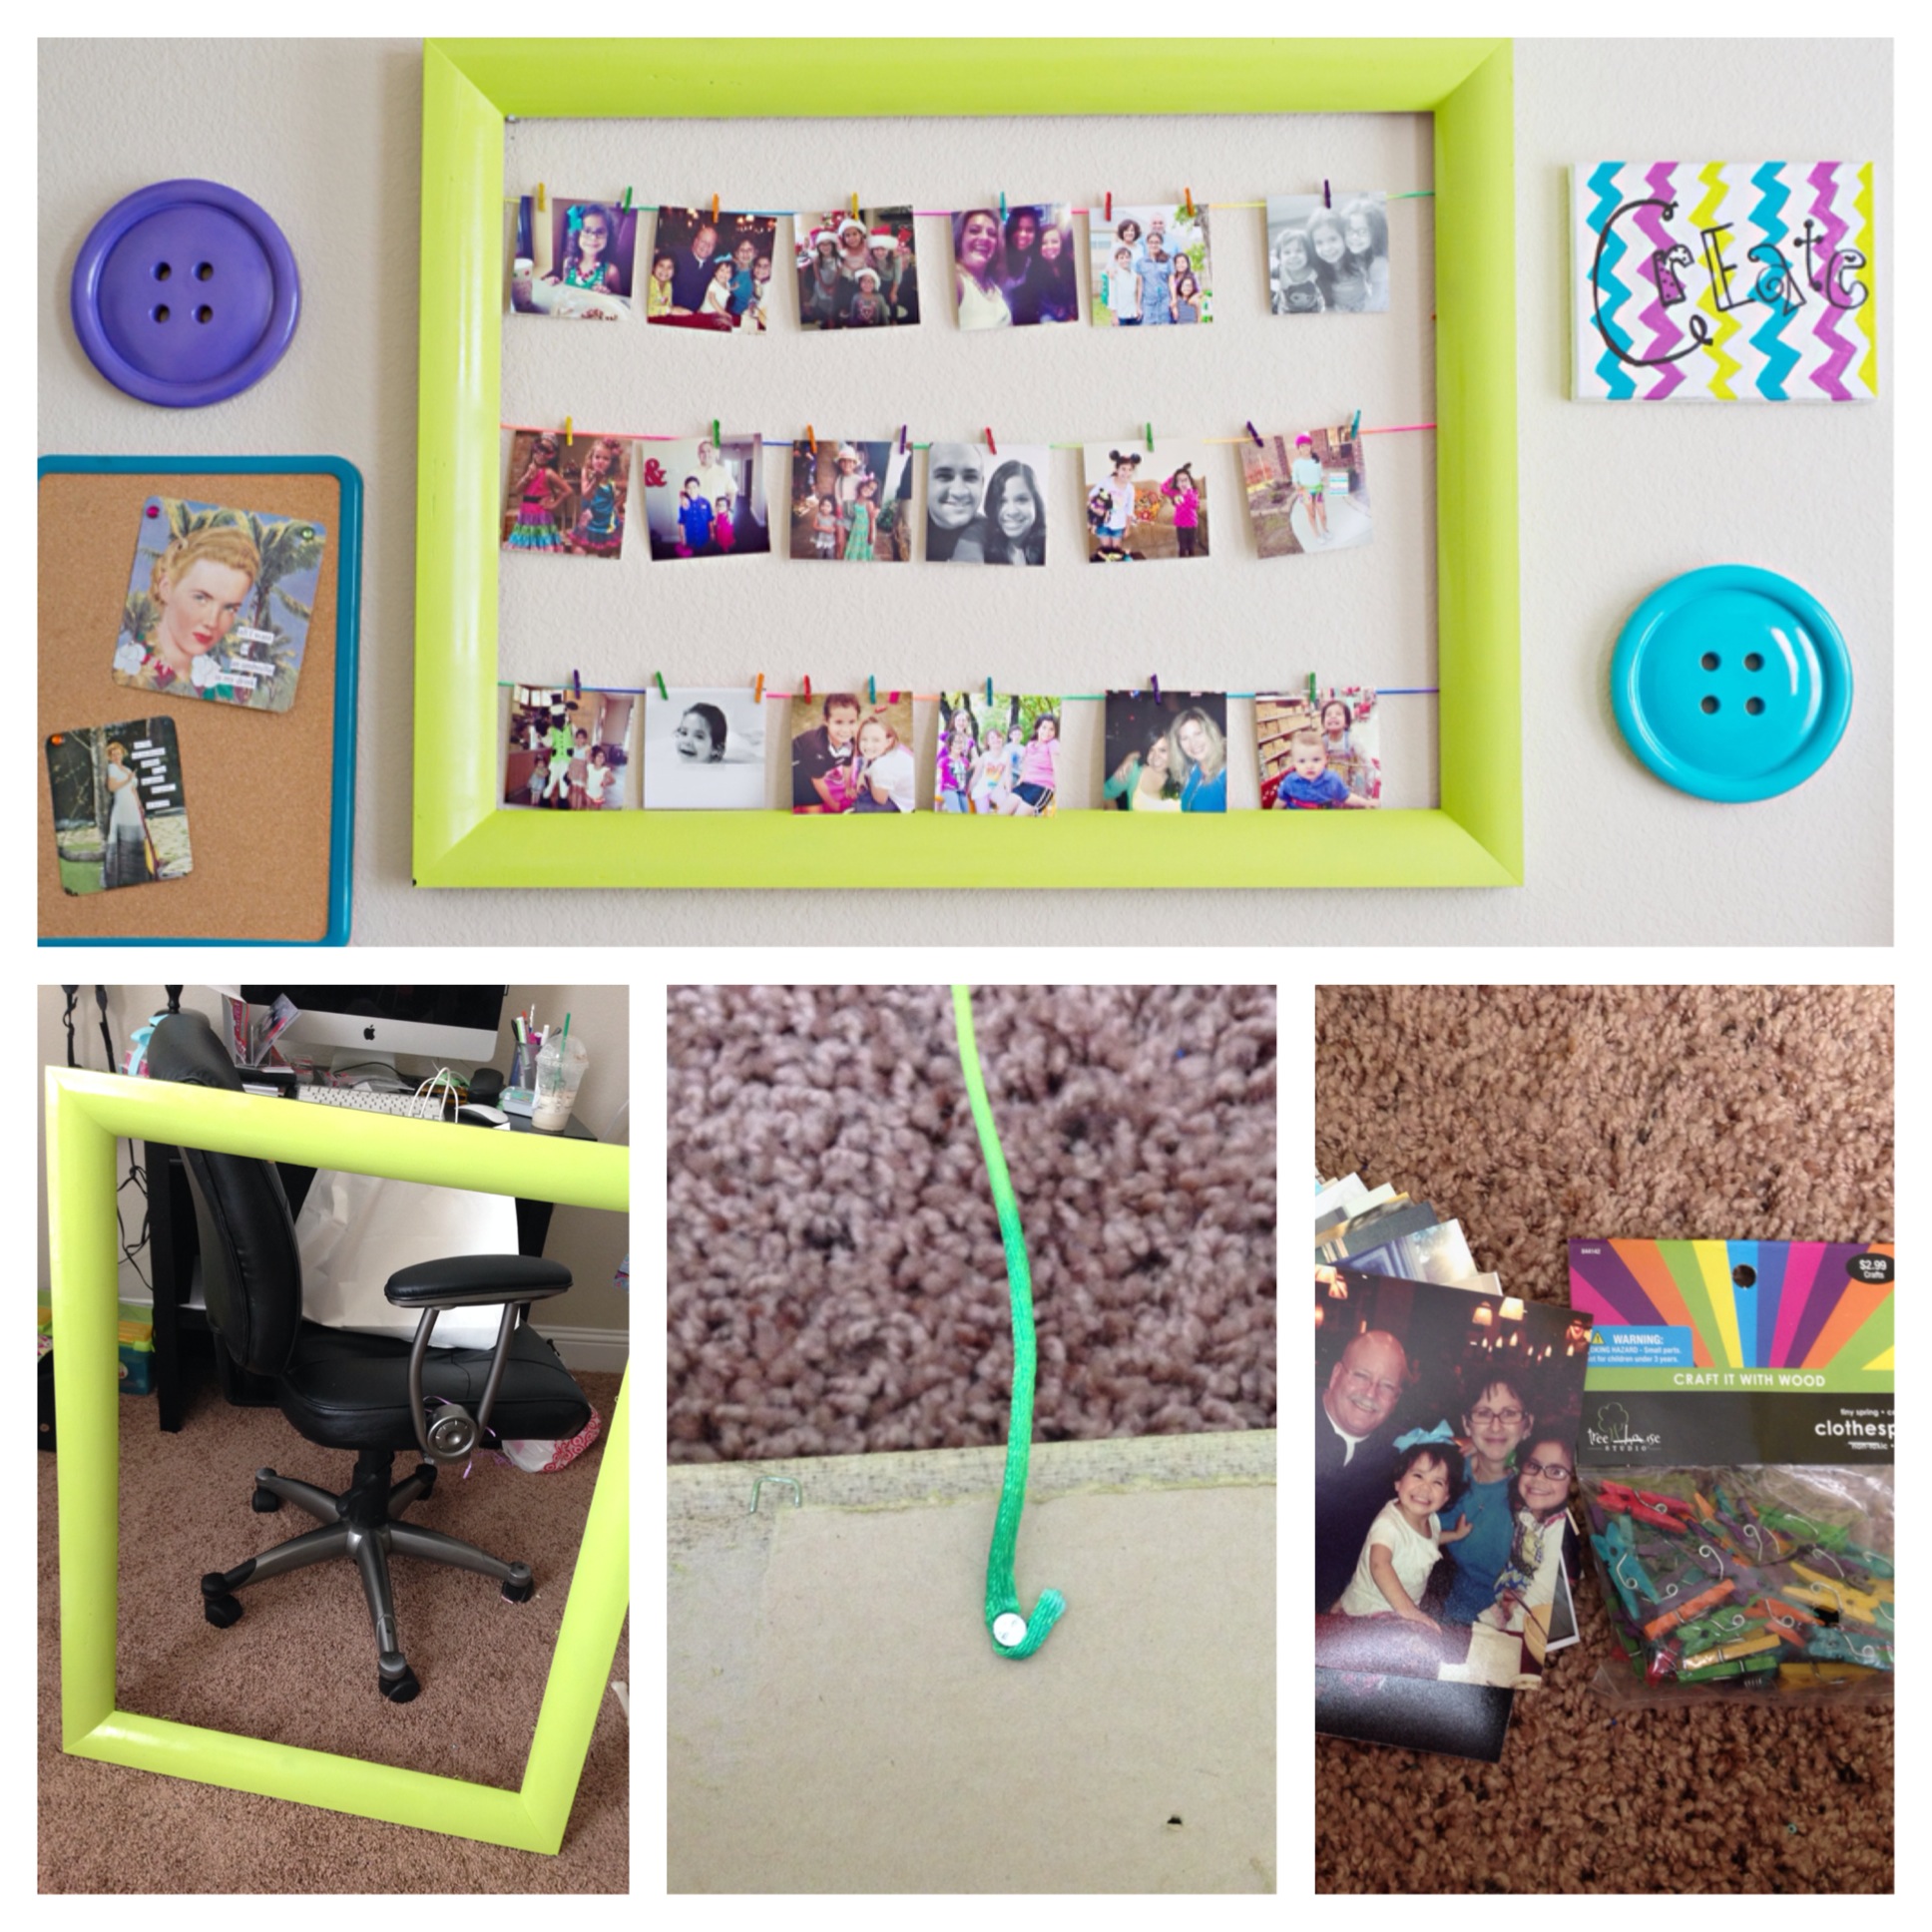
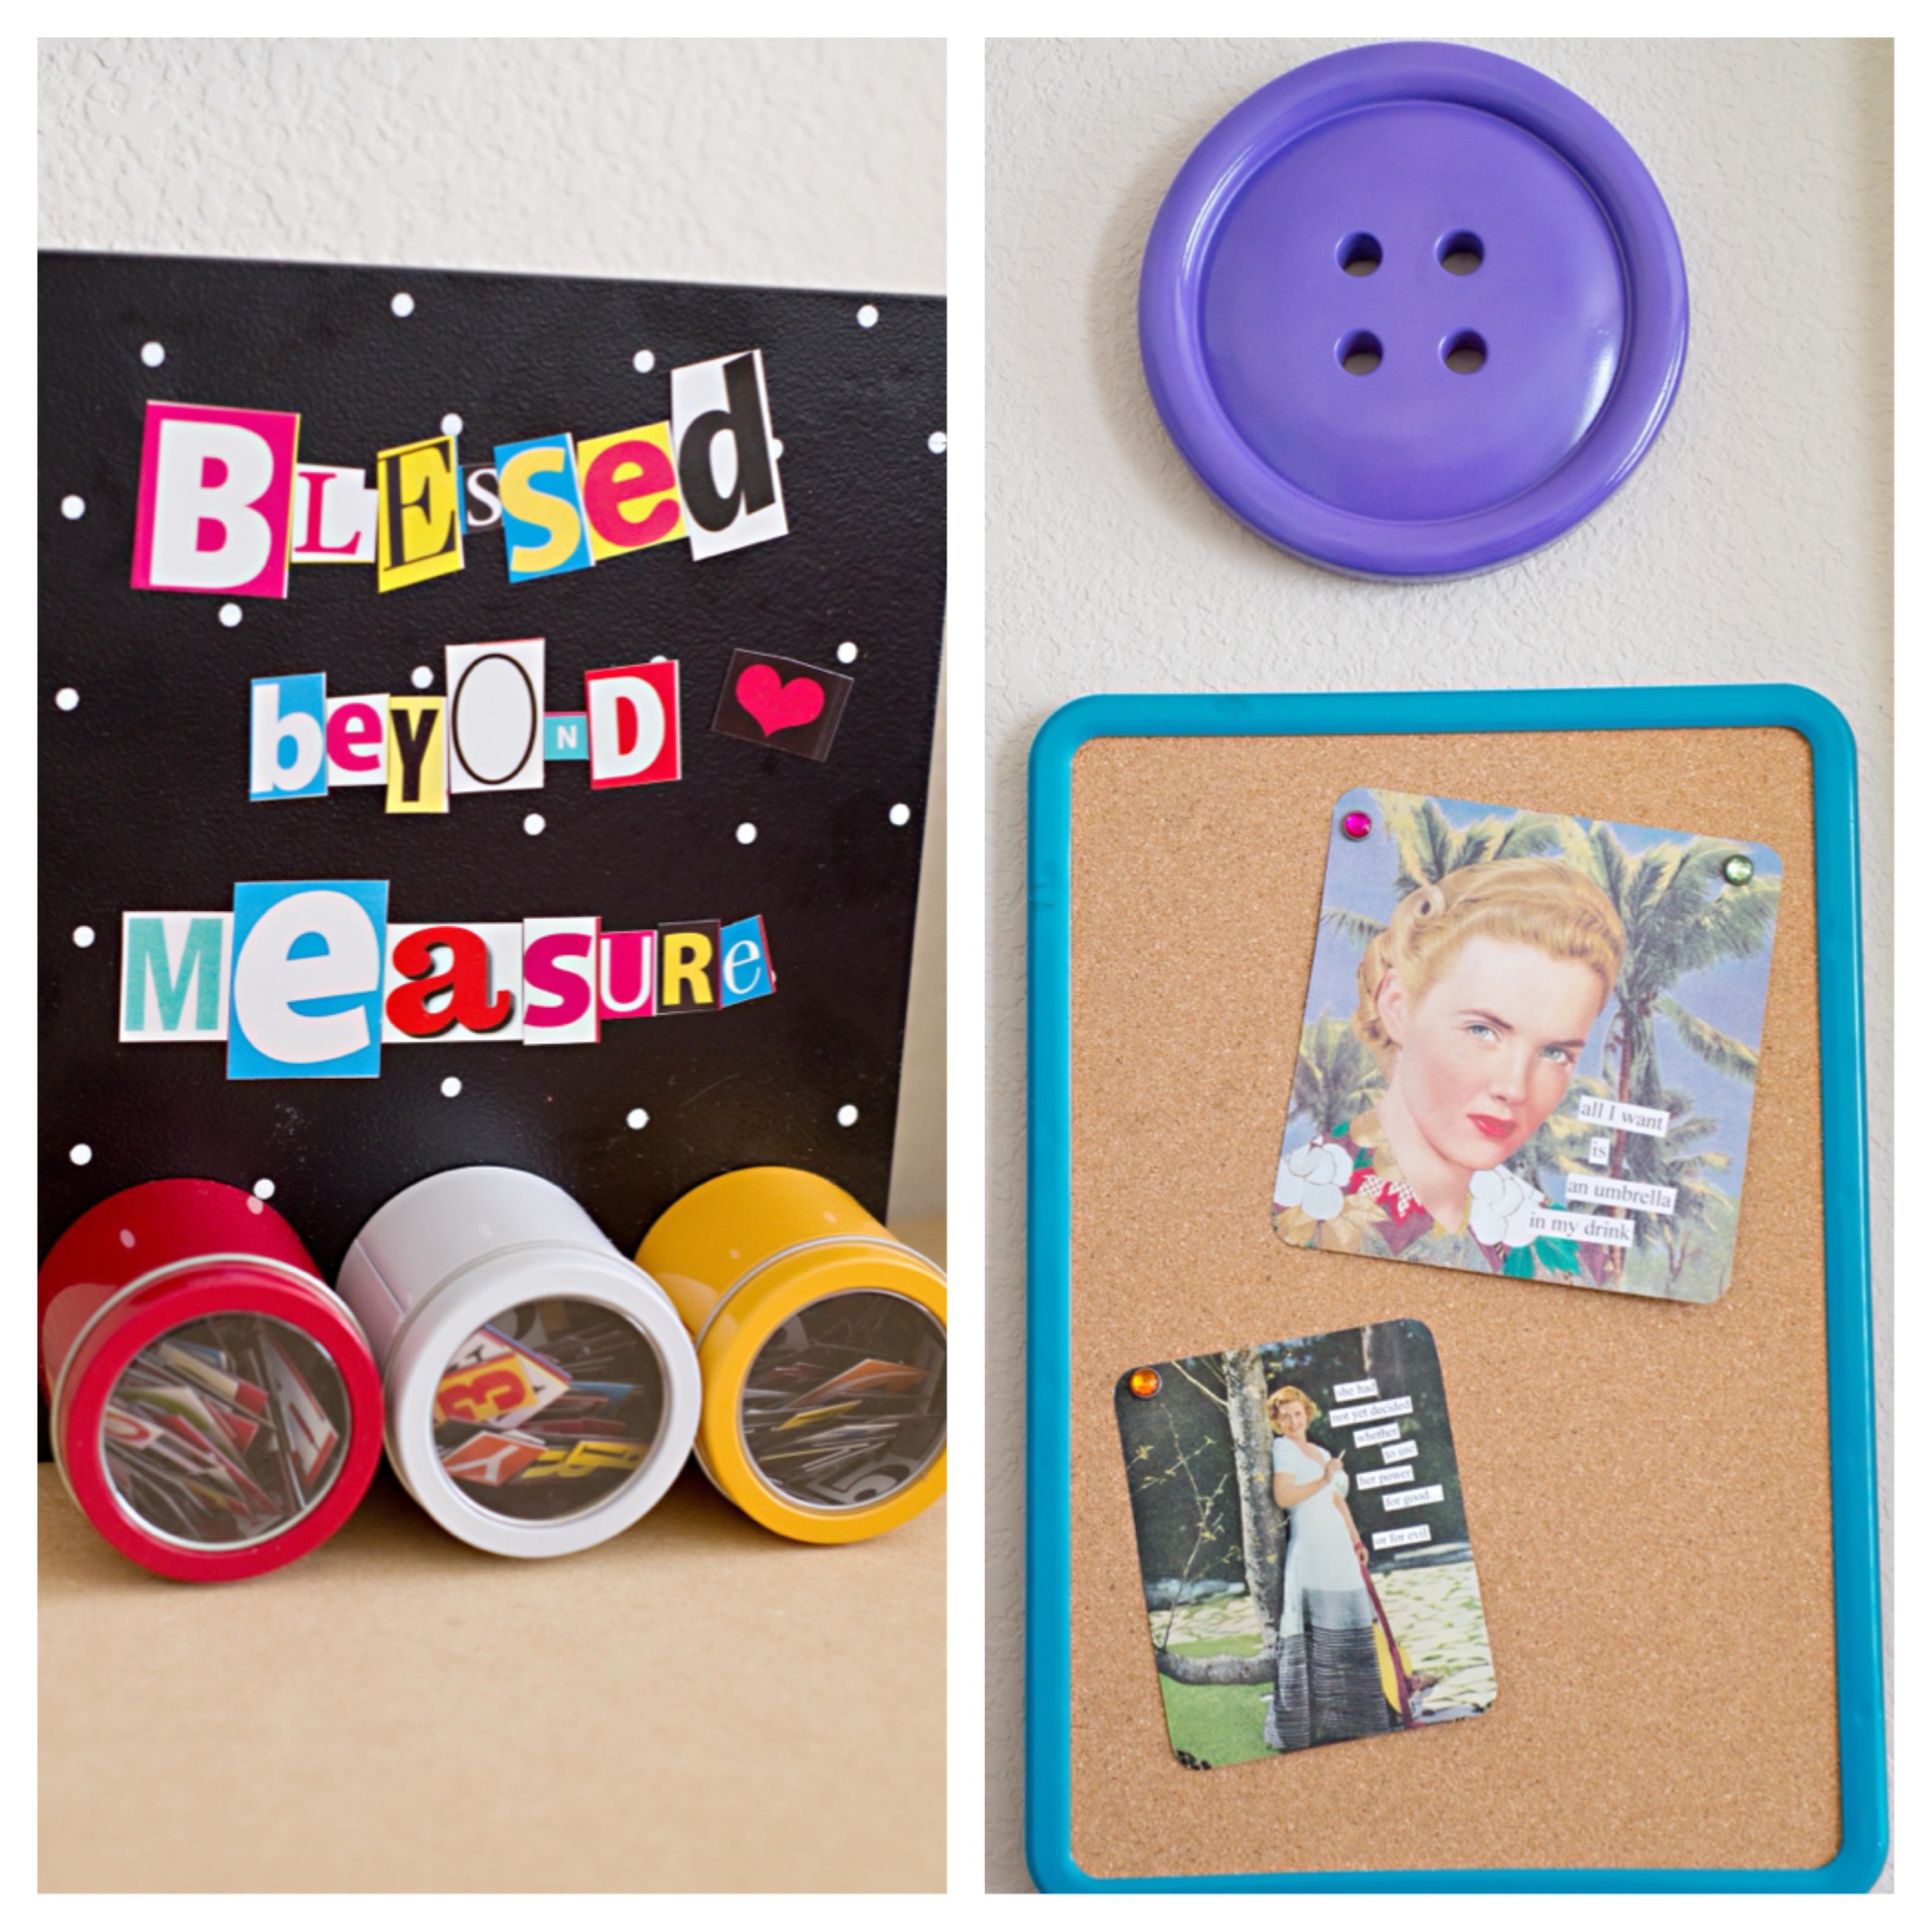
I found the giant buttons on clearance at Hobby Lobby for $4. They were green and pink originally but it was nothing a coat of spray paint couldn’t fix! The canvas my oldest daughter painted and I just used a paint pen to add the word “create” to it because I love the colors so much!
I found the turquoise bulletin board at goodwill for $1 brand new in the package and pinned some pages I cut out of an Anne Taintor coffee table book to it. I looooooooove Anne Taintor! I found this fabulous magnetic frame and the magnetic ransom letters at Tuesday morning and the little magnetic containers at Michael’s. The frame was on clearance for $3, the letters were $3.99 per package, and the little containers were $1.50 each.
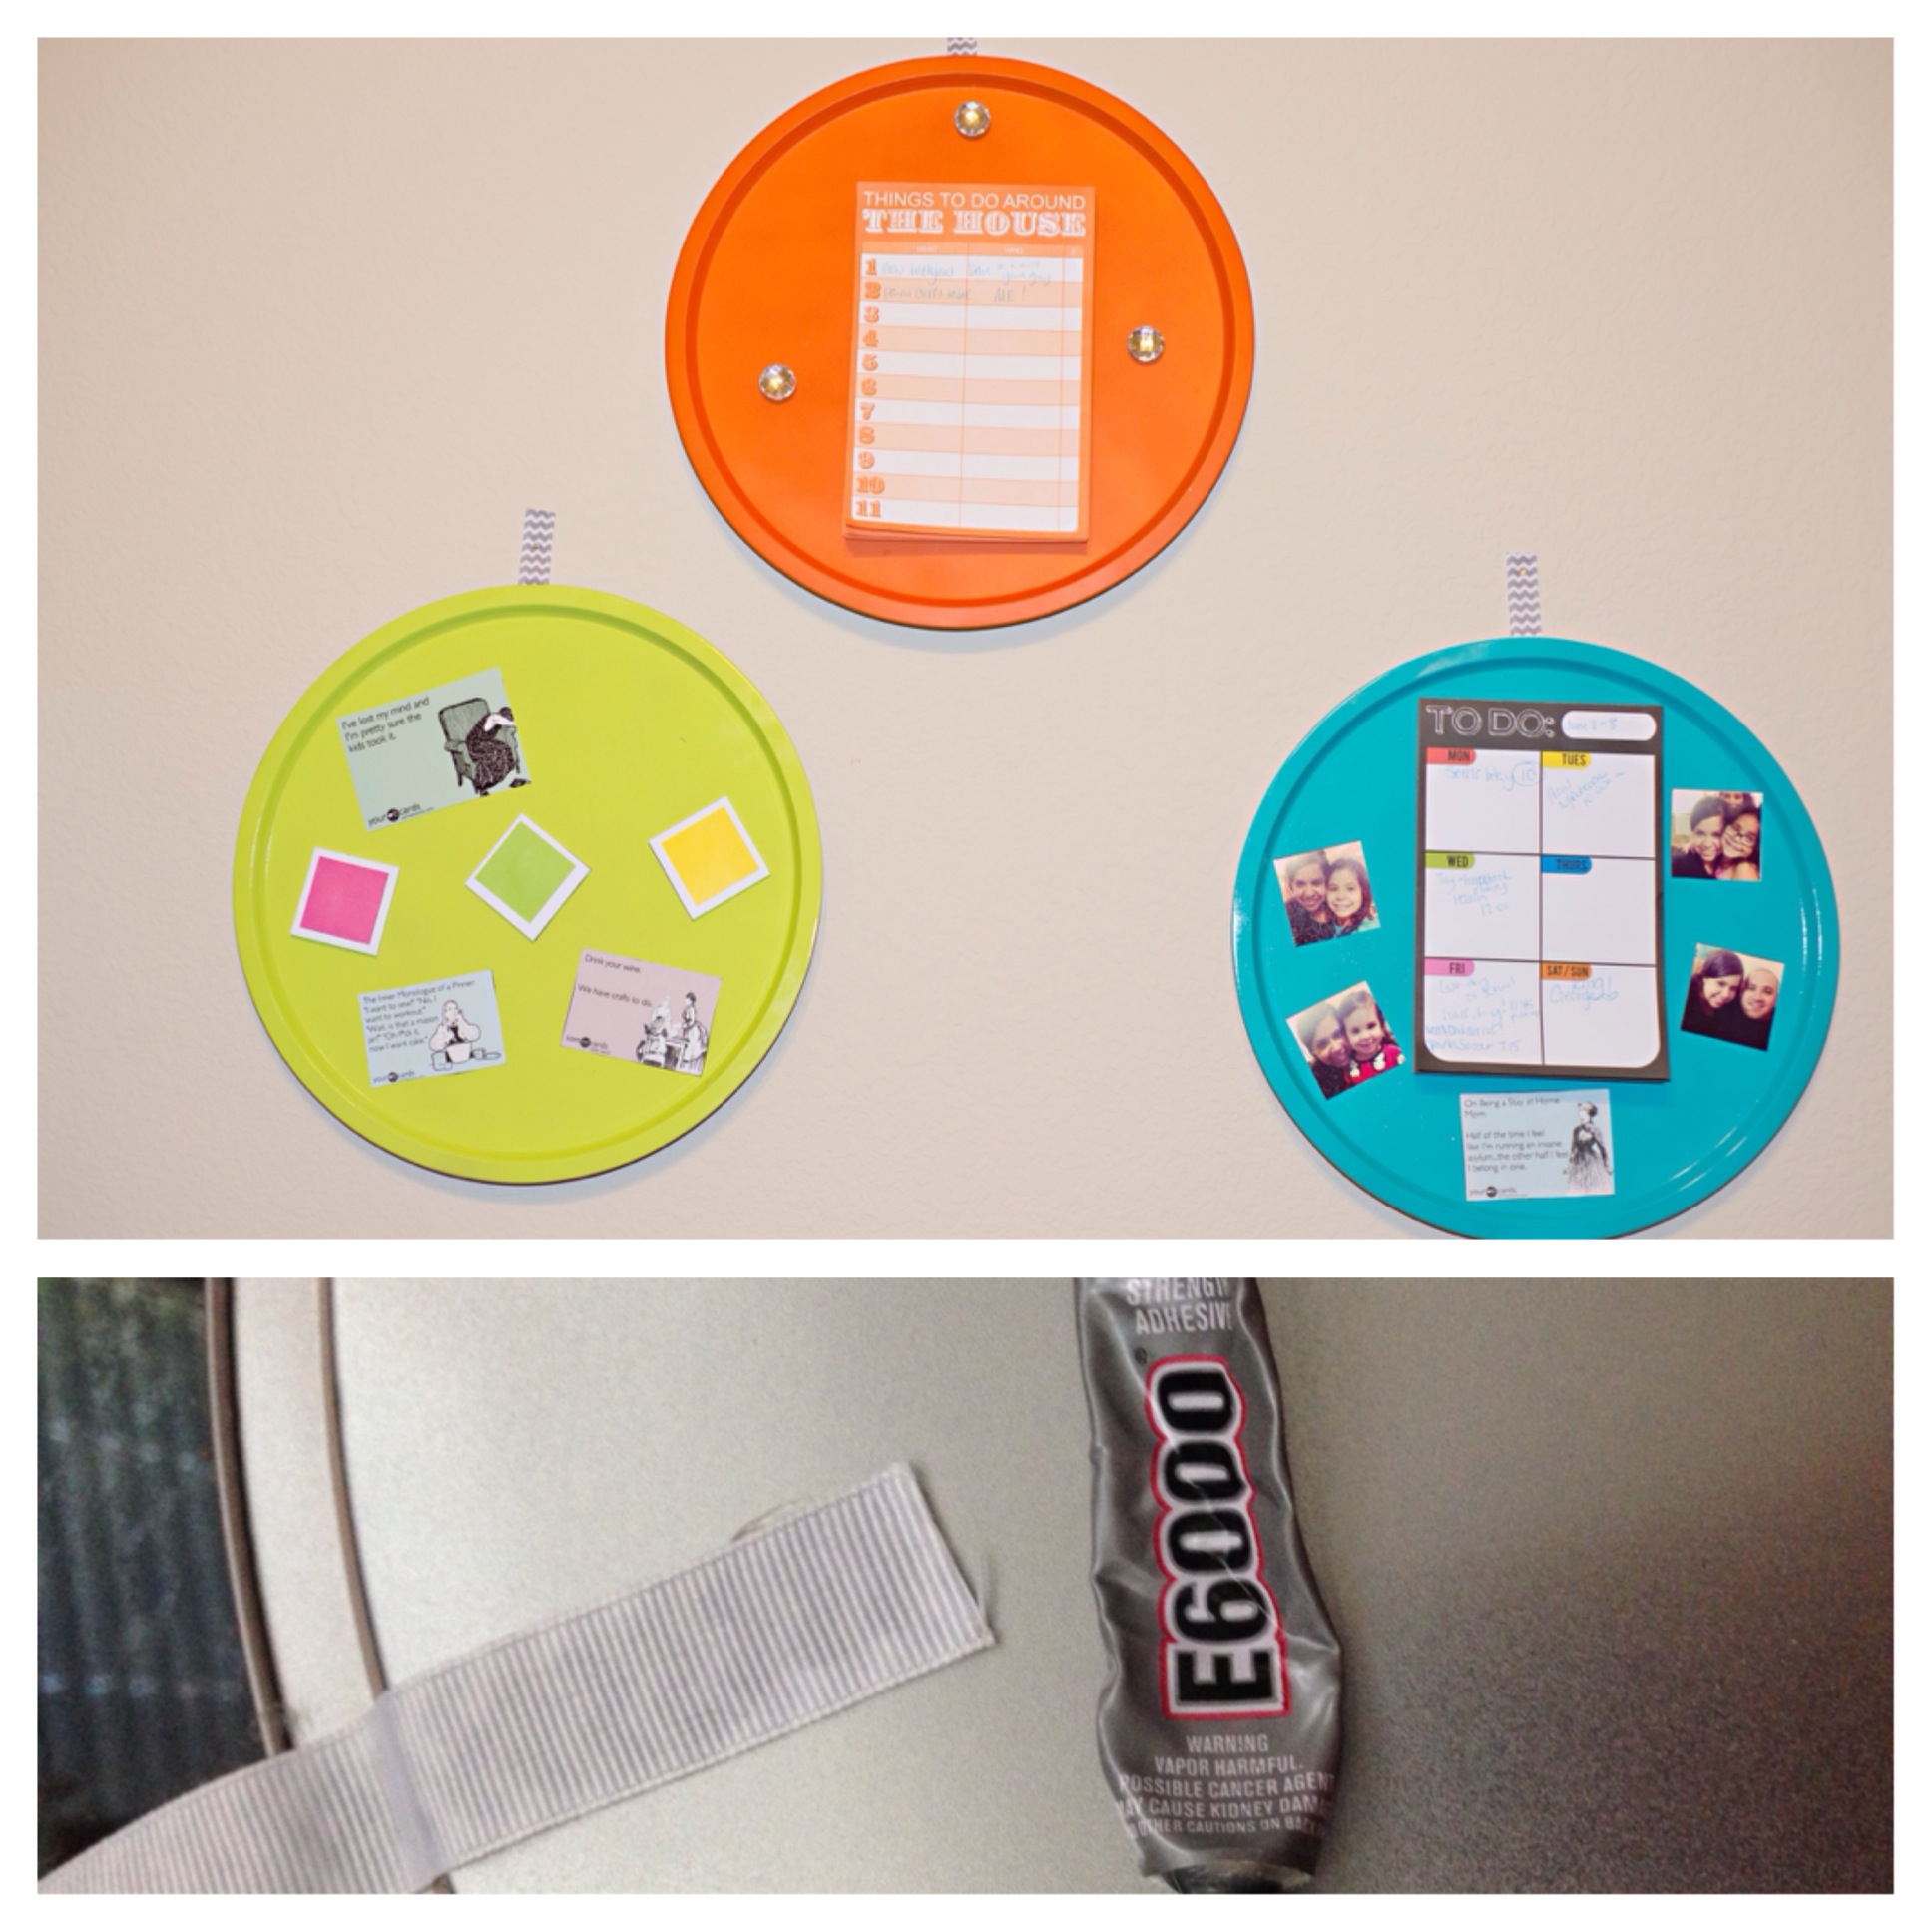
I needed somewhere to keep myself organized with to do projects, calendars, etc. I picked up these pizza pans at dollar tree for $1 each and spray painted them bright colors. I secured a strip of ribbon to the back of each using E6000 and then nailed them to the wall. I used sticky back magnetic paper to create some fun magnets of funny ecards and photos as well as some sticky notes and slapped them up there too.
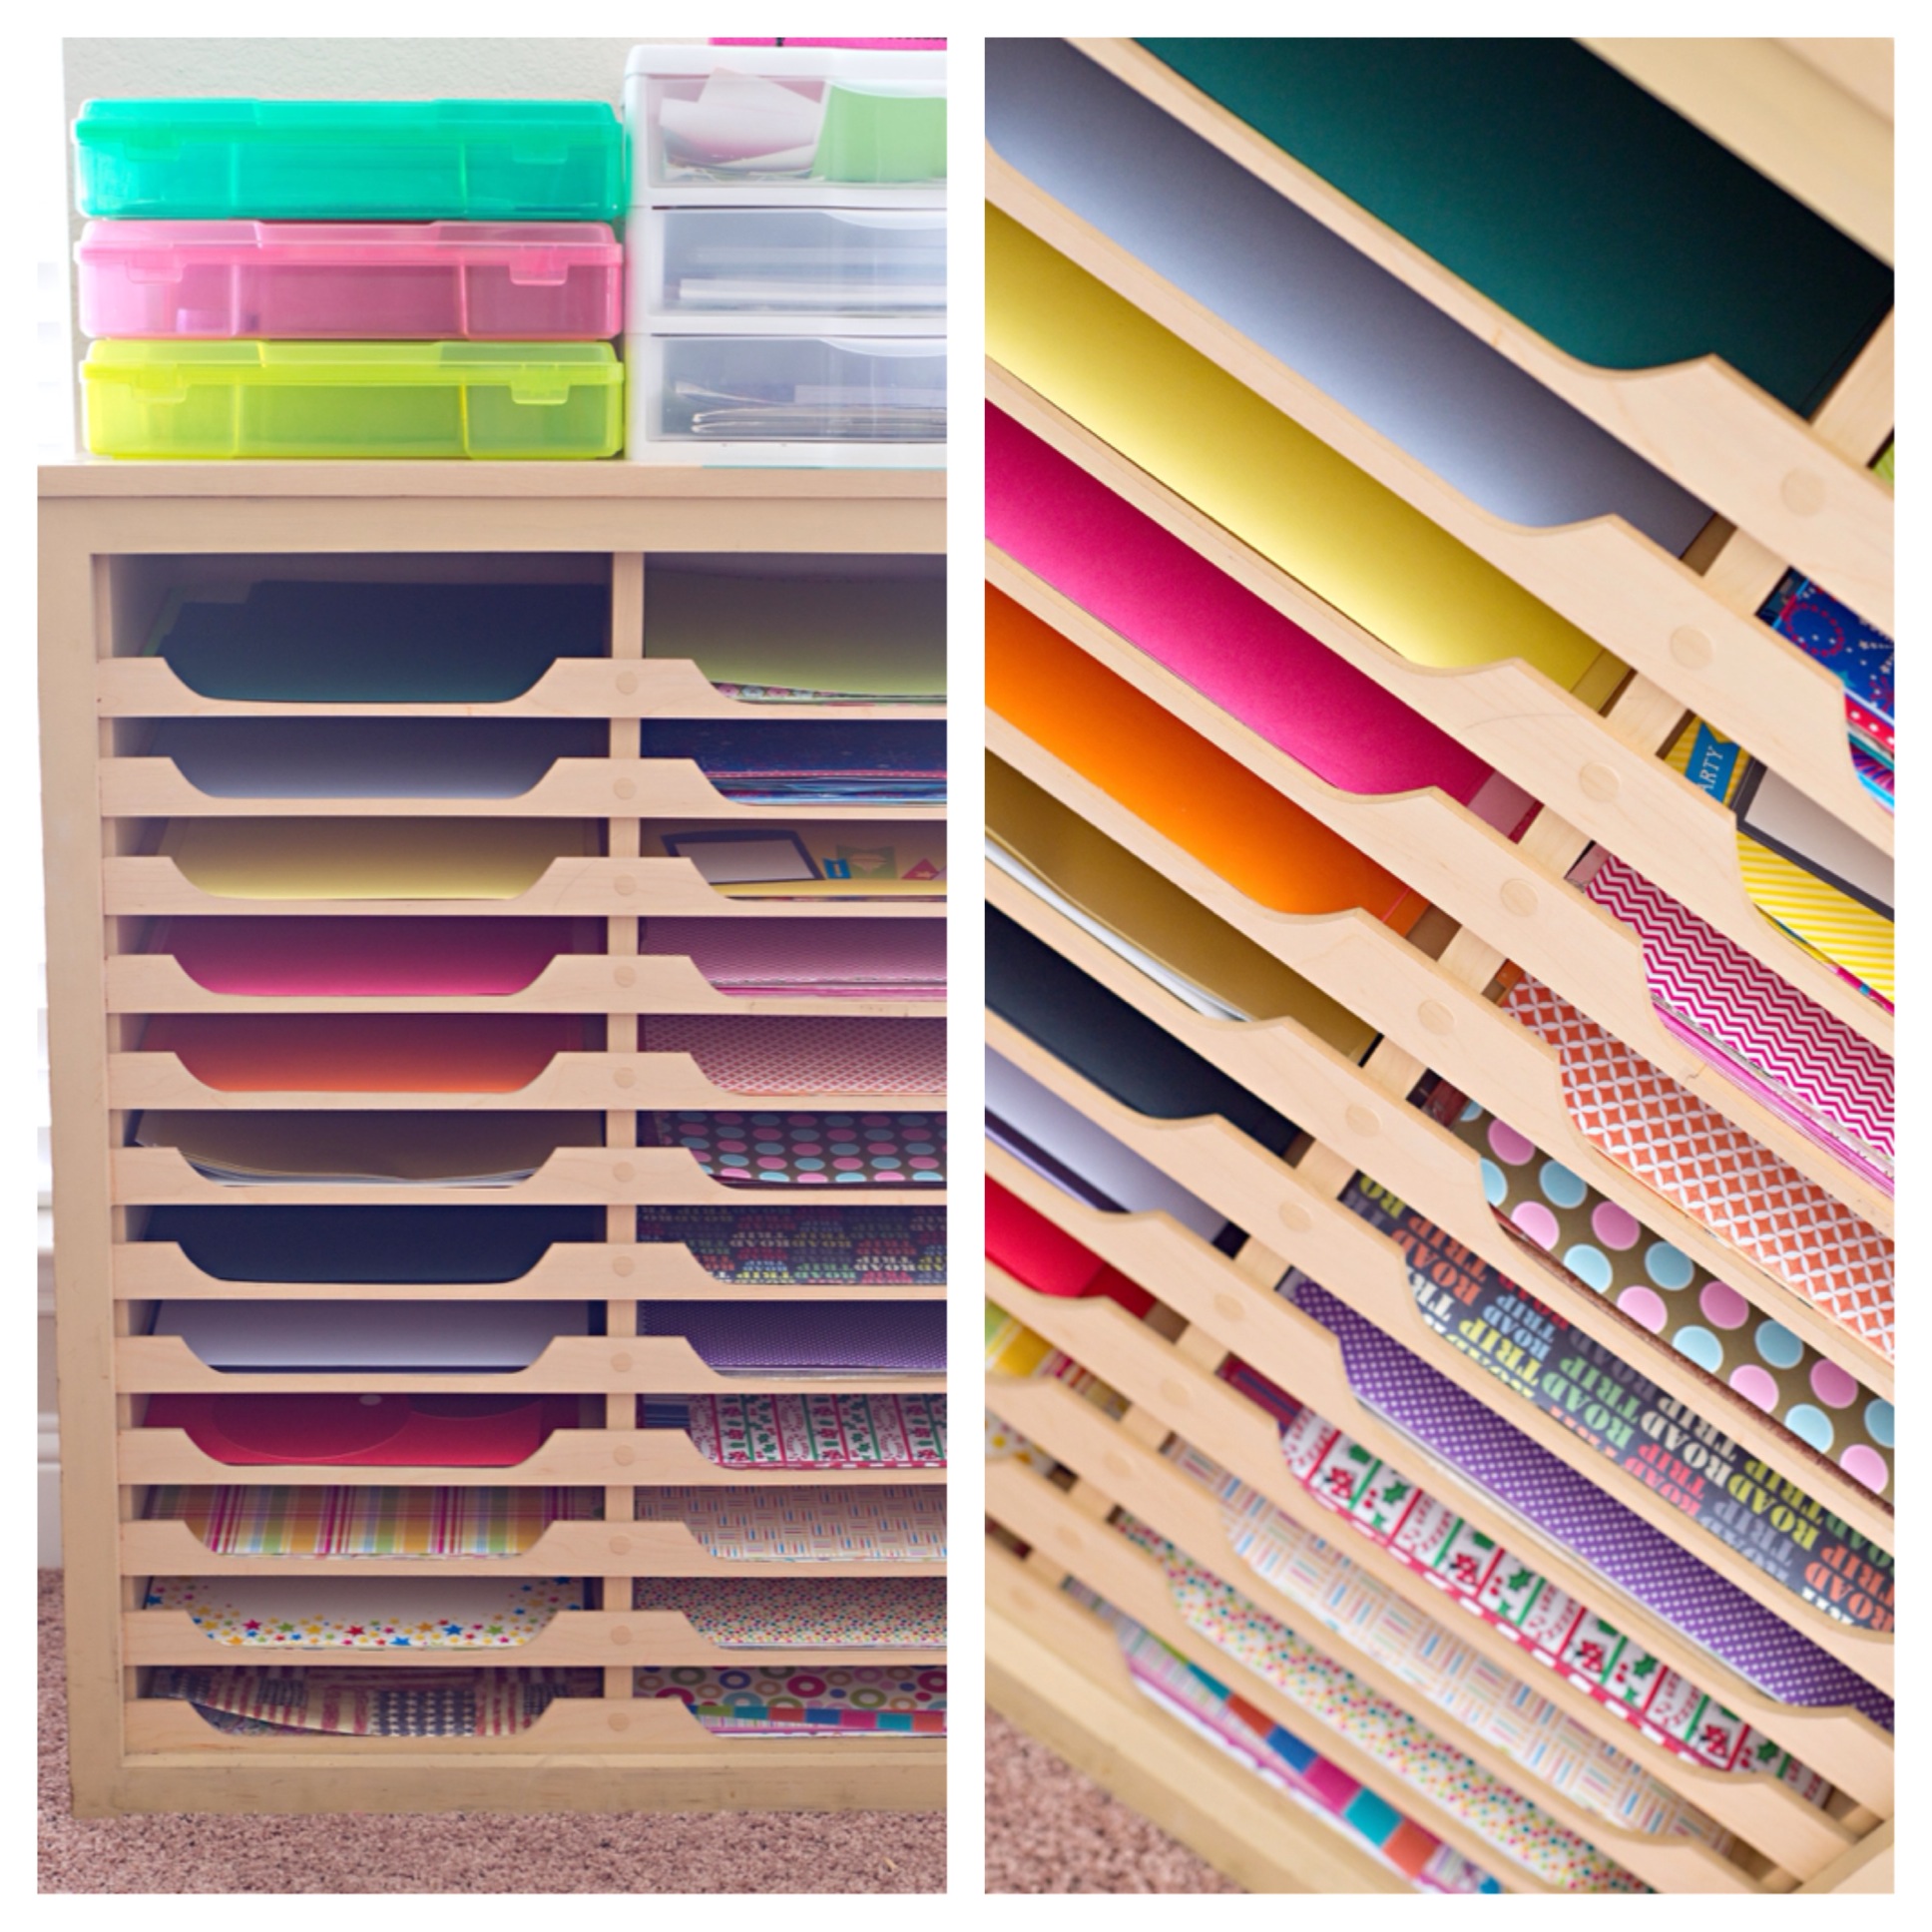
I had originally gone into goodwill looking for an old filing cabinet. I saw one on pinterest somewhere that had been painted in chalkboard paint and I thought that would be a fun addition to the room. I didn’t find one but I found something even better! This large commercial type scrapbook organizer is structurally in great shape. It was only $5.50!!!!! So excited! It needed a good cleaning and has a few chips in the top and bottom but they will easily be filled with wood filler later and then the whole thing will likely be painted. I put the kids to work color coding my papers. Solids on one side and the corresponding print on the other! So in love with this!!!
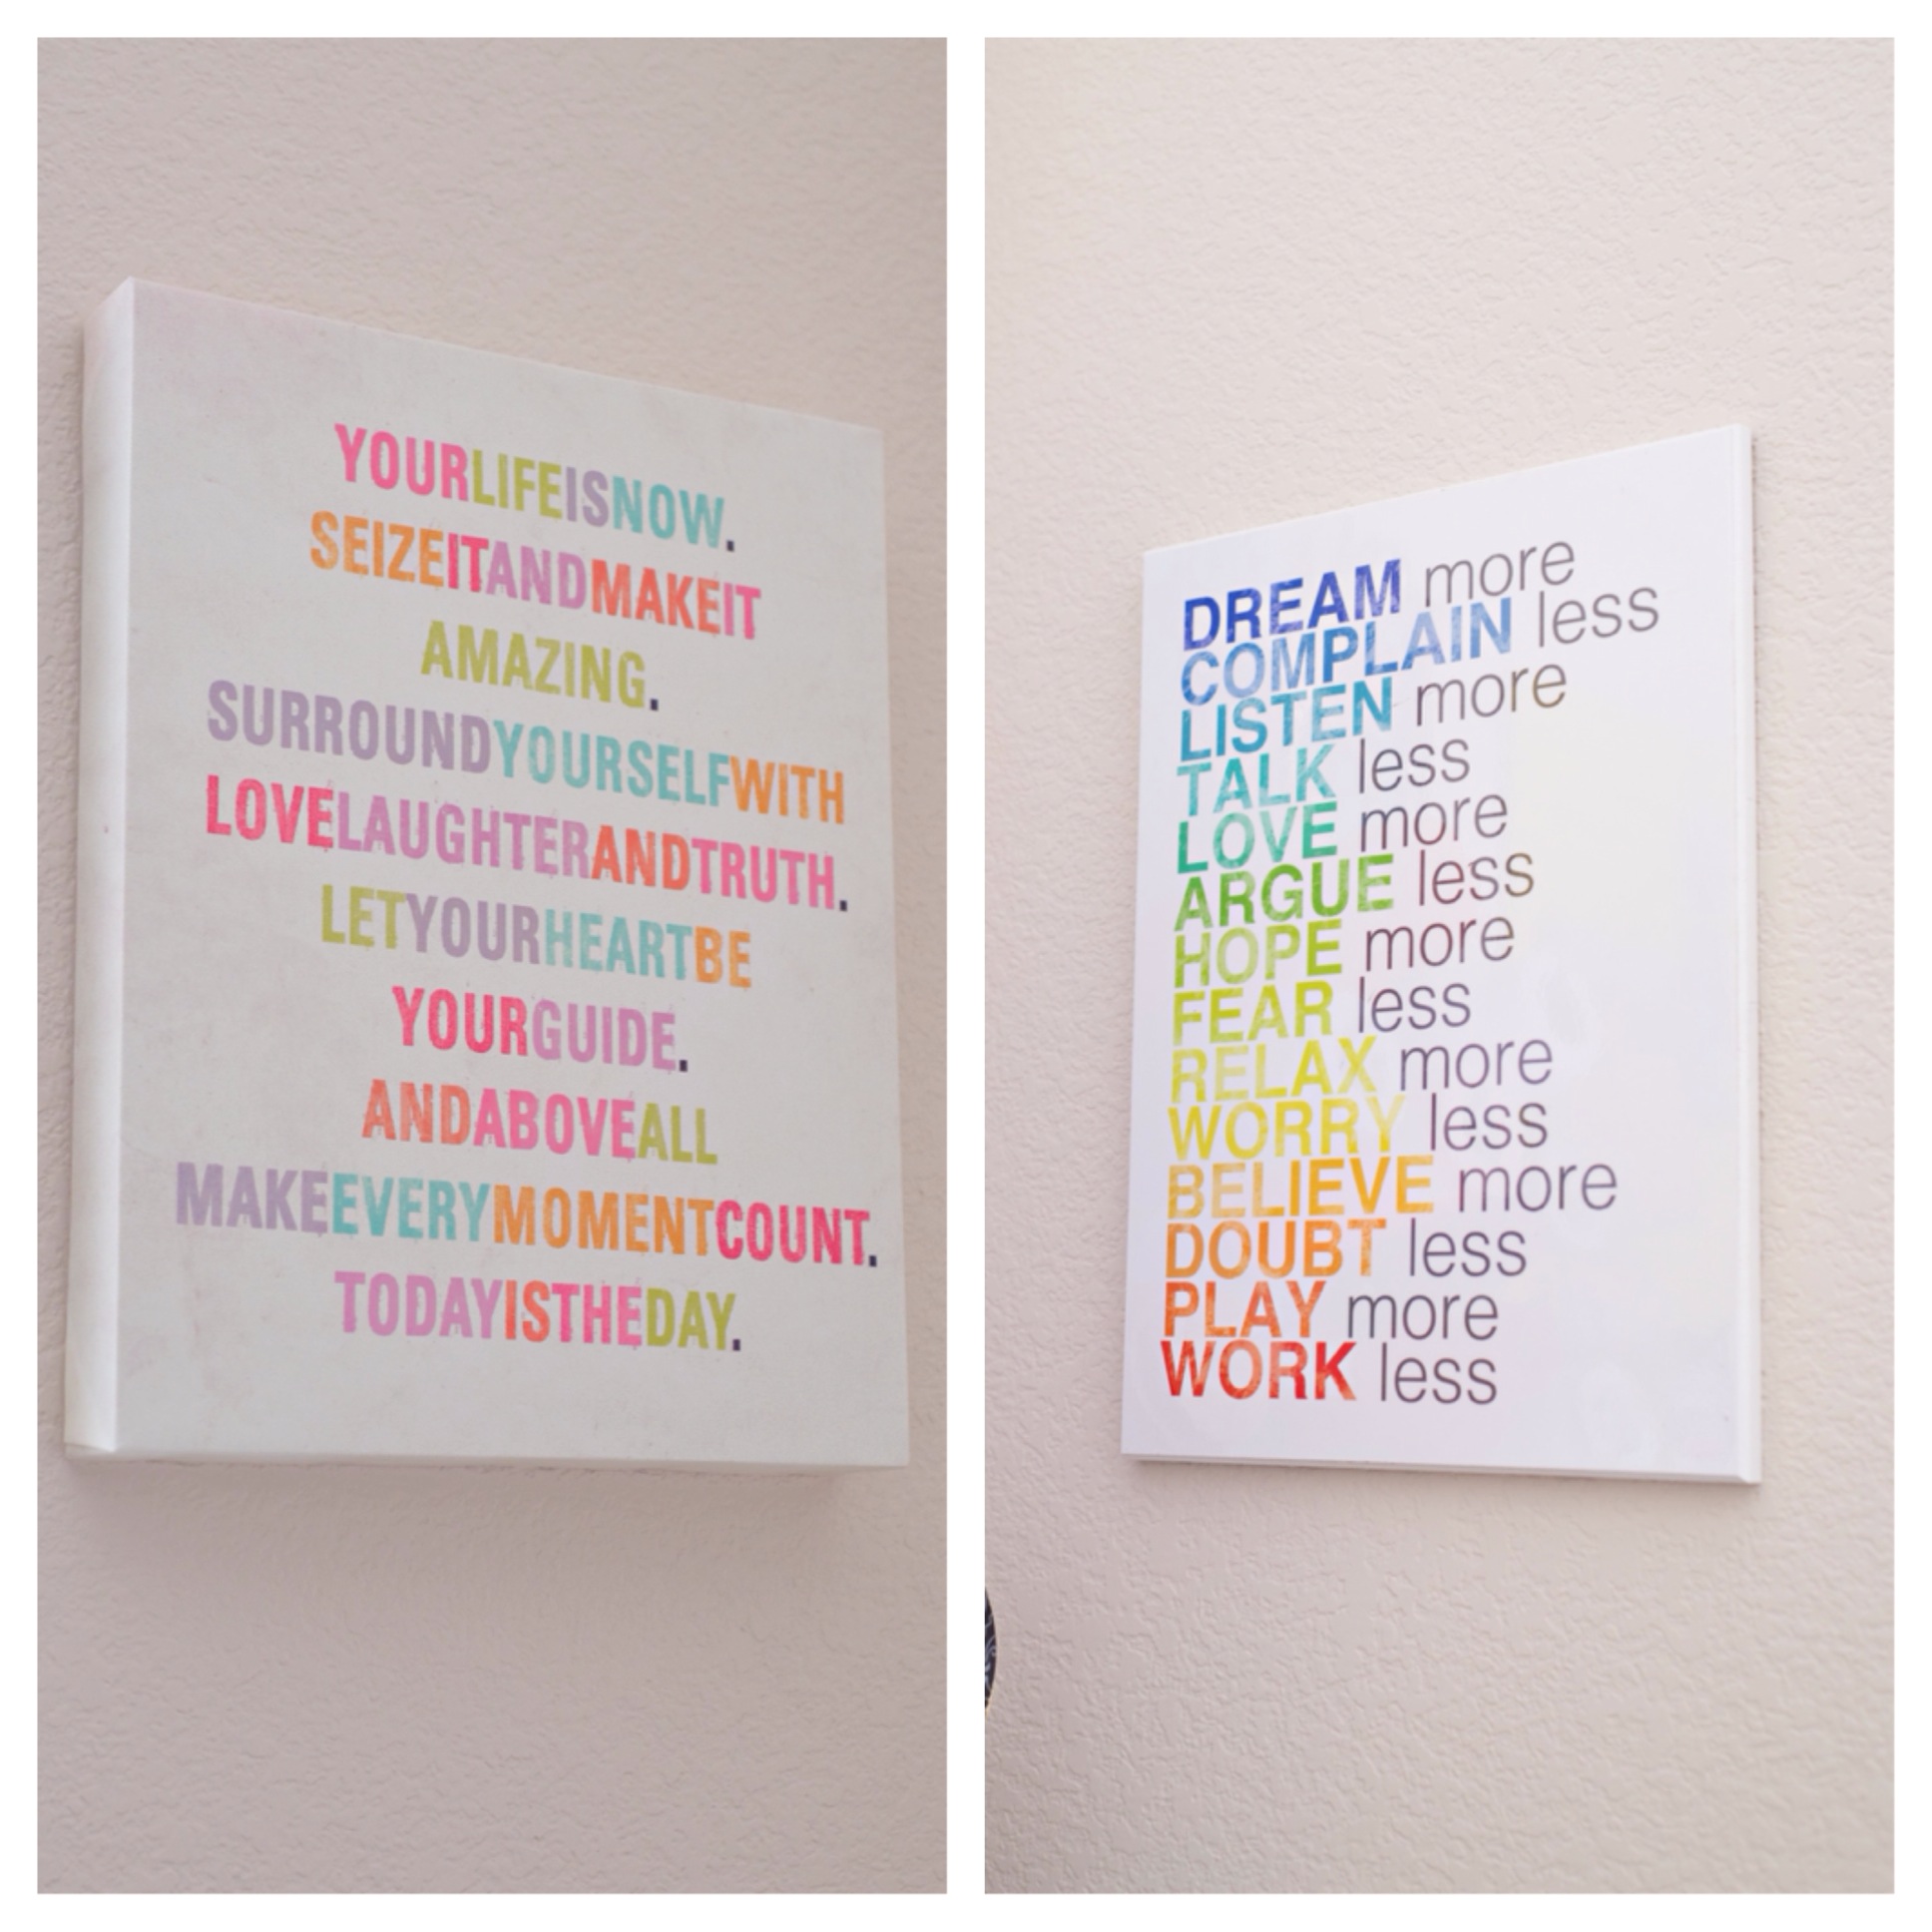
I found these 2 fun colorful artwork prints at Garden Ridge. Each one was under $12 and I love them!
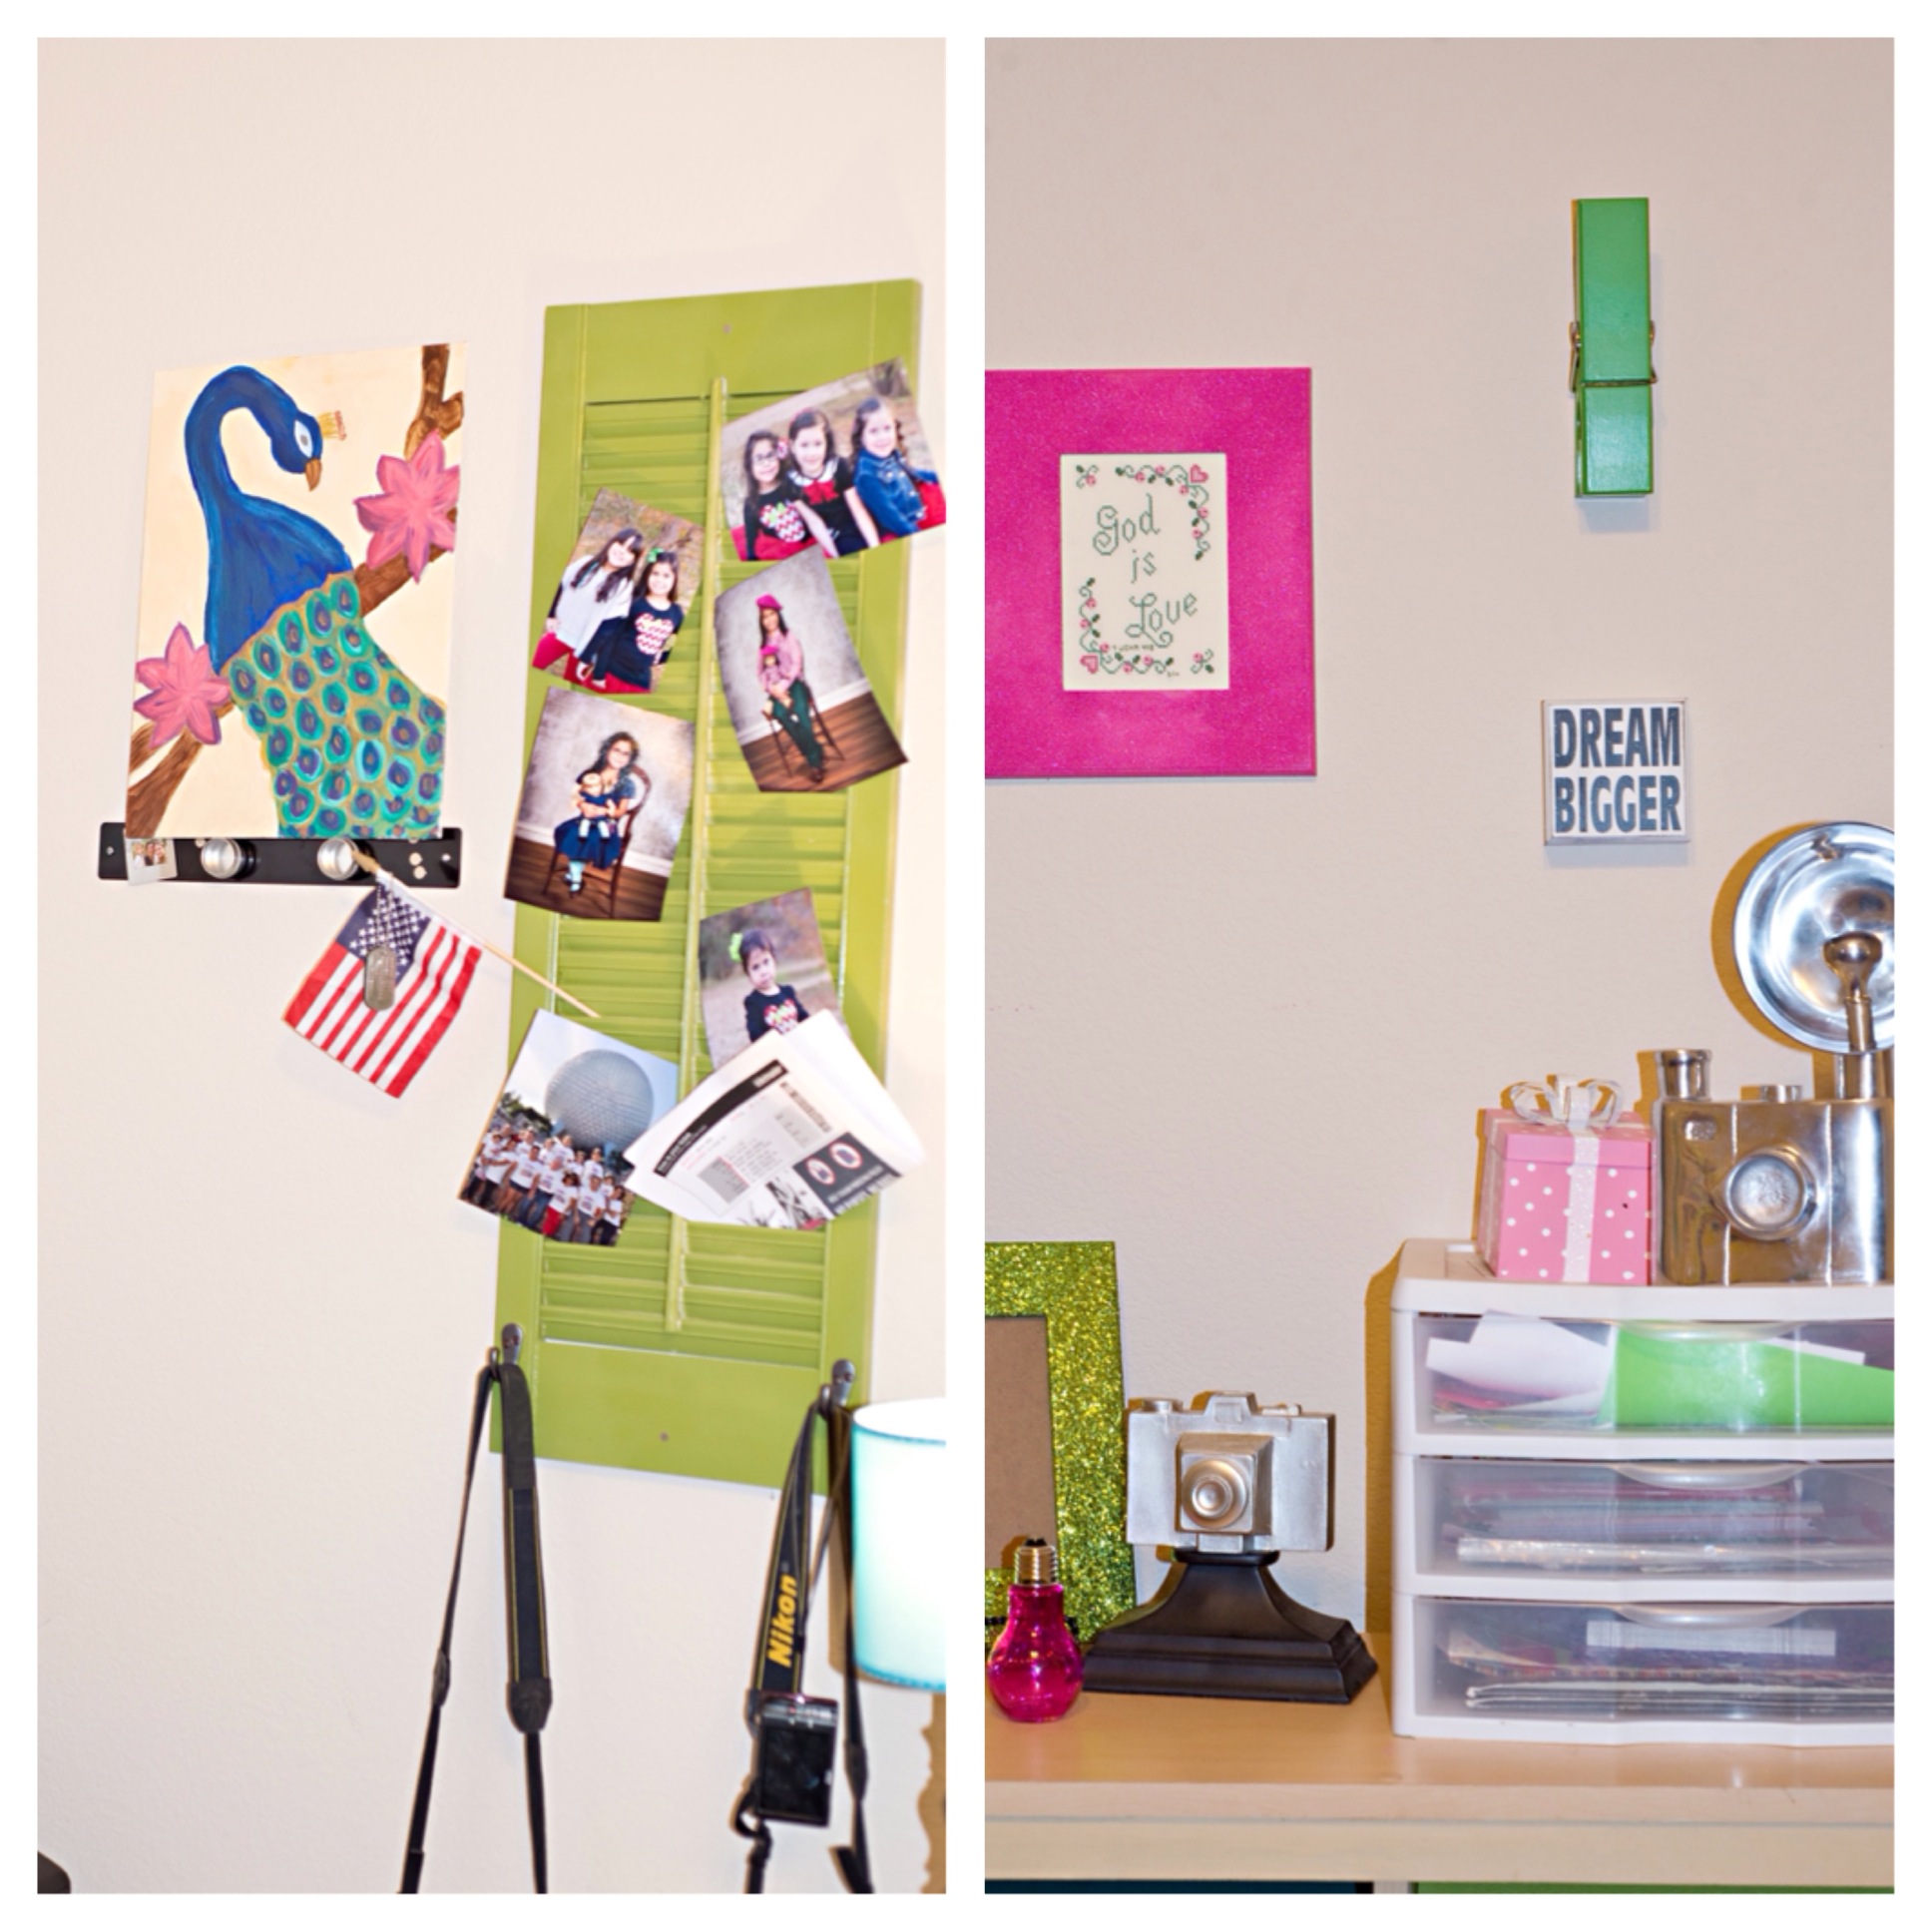
I used this shutter by my garage door in the old house to store the girls backpacks and hang onto the many many party and event invitations that came our way. Now that we have a hall closet for backpacks, I moved it into my office to hang my many many cameras. The shutter was originally purchased for $4 at a thrift store and I added the hooks to the bottom and spray painted it. The hooks were under $4 each. The peacock I painted at a painting party with friends. Artist I am not but it’s a fun little piece anyway.
On top of my scrapbook paper organizer, I have a plastic drawer system to catch still useable paper scraps and I added some fun things to the top. LOVE these cameras and the pink lightbulb! Got the camera on the black stand at Home Goods last year and that huge new metal camera at Ross yesterday for $10! The pink glass lightbulb came from Michael’s as did the giant green clothespin. Can’t wait to pin something on it! The dream bigger block also came from Michael’s for only $3. Last year I helped my mother’s friend with some computer work and she made me this cute little cross stitched “God is Love” sign as a thank you. I switched it to a pink glittery frame and it’s perfect!
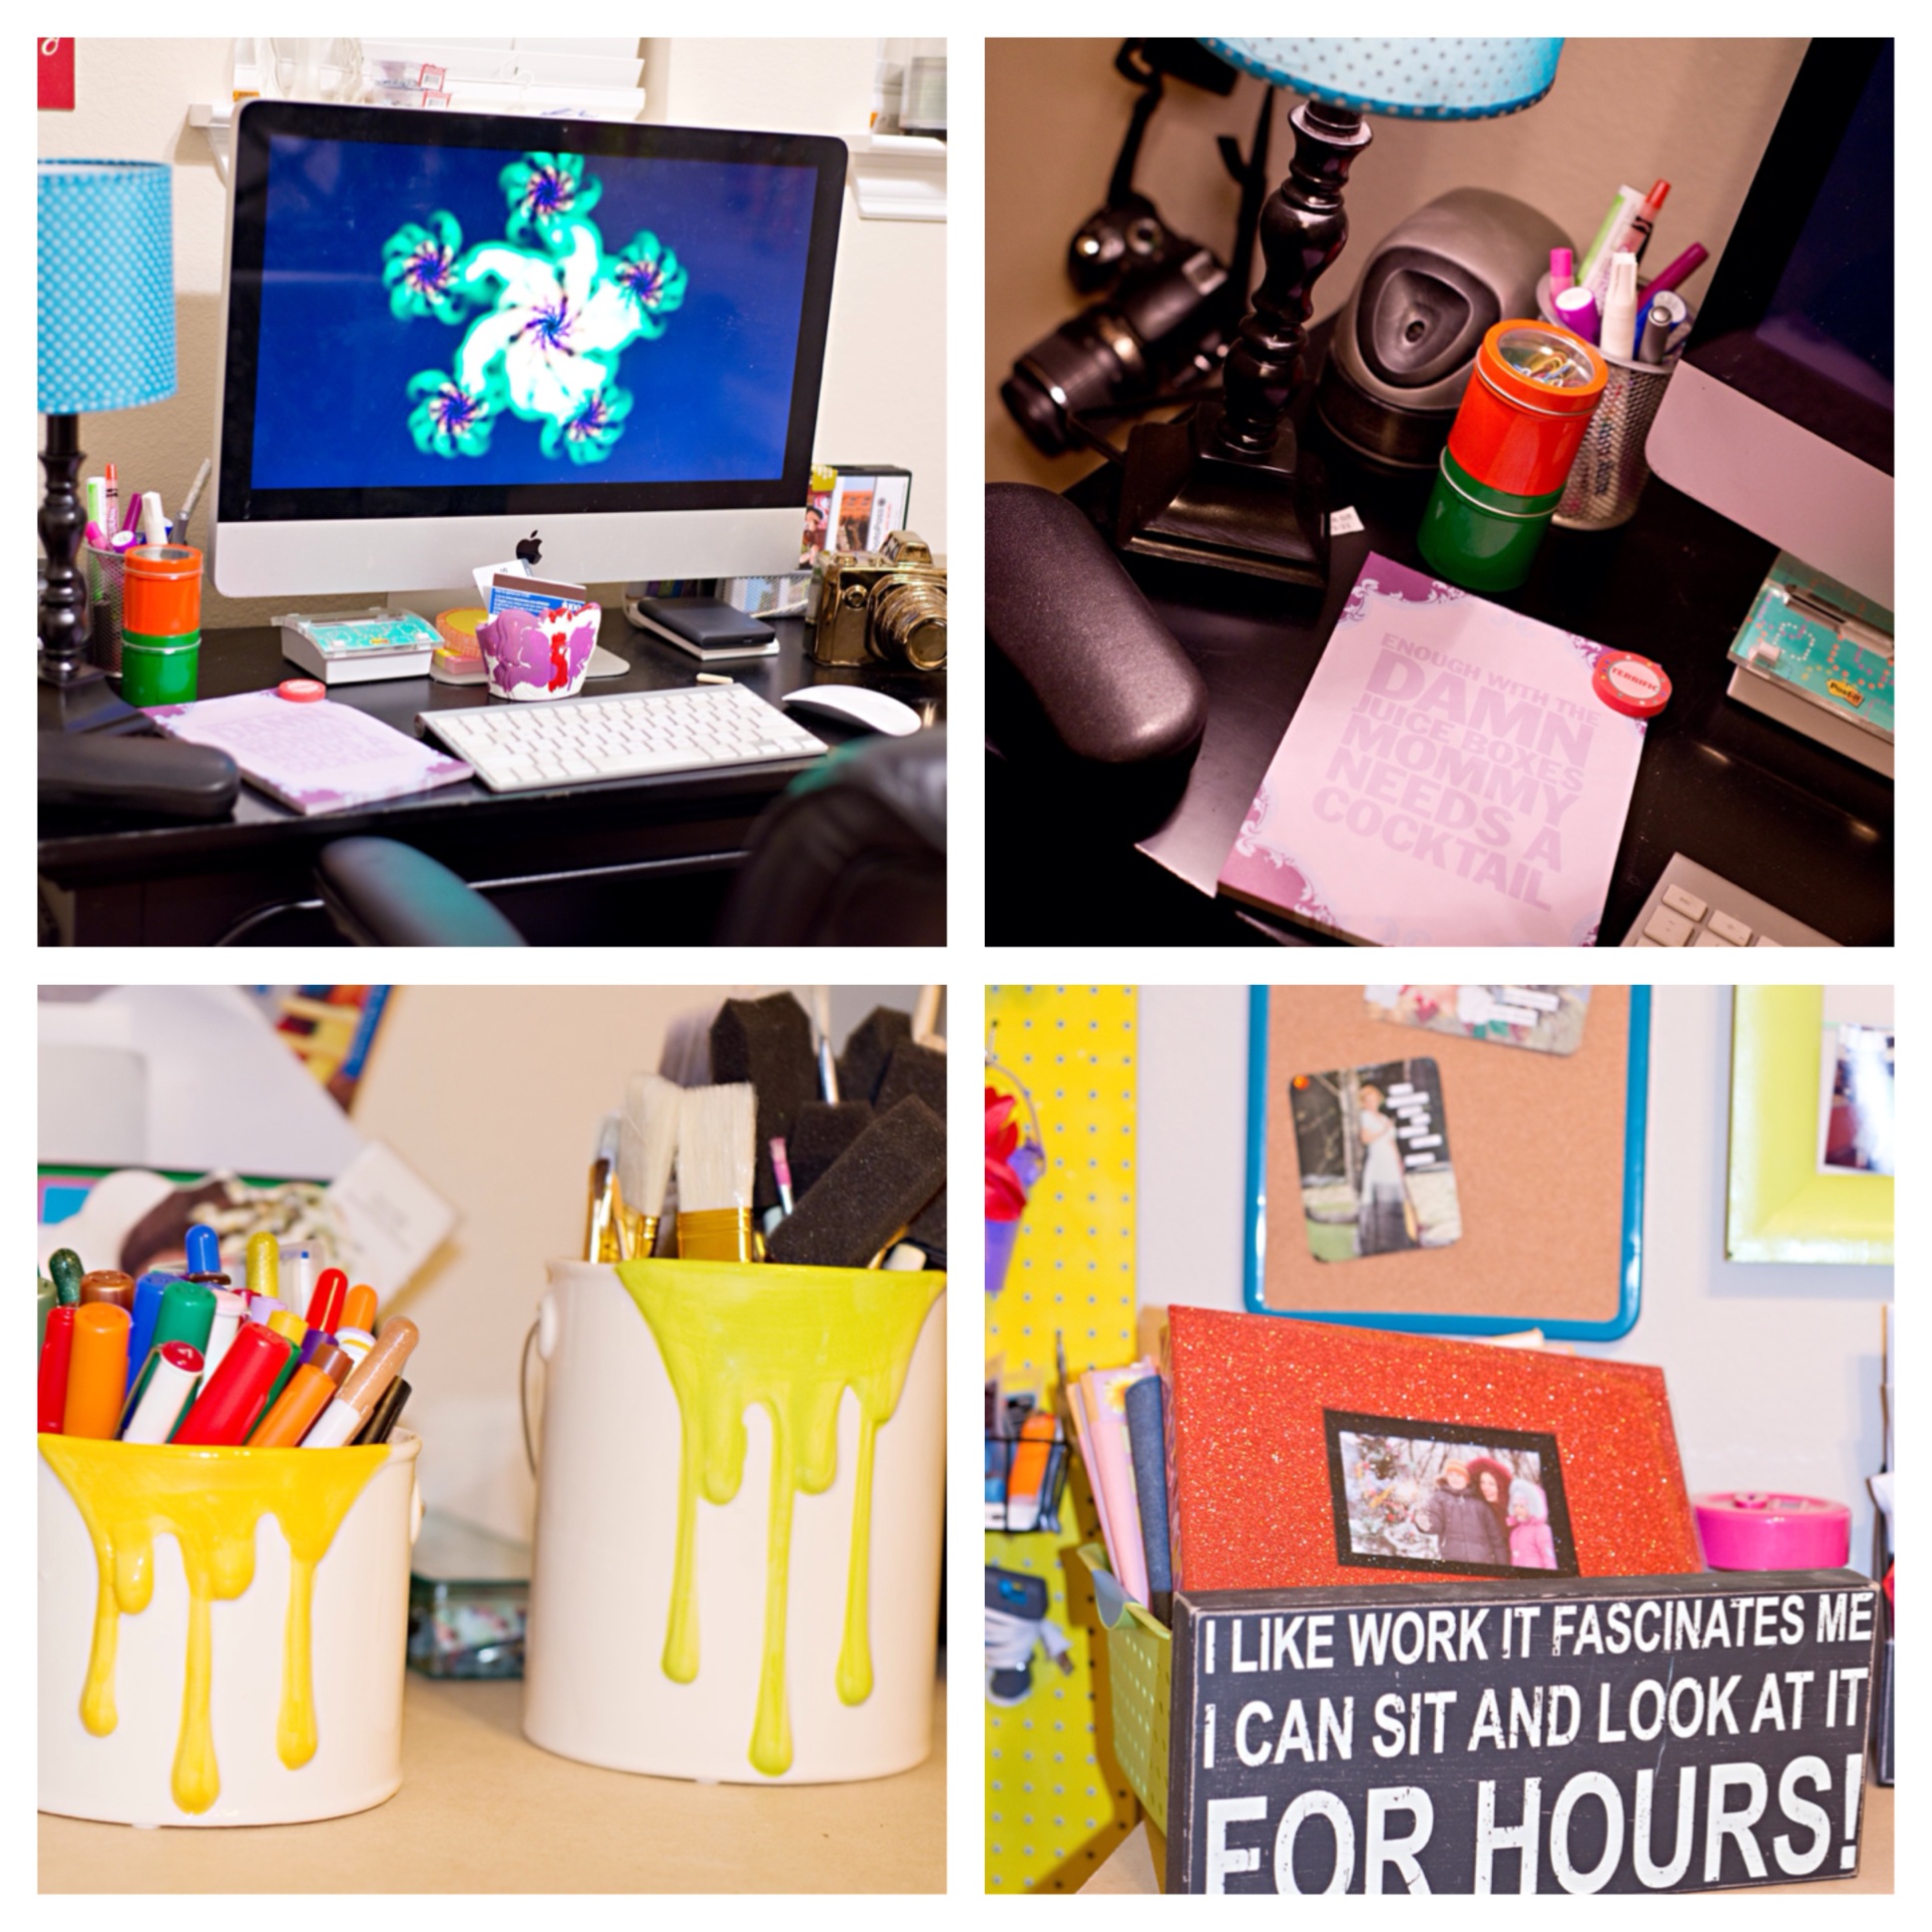
I took my computer desk out of the room to use as an accent table in the front living area and decided I only needed a small area for my computer along the back wall. I found this black unit at goodwill about 2 years ago in perfect condition for only $20. It was a shelving originally but I found that if I removed the middle shelf it worked out perfectly as a small desk! Got the small lamp and lampshade at Garden Ridge. Under $15 for the lamp and the shade when it was all said and done. Found the bronze camera at Ross yesterday for $7 and my sister bought me this cute little notepad at Pier1 years ago. I found the porcelain paint buckets for 50% off at Michael’s yesterday and thought they would be great on my craft table to store brushes and pens. I used a plastic storage basket that I already had to display 12×12 scrapbooks for easy access since they don’t fit in the cubes.
I still need a fun colorful rug, a few finishing touches, and to paint the desktop and scrapbook organizer but this little room has come a loooooooooong way in the last 3 days. Indeed I think I will be spending a lot of time in here! When it was all said and done, I spent around $300 to transform this space. Not to shabby at all! It’s fun and it’s functional and I’m in love! In conclusion, you don’t need a ton of money or anything fancy to create a cool place of your own. You can do a lot with a little when you use some vision to step out of the box and sometimes a little goodwill hunting luck! I may not be changing the world anytime soon but I’ve rocked my own space with a little spray paint, pegboard, and cube shelves!