Moms like me-Lori Latch

I’ve had this idea in my head for quite sometime and I’ve decided it’s finally time to execute it.  I’ve been long troubled about the pressures we place on ourselves as mothers and the comparison game.  It’s easy to look at someone’s posts on social media and their lives from the outside and think they’ve got it all figured out.  In reality, they’re probably just as lost as the rest of us.  So readers, I introduce to you a new monthly segment called “Moms like me”.  In this segment, I’ll provide a glimpse into the lives of moms who are just like me and you.  Stay at home moms, work from home moms, workforce moms all with 7 plates spinning in the air at once.  Although I’ve got a few willing participants on my list, I’ve decided to start with myself to break the ice.  Yeah, I interviewed myself, because I’m cool like that!  😉

blogmep.jpg

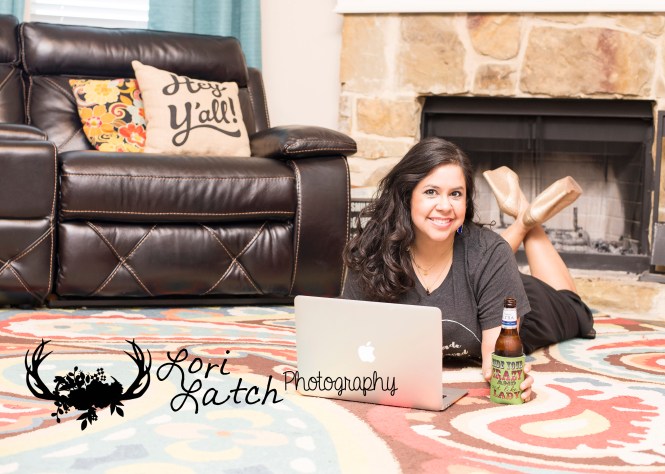
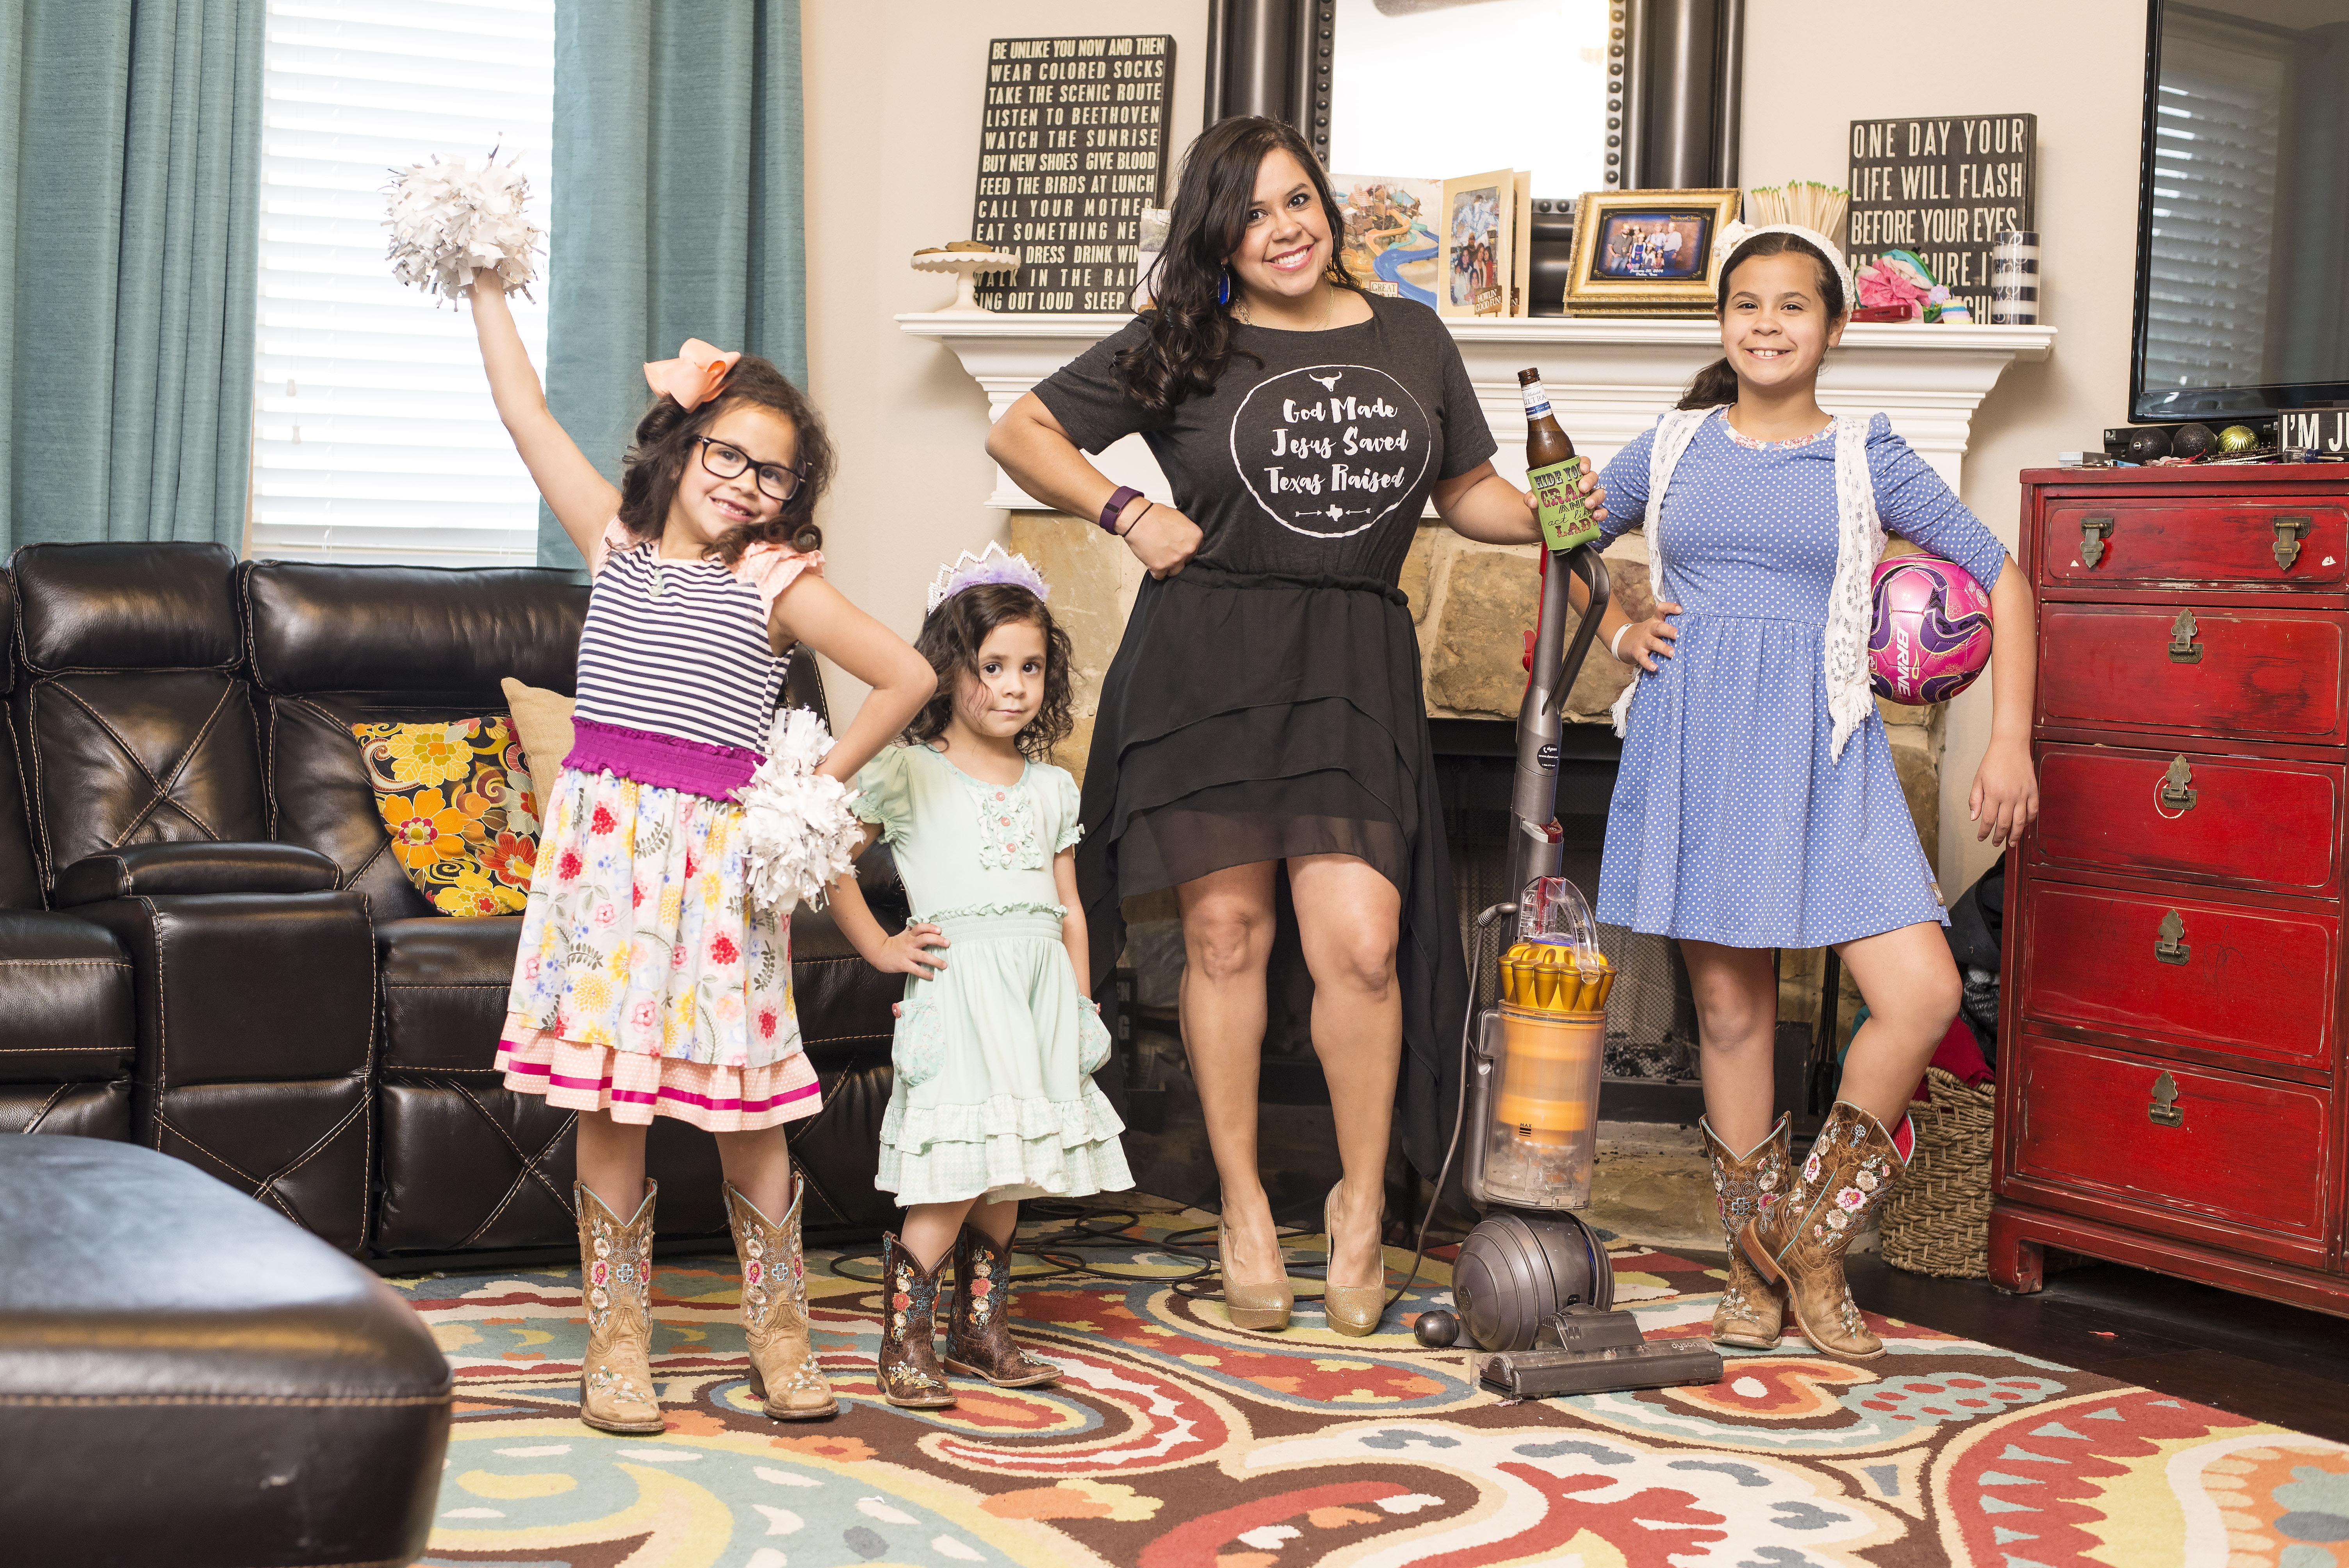
Tell us a little about yourself, like the cliff notes version:  Welp, my name is Lorianne Latch but most folks just call me Lori.  I’m a 32 year old Texas gal with a big heart, a deep love for Jesus, and all things artsy.  I’ve been in the photography business for about 6 years now and am still learning more about it every day.  I’ve got a good lookin’ hubby, 3 gorgeous girls, and a rambunctious yorkie poo named Sadie.

What about your other half?  Been married to Dave for going on 8 years now.  He’s truly become my best friend.  We’re pretty much always goofing off and laughing together.
_POC5046p.jpg
_POC5148p.jpg
Let’s meet the kiddos:  I’ve got 3 of them.  All girls.  Yeah, I know, we’ve totally got our work cut out for us.
P is 11.  She’s big hearted and the easiest kid on the planet.  Always has been.  She’s my big helper and an amazing big sister.  She’s my soccer star and my artist.  I can always count on her.
_POC5155p.jpg
T is 7.  She’s goofy, smart, and loud.  She’s caring and super sweet but will argue with a wall.  She’s my cheerleader and my horse lover.  She hopes to barrel race when she gets older.
_POC5173p.jpg
A is 4.  She goes about a mile a minute from the second she rises in the morning till she lays her head to sleep each night.  Strong willed doesn’t even begin to describe her.  She makes every day an adventure.
_POC5208p.jpg
Early bird or night owl?  Night owl. Definietly night owl.
What do you do after your kids go to bed?  Stare at the wall in silence.  For real though.  The day is so busy and noisy that I need like 10 minutes to process it all when it’s finally quiet.  If I’ve got sessions to edit, I usually do it when they’re sleeping and I can concentrate.  Sometimes I color (yes, adults totally do that), read, or lounge in the recliner and peruse pinterest.  When Dave is home, we watch movies and shows together. 
Tell us what a typical weekday looks like for you: 
I typically wake up about 6:30 and get the big girls ready for school. 
I drop them off by 7:30 and try to get some time in the Word in before full on chaos ensues.  
Tue/Thurs about 8:15 I wake the little one up, feed her, make her lunch, and get her ready for MDO.  
After I drop her off at 9, I run errands if there are errands to be run.  Grocery store, bank, dry cleaners, etc.  
I then frolic home to do my chores like a good little housewife.  
If Dave is home, sometimes we use the time to have a lunch date or something since we don’t get out without kids at night much. 
I work on some continuing education classes I’ve got online for a couple of hours and then it’s time to start picking kids up.  
After school snack, homework, and then it’s off to Cheer practice and soccer.  
Home to quickly whip up dinner and feed everyone.  
Then it’s bath, book, and bedtime for the kiddos!
gameblog.jpg
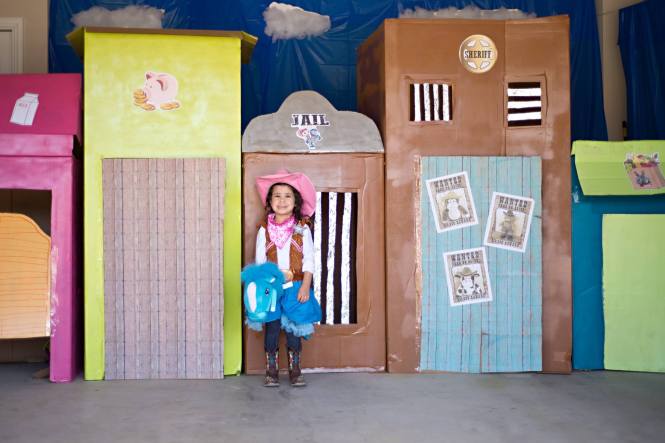
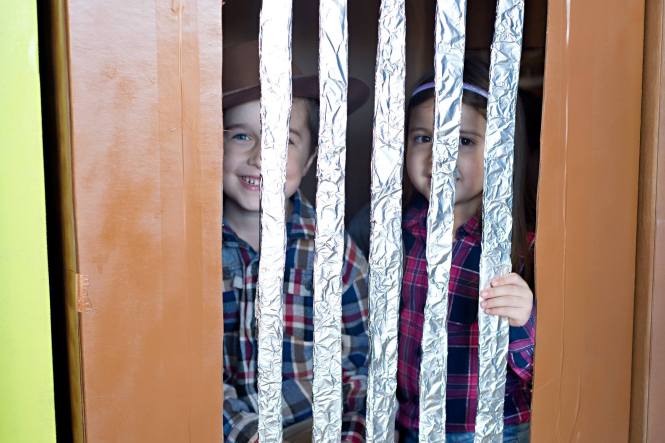
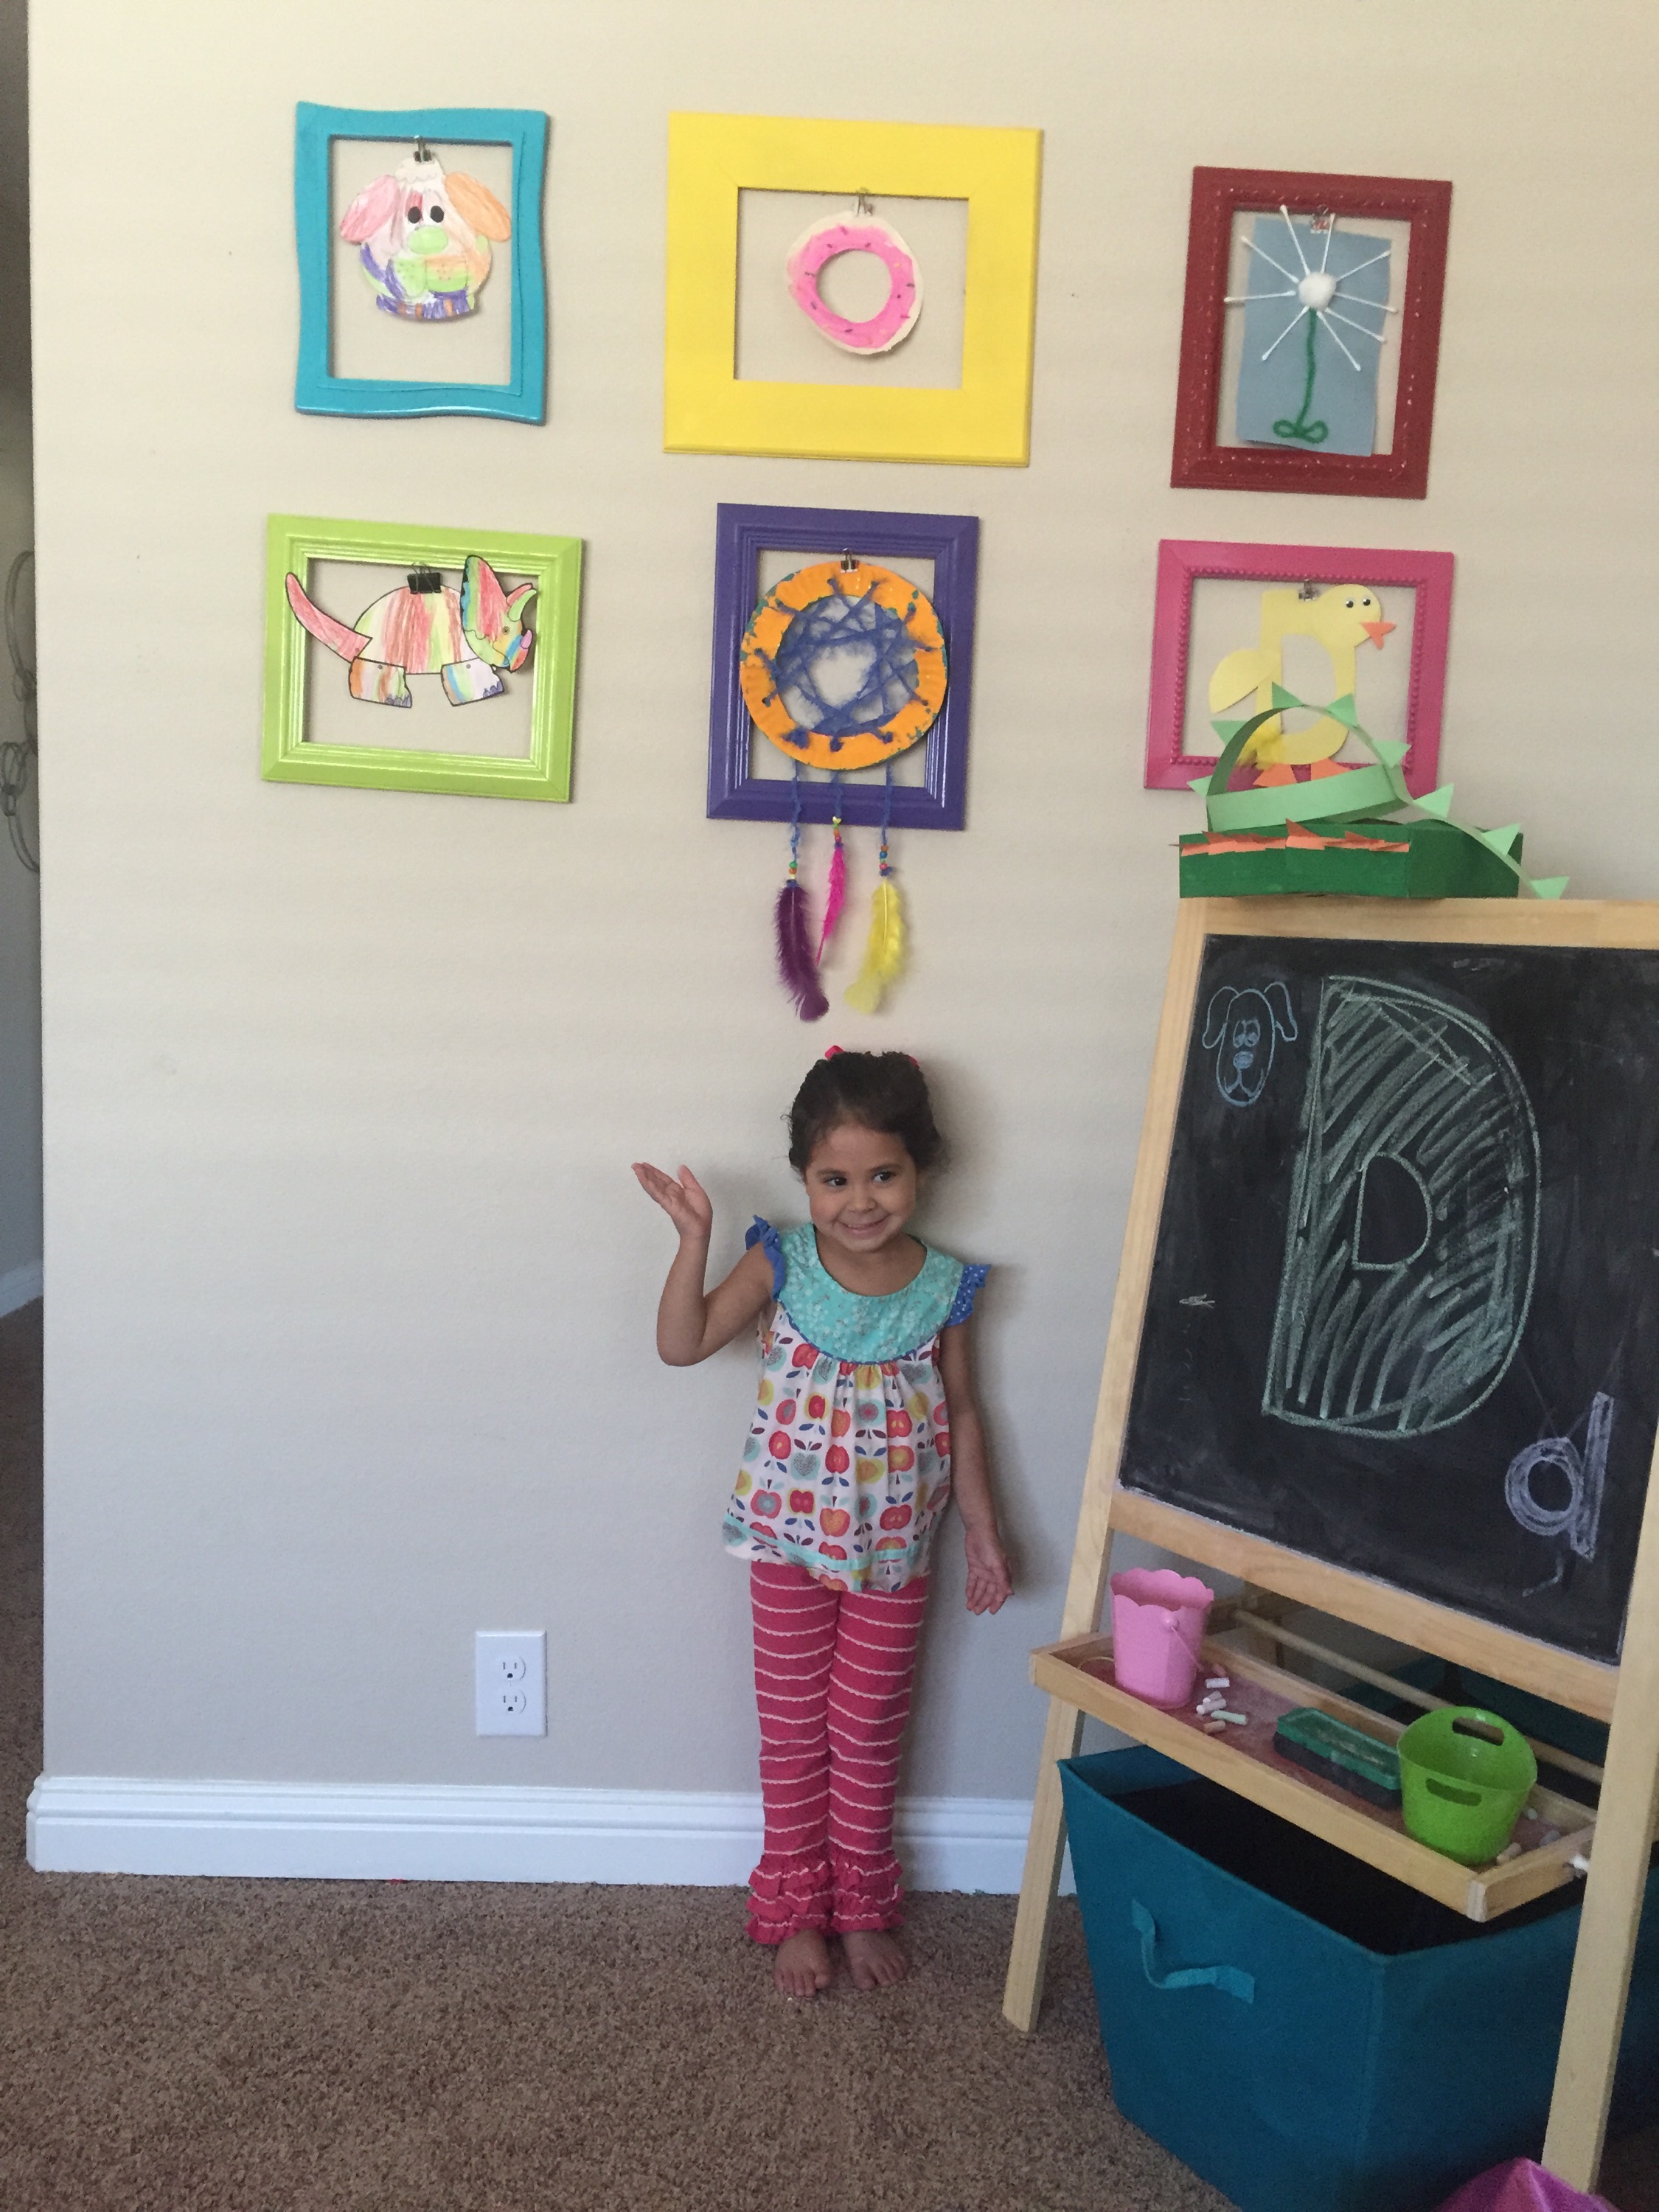
(I tried to include some real life stuff here, which is tough when you’re the photographer!  Thanks to my handy tripod and timed release shutter, I was able to get some pretty telling photos of the girls and I playing a game.  Playing board games is one of our favorite things to do together.  Even though I have like 8 chins and P looks like she was picking her nose(she was scratching the side of it actually), I posted them anyway.  Why?  Because the way A is being her sassy bossy self needs to be shared and the way T gets in your face to rub it in when she’s winning is legit)
Let’s talk about your business, how’d you get started and what’s the best thing about your job:  I took an interest in photography in my high school photo journalism class and I’ve loved it ever since.  I purchased my first dslr in 2009 as a way to mainly take photos of my kiddos.  I started taking pictures for friends and family but really didn’t know what I was doing.  I cringe when I look at some of those old photos.  By 2010, I decided to make a business of it and launched Piece of Cake Photography.  I was also making cakes at the time so the name went along with my cake business.  I took a little hiatus after we moved 2 years ago but recently rebranded and relaunched as Lori Latch Photography and I’m super excited about all the new possibilities.  (Like me on Facebook and follow me on Instagram).  The absolute hands down best part about my “job” is meeting awesome new people and getting to see the world through the eyes of a child occasionally.  I’ve gotten to share in some amazing moments from birthdays to weddings and have enjoyed watching some of my clients grow over the years.
What are your biggest challenges balancing your business and your family? Sometimes I’m so swamped with editing or a design project that I need to do it during my children’s waking hours.  It becomes difficult when you’re interrupted repeatedly to get a snack, a drink, diffuse an argument, or doctor a boo boo.  Some days are so busy I don’t have a single waking second to myself and I work into the wee hours of morning making sure my projects are client ready.  
Do you ever feel like society underplays your job as a mom?  All.the.time!  Sometimes I feel like people think I stay home with my children because I didn’t have any other skills or because I wasn’t smart enough for a “real career”.  That’s totally not the case.  I stayed home because I felt like it’s what was best for my family and my children.  If you think I don’t miss the adult interaction of my 8-5 you’re gravely mistaken.  It’s a choice.  A choice that I question daily.
What do you think about the pressures we put on ourselves and other mothers?  I think it’s dreadful.  Mom guilt, it’s real y’all!  We’ve got the weight of the world on our shoulders and we are all so critical of ourselves and other mother’s too for that matter!  If I feed my children anything less than farm raised organic meat and organic locally grown produce with fresh spring water I feel like a failure.  We have this idea of what the perfect June Cleaver mother should look like with a perfectly clean home, fantastically delicious nutritious meals, and perfect hair and pearls and when we undoubtably fall short, we beat ourselves up.  When other mothers don’t parent quite the same way we do, we judge.  
What bit of encouragement would you offer other moms?  You do you.  Worry about what works best for your family and your busy lifestyle.  Worrying about keeping up with your neighbor, your best friend, or that awesome mommy blogger you found on pinterest will only bring more stress to your life.  Seriously, some days I make elaborate meals and play all day with my kids.  Some days we do amazing art projects and things are all unicorns and rainbows and we post those things on social media for all to see.  Other days, we run late , forget things, eat chef boyardee, and have meltdowns you don’t always see.  Some days I have the patience of Job while others I yell at my kids and then feel so guilty I crawl in the fetal position and cry.  The point is, if elaborate valentines, meals, and parties are your cup of tea, you do you.  If they’re not, there is absolutely no shame in your game!  I’ve got to make a more conscious effort to stop holding myself (and others) to some unrealistic standard.  We’re all in this together!


*Are you a DFW area Mama who might like to be featured in a future Moms like me post?  It’s easy and fun!  I’ll email you a few questions similar to those above and then on a day that’s convenient for you, come snap some photos of you and your family both in a portrait like setting and your natural element.  There’s absolutely no session charge and I’ll link your business page for your customers and mine!  Let’s support each other’s businesses ladies and encourage other mamas too!  I’m looking for work from home mamas, business owner mamas, working moms, and stay at home moms married or single.  It takes a village!*


Advertisement

Sheriff Callie Party

I know I’m a little behind on sharing A’s December birthday party but I figured while I’m on a roll, I may as well back track!  She requested a Sheriff Callie party and I’m typically pretty opposed to character parties but I thought I could probably run with a cowgirl theme so I agreed.  Of course our first step was to snap some photos for her invitations.  I stumbled upon the cutest little flea market outside of town that looked like a mini old west town from the outside so we loaded up and took advantage of the scenery.

12182466_1213939121965902_9062488487293502400_o12183975_1213938948632586_6029924938854189326_o12185582_1213938665299281_3220505073454221304_o

I designed a quick and colorful invitation in photoshop and sent it off to my print company.  The above photo was the back and the front was this:

ainviteblog

We used our trusty ole tablecloth trick to transform our garage into the ole west.  We picked a blue color to look like sky and my mother had the idea to use cotton to make clouds.  The result was pretty adorable!  I knew early on that I wanted to make an old west town out of appliance boxes for the party so I called me local Lowe’s and asked them to save me a few refrigerator and washer/dryer boxes.  They called within days saying they had a few and we went to work cutting and painting them.  We made a bank, Ella’s saloon, Uncle Bun’s store, and of course the Sheriff’s station and jail.  I had my husband cut a walkway between a refrigerator box and a dryer box so that we could connect them.  That way when the Sheriff had to throw someone in jail, they had to go through the station door.  We used a box cutter to make the bars and tin foil to give them a metallic look.

12304129_1229405167085964_2251264644273695482_o

12314507_1229404990419315_5373660943051839464_o

We took pictures of her stuffed animals and added them to wanted posters in photoshop then printed them in sepia tone and taped them inside the sheriff’s station and the outside door.  I used scrapbook paper that looked like old distressed wood from Hobby Lobby for the bank and sheriff’s station doors.  We bought fake money at dollar tree for the kids to play with in the bank, plastic cups and pitcher (also from dollar tree) for the saloon, and brought out some play kitchen foods and shopping bags for the general store.  It’s amazing how much fun kids can have in cardboard boxes!

12309876_1229405043752643_1548588514958694158_o

As our guests arrived, we got them all fitted in bandanas, cowboy hats, and deputy badges. We got the foam hats in black and brown at dollar tree and the bandanas at Hobby Lobby.  Because they were so large and the majority of our guests were under 5, we cut each bandana into 4th’s.  This was cost efficient and they fit much better on little ones.  The deputy badges came from Hobby Lobby as well.  We also gave each guest a little drawstring canvas bag from oriental trading to keep their gold nuggets in from the panning for gold station.

12322535_1229405003752647_5064823667188731418_o copy

Because our party was in the afternoon, we served sweet snacks rather than an actual meal.  We choose flavored popcorns from a local gourmet popcorn shop and put them in little cow print favor bags from Hobby Lobby.  We also made s’more pops by putting large marshmallows on a skewer, dipping them in melting chocolates, and then covering in sprinkles.  These were a huge hit as were the chocolate coins. I raided our American Girl collection and thought this Our Generation horse stable was the perfect addition to our table.  We used it to hang onto our snacks.  12322645_1229405073752640_166357767555459773_o

I found those awesome fabric garlands on clearance at Michael’s for around $3 each and knew I couldn’t pass them up.  We found the tissue fans at Dollar Tree for an extra pop of color.

12322468_1229404623752685_6256342437617259332_o.jpg

Kids colored Sheriff Callie sheets and “roasted” their marshmallows over the “fire”.  I found that adorable inflatable campfire at oriental trading and it was a big hit!  I printed the coloring sheets directly from the disney jr. website.

12310672_187047958307117_7697245316801534665_n

My niece, nephew, and girls tried out the panning for gold station before the party started.  For quality assurance purposes of course.  To make this, we purchased a small bag of decorative rocks from Dollar Tree and spray painted them gold.  We then took a large long plastic bin and filled it with sand purchased from Home Depot and sprinkled the “golden nuggets” all around burying them in the sand.  We added water to the top and added some shovels and other sand toys we already had.  We used foil pie tins which we hammered holes into the bottom so the kids could scoop and sift.  Whatever nuggets they found, they got to take home in their little pouches.  There was a steady flow of children here the whole party.  HUGE hit even with the older kids!

12322975_1229404827085998_6484540091270112386_o12345428_1229409463752201_3992132753195760829_n

Another huge hit was the Photo Booth area.  To make this, I just took an image of a wanted poster I found online (I’ll link it if I can find it again) and enlarged it in photoshop. I then printed it off in quarter sections.  We cut it out, burned the edges with a lighter to give it an aged look and then glued it to a piece of cardboard that was left over from our cardboard box town renovations.  We used a box cutter to cut out the center and thumb tacks to secure the edges and look like fancy nails.  We used a long thick piece of leftover cardboard to create a stand and then placed it in a small bucket filled with sand and rocks to steady it.    The kids had fun with this but honestly, I think the adults had more fun with it!  haha

12304413_1229404437086037_7090691863260207442_o12309593_1229404647086016_1699248556588323366_o12304452_1229404307086050_150008644779209787_o12347620_1229409477085533_5632465708333491233_n

Unfortunately, in my haste, I forgot to photograph the other 2 activity stations we had but they were inexpensive and simple and kept the kids busy the whole party long.  We took a stick horse from our playroom and stuck it in the yard by digging a small hole for the stick.  We set out hula hoops we already had and let kids try their hand at “lassoing” the horse.  It was sort of like a ring toss on a bigger scale.  We also had buckets which I had decorated with pictures of boots I had printed and colored.  We purchased plush snakes from the dollar tree and kids had to try and toss the snake in the boot.  We called it the “there’s a snake in my boot” game.  Because we’re witty like that!  😉

12314597_1229404207086060_6540267032338320195_o.jpg

The Sheriff and all her little pals had a great time and those darn boxes stayed in our garage for a month because we couldn’t bring ourselves to toss them!  lol

Birthday Carnival Fun

Gosh, I’ve been pretty bad about updating here lately.  What can I say?  I’ve been a busy beaver for sure!  The holiday’s had me swamped and then it was birthday parties and traveling and out of town guests galore!  Last weekend, we hosted T’s 7th birthday party here at home.  Even though I never managed to get A’s Sheriff Callie party blogged (I better do that today too!), I thought I would go ahead and get the details for the Carnival party blogged while they were still fresh on my mind.

We decided about 3 months ago that we would be going with a Carnival theme and took to pinterest immediately to begin planning.  A few weeks before the party, I took her out in some colorful clown garb to snap a few photos for her invitations.  They’re pretty goofy but they’re probably my favorite pictures ever of her because they really let her silly personality shine!  Here are a few of my favorites!

pLLP_0422LLP_0383pLLP_0352p

I normally have really cute double sided photo invitations printed from my print company but, unfortunately, I procrastinated a bit and ran out of time.  Instead, I had them printed 2 to a page at my local office depot.  They had them printed and cut down to size for me within an hour and they were on their way to the post office that afternoon!

tinviteblog

Meanwhile, we begin gathering supplies and prizes for the games and sketching ideas for setup in chalk in the garage and driveway.  Haha  We decided that since A. I would be returning from camp with my oldest the night before the party and B. The party was in the afternoon that we would not serve a full lunch menu but instead opted for snacks and sweets.  While I was at camp, I enlisted my hubby and mama to transform our garage into a big top canopy by using plastic tablecloths.  We’ve used this method for many parties and it always works so well.  Gives us an ample party space while still being whimsical and colorful.  You almost forget you’re in a garage.  Thankfully, weather for both my girl’s winter birthdays has been absolutely perfect!

LLP_1348LLP_1323LLP_1307LLP_1321

I wish I had taken a better picture of the garage because it looked super cute but you get the gist here.  We served popcorn, cotton candy, cake, and ice cream.  I got the cute little carnival napkins at Hobby Lobby, as well as the little cotton candy stand, and the marque looking signs.   Most of the other table decor came from the dollar spot at Target!  We found the colorful popcorn containers there as well as the felt birthday banner and letters, and the cute little red cake stand.  Because I didn’t have a lot of extra time or energy for cake decorating, I picked a super simple design and I’m pretty pleased with the way it turned out.  I rolled the bottom tier in sprinkles and for the top tier, I designed cute little ticket strips with her name and birthday in photoshop and then took it down to my local Wal Mart bakery for them to print on an edible image.  It was quick and easy and the image only cost about $7!  I got the little pennant banner, cupcake flags, and glitter 7 at hobby lobby too.  I bought bags of cotton candy from our local Golden Corral for $1.25 each and just divided them into small portions and put them on lollipop sticks.  They made for a cute display and kids weren’t consuming giant portions of sugar so it was a double win!

We had 5 game stations so each kid was given 5 tickets when they arrived (I got these at dollar tree!) so they each got to try each game once.  Because we had extra time and more prizes once each kid had a turn, we allowed them another set of tickets if they wanted to continue playing which most did. We also hired an amazing local face painter.  She was a huge hit with the kiddos!  Our carnival games were simple and inexpensive as were our prizes.  Most were purchased at the dollar tree with the exception of the pet fish soap which I made myself.

LLP_1308.jpg

The balloon pop station was the biggest hit I think.  To assemble it, we used squares of cork board purchased at hobby lobby attached to a piece of plywood we had laying around.  We used thumb tacks to attach the balloons and darts with plastic tips for the kids to throw.  If they popped a balloon the selected a prize (bubbles or play dough) and if they missed they got a piece of candy.  They each got 3 tries per ticket.  We got the dart balloons on amazon and the darts 3 to a pk for $1.97 at Wal Mart.  We blew all the balloons up prior to the party and placed them in trash bags.  We just did a little at a time and within a couple of weeks had them all blown up!  🙂

LLP_1334.jpg

For the fish bowl game we used small clear plastic cups from walmart filled with water.  We dropped a plastic fish toy in several of the cups and kids had to toss ping pong balls into the cups.  They got 3 tries per ticket and if they got it in a cup with a fish, they got to take home a pet fishy bath soap.  I made these easily by purchasing a large block of clear glycerine soap from Michael’s with a 50% off coupon.  It totaled about $10 and I still have a ton left for a future craft!  I purchased the vinyl goldfish on Amazon.  They were so simple to make and the kids had a blast helping me.  We cut the soap into smaller pieces and placed them in a microwave safe bowl.  We melted them in the microwave and then poured the liquid into small plastic treat bags sitting in mugs.  We then moved the bags to a bowl of ice water where we used a skewer to push fish toys down into the soap as it hardened.  If you choose to add scent to your soap, mix it in with the bowl.

fish

LLP_1328

For the ring toss, we had the painstaking job of drinking beer to empty those bottles!  I gave my husband that job weeks in advance thinking they would be done waaaaay ahead of time but the week before party time, we only had 2 bottles sitting on the counter!  Luckily, we attended a Super Bowl party the weekend before and managed to collect enough!  lol  I spray painted the bottles and caps and found those super cute carnival soda labels at Hobby Lobby.  The kids each got 3 rings (which were harder to find than I imagined).

LLP_1346

For the lucky ducky game we purchased 50 rubber duckies and this inflatable pool from Amazon and glued washers to the bottom of each duck.  We painted about 12 with nail polish first.  The kids got 3 tries to pick a duck with a colored washer on the bottom to win a prize.  They got a piece of candy if they didn’t pick a winning ducky.

Last but not least we had a bean bag toss.  I didn’t get any pictures of this but it was pretty simple.  We used a lawn game set we already had from Academy and set it out side by side that way 2 kids could play at once.  Each got 3 bean bags.

LLP_1373.jpg

After a stop at the face painting booth, our guest were ready to have their picture taken in the ring of fire.  I had my oldest and a friend make this using a hula hoop we found at the dollar tree and red, yellow, and orange tissue paper.  Made for a cute photo prop!

LLP_1368LLP_1342LLP_1326LLP_1313LLP_1387


Overall, I think a great time was had by all.  Even this ole top hat wearing Ring Master!  Thanks to everyone who came to make our girl’s day extra special!

LLP_1378.jpg

Christmas Categories-a new take on gifting

Each year, I go crazy at Christmas time. It’s my absolute favorite time of year. We have a tree in every room of the house, mounds of wrapping paper, and Christmas music can be heard starting in early November. I love buying gifts for my kids and each year they have over a dozen wrapped items under the tree from us, countless gifts from friends and family, and a large item Santa brings. I’m seriously finding items from last year in my kids bins that have still never even been opened! So this year, I decided I wanted to take a different approach to gifting. I had seen online about some moms doing a 4 gift per kid principle by using the “something you want, something you need, something you can wear, something you can read” concept. I liked this but decided to adapt it a little because A. I can’t commit to buying my kids a “need” for Christmas. If they “need” something, we just buy it when it’s needed. B. 4 didn’t seem like a right number to me but 6 did. Don’t know why. lol So after brainstorming a little with Dave, I came up with these categories for our kids this year:

1. Something to play together
This could be a wii game, a board game, a play set they would all enjoy, etc. For this category, I picked a board game for each of them.

2. Something to create
This is a craft, art item, or activity. My kids love creating things and doing busy work with their hands like their mama. This could be a craft set, art supplies, or activity of some sort. I got P a paint by numbers print of Van Gogh’s Starry night for her room, T got a set of Bunchems, and A is getting a set of bendaroos

3. Something to read
Pretty self explanatory. They each got a boxed set of books they enjoy.

4. Something to wear
I went with cute Pj’s and slippers for this category for when we are roaming the halls of Great Wolf after Christmas. But it could obviously be anything like a cool scarf, a new pair of shoes, a shirt.

5. Something they wish for
Just a small wish list item. P wanted me to re decorate her room for Christmas so she’s getting a new quilt for her bed and some art work for her wall. The other two wanted a puppy surprise.

6. Something made by Mama
This was one of my favorite categories. I wanted them each to have a gift made especially for them by me (with some assistance by Dad in some cases). For T I made a Shopkins display frame with glittery shelves. I’ve of course stocked the shelves with several new shopkins baskets too! You can see how I did it here. For A, I’m painting a picture of the moon over the eiffel tower. She always tells me she loves me all the way to the moon, all the way to Paris, and all the way back home. So I plan on writing that on there too. I’ll certainly post a photo when it’s done. For P I have a HUGE plan to make her a custom dry erase headboard that looks like a giant piece of notebook paper. Then she can doodle on it to her heart’s content. I’ll post a photo and directions of that soon too. I have to find a secret workplace to complete it! lol

This is our first year doing something like this and I really liked having a little check list to go along and it kept me from going insanely overboard. I found some cute little felt shaped tags at Target and assigned a category to each shape. When it’s time to open gifts, we will hand out all the gifts with the same shape out together that way they are all opening their pjs together or their books together. Should be fun!
FullSizeRender-3

We asked Grandparents to gift experiences rather than toys as our children are fortunate to already have so much. We suggested a trip to Greatwolf Lodge, gymnastics classes, horseback riding lessons, ballet classes, museum memberships, etc. Making memories is really better than any toy at the store!

Do any of you do something similar for your kids? If so, what are your categories?

A very shopkins Christmas

It’s happened.  I tried to fight it for a long time but I’ve finally succumbed to it.  The shopkins craze has hit our house.  For about a year now, T has asked me for shopkins every time we leave the house.  If you don’t know what shopkins are, they are tiny gumball machine prize sized collectibles which unfortunately do not have the gumball machine price tag.  They most often come in “blind baskets” so you have no idea what you’re getting.  It’s a surprise!  All my nieces in the 6-8 year age range love them and thus my 6 (almost 7) year old has jumped on the bandwagon.   This year when making Christmas wish lists, that’s all T said she wanted.  Seriously.  Anywho, if we’re going to do this shopkins thing, we’re going to do it right.  She’s my little collector so I knew I wanted to find a way to display her shopkins so that she could easily reach them to play with but see what she has at all times.  This year, we’re doing Christmas a little differently and we have gift categories to be checked off.  1 category is “made by mom”.  So for T’s gift, I decided I wanted to make a shopkins display.  I purused Pinterest for ideas but couldn’t decide then yesterday, while strolling Michael’s, I hatched a design plan!  Thought I would share it here in case you’ve got a shopkins crazed collector too!

What you’ll need:

-An acrylic box frame (any size you choose) I went big with a 16×20 

-foam core or sturdy cardboard

-box cutter

-wrapping paper

-hot glue gun

  
You can use your frame as a template and a straight edge to cut your shelves out of foam or cardboard.  I wanted 8 shelves on my display and each shelf needs to be doubled up.  So total, I cut 16 strips.  Leave them a little longer than necessary (about half an inch.  You can trim with scissors later.  

  
After cutting them, I grabbed a glue stick and began sticking them together in pairs.

  
Next, I cut 8 strips of wrapping paper to wrap around each shelf.  I had this fabulous glitter paper that worked perfectly because it won’t scratch easily, it was thicker than my others, and it seamlessly matched up when I wrapped it around without being noticeable.  You’ll want to use something similar or solid color for best match up.  You could even use printed contact paper!  I used my glue stick to secure it to each “shelf”.

  
Next, you’ll need to find a box or a book that will match your desired thickness.  I wanted her to be able to store those little baskets and bags on it too so I found a box that was the perfect width in the closet and used that as a guide.  I then used hot glue all along the back and sides of the “shelf” to secure it to the frame.  

  
Moving the box up with each shelf kept them perfectly spaced and I used a small level to double check my work.

  
I plan to cover the outside trim in ribbon that way I can hang it on her wall as well but I haven’t picked that out yet.  Next, stick your shelves with shopkins and you’re ready to go! 

 This week, Michael’s has a 50% off coupon so I used that for the frame which brought it down to about $7.50!  They also are now carrying shopkins in the store so we used to coupon again to score a 12pk set half off!  
Hope this is helpful Mamas!  I know I’m going to have a pretty happy girl come Christmas morning.  😃

Ipsy glam bag subscription

I had been dying to try one of those monthly beauty subscription sites for a long while and one day a friend on Facebook posted about how much they loved ipsy so I decided to give it a try.  Signing up was super fun and easy.  The website asks lots of questions about your beauty preferences and then you go on a wait list to be approved.  You can expedite the process by posting to social media.  For $10 a month, ipsy sends me 5 products to try in a super cute re-useable cosmetic bag.  Sometimes the products are full size but most often they are sample sizes.  I love it because I get to try products and brands that I wouldn’t otherwise even know about!  Plus, the bags are super cute and so handy for lots of things.  I’m currently using one to store holiday receipts in case anything needs to be returned, one for holiday cash envelopes, and one for my on the go makeup needs.  Additionally, each month ipsy has stellar giveaways you can enter just by posting to social media.  You can also earn points for products by doing surveys on products you’ve tested or referring a friend!

  
In july’s bag, I fell in love with this lip color by teeez.  I get compliments every time I wear it and the shimmery eye shadow is dreamy.  The cool way spray was awesome when I didn’t feel like fixing my hair.  Just spritz and scrunch and bam!  Instant beach waves!

  
August’s bag held yet another fantastic lip product with the hikari gloss, a fantastic eye liner, and a great polish in a shade I wouldn’t normally have tried but loved on!  The argan oil is heavenly in a house full of frizzy curly hair!  

  
September held another brand of hair oil that is equally amazing and I didn’t mind having two because between me and 3 daughters it gets plenty of use and a little goes a long way!  The nyx eyeshadow pallet is by far my new favorite product!  I’ll be picking some up when this is gone for sure.  So pretty and shimmery but without being too made up.  I scored big with another awesome lip color too!  I got to try brow gel for the first time ever and I’m a believer!

  
In October I got this super dual sided metallic bag of goodies.  The cream feels fab on my dry hands and the concealer brush is great!  I like the cleanser but have only used it a couple of times so far.  The polish is an awesome color but unfortunately isn’t as long lasting as I would have hoped.

  
The mailman just dropped off november’s bag  so I haven’t had a chance to try anything out yet but I’m super excited about a new mascara and highlighting trio.  That right red lip crayon is going to be fun just in time for the holidays!  

So overall, I’ve been super pleased with my subscription and plan to continue the service.  It’s so exciting to get that magenta metallic mailer each month and a blast to play with your goodies for a little mini makeover!  Yep, I sit on the floor and play with makeup like my 3 year old!  😂

Here’s my latest ipsy makeover:

  
Wanna try it too?  Follow this link to get started: 

https://www.ipsy.com/new?refer=v3sh6

Mommy’s preschool D-E-F

Here’s part 2 of our alphabet projects. Letters D, E, and F. You can see part 1 featuring letters A, B, and C HERE

Letter D:
Dinosaur
Dog
Duck
Digging
Donkey
Donut
Dad
Dirt
Dice
Dreamcatcher
Dandelion
Dolphin
Drum
Doll

IMG_6451

There were so many fun things planned for D but we ran out of time before getting to them all 😦

I’ll highlight a few of the fun ones we did get to as I’m sure you’re not so interested by the worksheets. We made a dandelion using q tips, a cotton ball, and a pipe cleaner. She simply glued the cotton ball on the top center of a piece of paper then glued the q tips around it. I made a pipe cleaner stem and we were done! We also used a paper plate to make a donut. She painted it and then glued on real sprinkles. For the duck, I cut out a D from yellow construction paper as well as a half circle wing. I made a heart shaped beak and triangle feet from orange paper. She glued all the pieces on and added some yellow tail feathers and goggly eyes.

For the dino feet, I let her paint 2 empty (okay fine, I had to empty them but we are still totally using the kleenex! lol) kleenex boxes. I free cut 4 orange triangle claws per foot and let her glue them on. We then took green construction paper cut into strips and made the hat. 2 around the head and 1 across the top. I then let her glue on green triangles all around the top. She got a kick out of this and is still parading around in this outfit today!

IMG_6253

Our favorite project for D however was the dreamcatchers. The big girls begged me to wait until they got home from school for this one and everyone had a blast! I took a cheap paper plate and cut the inner circle out. Then, using this template as a guide, we used a hole punch to create 11 holes around the outer edge of the plate. While they painted their plates, I cut long pieces of yarn for them to use. I didn’t measure, but I would guess about 3 feet just to be safe. They weaved the yarn through every 4th hole as the above mentioned blog suggested and it worked well. We finished by stringing beads and tying feathers to 3 small strips of yarn and then tying them to the 3 bottom holes. They turned out so cute!
IMG_6264
IMG_6266

IMG_6265

IMG_6267
IMG_6265
IMG_6267

For our cooking project that week we made Dirt cups. She mixed up the chocolate pudding mix, crushed up double chocolate oreos for the “dirt” and added a gummy worm. She loved making AND eating this one! lol
IMG_6377

Letter E:
Egg
Elephant
Ear
Earth
Eyes
Earring
Eagle
Envelope
Eskimo

IMG_6565

For the eskimo I sort of just free sketched the body, hair, mittens, and boots. They don’t have to be perfect. We used a coffee filter as the fur around her head, and cotton balls as fur accents on her coat.

We printed and cut out this eagle template from construction paper and then traced her hands for the wings. Simple and so cute!

For the elephant mask, she painted a paper plate and I cut out eye holes. I cut the ears and trunk out of construction paper and she glued them on. We also added a large craft stick (can be seen by lifting the trunk) so that she could hold it up to her face. The giant eye balls were printed from here and then glued onto paper plates. We then glued the eyes onto a strip of construction paper so they would stay together and hang easily.

My favorite E project though was the earth. We made this by coloring random patches on a coffee filter in green and blue. A then took a water spray bottle and sprayed it over the filter (I set an old towel under the filter so it didn’t wet the table). Within seconds the colors started merging together with a sort of tie dye effect. We traced her hands to hold the Earth and then read the creation story to tie in the scripture “In the beginning God created the heavens and the Earth” Genesis 1:1
12027272_1194392863920528_7226194017042267347_o

We dyed eggs with a kit I had leftover from Easter as our cooking craft.

Letter F:
Frog
Fish
Flamingo
Flag
Football
Feather
Flower
Fox
Food
Fly
Fireman

IMG_6832

We used a few F worksheets we had in our file so I don’t have links for those. We made the fox by folding a paper plate into fourths. She then painted it and glued on the eyes and a puff ball nose. She wanted a girl fox so I cut 2 small triangles and a circle and let her make a bow out of them. We cut triangle ears from construction paper and glued them inside the folds of the plate then glued the whole thing shut.

IMG_6706

We printed and cut this fireman template and then A colored it (rainbow of course, it’s always rainbow lol). We then glued it onto a toilet paper roll.

IMG_6709
I cut the stars and stripes from construction paper and let her glue them on. I used a scrapbooking shape cutter for the stars and it was super quick!

I cut the flamingo’s body for a free hand sketch then we traced her hand for the tail feathers. She glued it all together with a goggly eye and some real pink feathers. Super cute! Her favorite project was the frog though. I just cut a toilet paper roll in half and then traced one end on a piece of construction paper for the mouth. I then cut out a larger green circle for the face. I let her select her eyes and then cut circles a little larger than the eyes for the top. I free sketched and cut the legs. We grabbed a pink rubber band and cut it so that it was one long strip. We tied a black puff ball to the tip and glued it inside the mouth. We glued a strip of green construction paper over the body as well to cover the cardboard. When the glue was dry, she was able to move the “tongue” in and out of the frogs mouth to eat the fly. 🙂

Mommy’s preschool A-B-C

A and I have been working on a letter of the week project since the big girls started school. We’ve done really well with keeping up with it thus far and I love that she’s learning AND having a blast doing it. I’ve spent hours scouring pinterest for letter activity ideas and thought I would share some of the things we’ve been working on thus far with you guys. We will start the letter Ii next week so I’ll get you that far then add more letters as we complete them in case you want to start working with your little too. I’m going to do 3 letters per blog post that way you can easily find inspiration for just a specific letter you need without scrolling through the entire alphabet at once. I’ll give you a list of words we came up with for that letter (we didn’t use all the words but you may come up with something for them), I’ll show you what we worked on some, and give you some ideas for snacktivities too. We created a display wall of brightly painted picture frames with binder clip hooks to display her work each week near her chalkboard. Hope this helps! I tried to plan worksheets, crafts, and a cooking project for each letter.

A few ideas for craft supplies we keep around at all times that you may consider stocking up on: Construction paper, toilet paper and paper towel rolls, cheap coffee filters, cheap paper plates, craft sticks, goggly eyes, tissue paper, feathers, glitter, paint, cheap shaving cream. We got most of our supplies at dollar tree!

Letter A:
Apple
Alligator
Ant
Arrow
Astronaut

11953423_1178241518868996_5351651662948594105_o

You can find the Alligator A coloring sheet we used here: Alligator coloring sheet

I was very fortunate that a friend’s mom gave me a box of preschool goodies organized by letter when P was this age and I’ve used it with all 3 girls now! It’s so special re-living each letter with A and remembering how the other girls did it a little different. I’m not much help with letter A as it was our first letter and I wasn’t all that prepared and original with our work 😦 For our cooking project that week we made an A-A-Apple crumble. Simple and yummy!

11917557_1177076812318800_4366250135826492569_o
For this, we used an apple slicer on the apple and then cut those thin slices in half. For the crumble we used about a tablespoon of steel cut oats, a dash of cinnamon, a sprinkle of coconut flour, and about 1/2 a teaspoon of brown sugar per 1 apple. We arranged the apple slices in a single layer on a baking sheet and sprinkled with our crumble. We baked them at 350 if I remember correctly for a few mins until the apples were soft.

Letter B:
Boots
Banana
Ballerina
Bat
Baseball
Bath
Bike
Boat
Bear
Butterfly
Blue
Bee

IMG_5953

We found a nice printout of a clown holding some balloons and I wrote B on each balloon and let her color it.

The boot was one of my favorite projects, because well, TEXAS! lol We used this template. I printed it and cut out each piece individually on construction paper. Then I let her glue all the pieces on and decorate it with stickers. I drew the stitching on with a marker. But you could just print this and have your little decorate it instead if you wanted to save a few steps.

For the bird I cut out 2 large circles from construction paper. We cut one of the circles in half for the wings. I cut the feet and beak out of construction paper and let her glue on goggly eyes to finish. Super quick, easy, and cute!

11940133_1181553338537814_4479306018813843535_o

We used the B for bat coloring sheet also from education.com (same place as the A alligator one). You can create an account for free and have access to all sorts of goodies! B for bat

I got the template for the ballerinas HERE
unfortunately, the whole blog is in spanish but you get the idea. I printed the ballerina templates, traced them onto paper (I planned to use construction paper, but A wanted to color them herself instead), we cut them out, glued them onto large craft sticks then added a cupcake liner as a tutu. She loved these!

IMG_5774

We used an egg carton to create the bumble bee. I cut to little cups off and hot glued them together for the head and body then let A paint it. We glued on goggly eyes, pipe cleaner legs and antenna, and paper wings. So cute!

We made banana pudding as our cooking project that week.

Letter C:
Cactus
Cat
Caterpillar
Cookie
Cupcake
Cow
Campfire
Carrot
Car
Clown
Cake
Crab

IMG_6228

We made a giant cupcake out of construction paper. I just free drew and cut it then we used shaving cream mixed with pink paint as “frosting”. She sprinkled the top with tiny seed beads while it was still wet. I don’t know why we had never used shaving cream to paint before because it was super fun! We used it to frost our “cake” the next day too. To make the cake, I cut out 2 large circles from construction paper. I cut up toilet paper rolls to line the bottom circle (we save these for spirit sticks for cheer and they make terrific craft supplies!). I then glued on the top circle and then cut a strip of paper to cover the sides. A then painted the icing on and added paper polka dots for decoration. She wanted a candle on it so I let her paint another slightly trimmed toilet paper roll for that then I let her tear tiny pieces of tissue paper and stuff them in for the flame.

IMG_6036
IMG_6043

I cut tiny cookies out of brown construction paper and let her draw on chocolate chips with a black crayon. We made a baking sheet out of some aluminum foil. For the carrot, I just cut out a large letter C with a pointy bottom from orange construction paper and let her stick green pipe cleaners in the top. We also made a car from a toilet paper roll. I cut out a top seat area leaving a tiny lip for the windshield. While she painted it, I cut out small circles for the tires and steering wheel. She loved it! For our snack we made cookies of course!

You can see letters D-E-F here

BIG SEVEN

7 years. 364 weeks. 2,555 days. 61,320 hours. 3,679,200 minutes.

As of 5:00 p.m. today, that’s how long I’ve been married. 7 years, although it’s not a particularly large or traditional anniversary milestone, it is for me. I try not to get too incredibly personal where my marriage is concerned but it is with my husband’s permission that I share a little bit about our story. Our marriage has never been a walk in the park. In the 7 years since we said I do we have been through our fair share of trials. We’ve seen a deployment, an oil boom, 2 oil busts, a layoff, the birth of 2 children, 3 moves, and a whole lot in between. Last year however, we endured our toughest trial yet. As I’m sure those of you who personally know me or closely follow my blog are aware of, we lost my mother in law last August. Just one week shy of our 6 year wedding anniversary. That summer had been particularly strenuous on our marriage because it just seemed as though we had grown apart. I felt like Dave was mean and short tempered all the time, like he no longer cared about me and our marriage, and that he was incredibly selfish. He felt under appreciated, like I nagged constantly, and that I was trying to control him. Neither of us were budging and were both frustrated and burnt out on the relationship. Around June, I suggested maybe we take some time apart and perhaps give each other some breathing room without speaking while he was away at work to do some thinking. Within 2 weeks, we had decided to work on things and make some changes so that we could make our marriage work. We sort of just swept things under the rug at this point though because neither of us actually did anything to change. By August we were pretty miserable with each other but in attempts to reconnect, he took off work for our anniversary and my mother was planning to keep the kids for a few days so that we could spend some much needed one on one time together. The week before we were scheduled to leave, we got the news that his mother had passed and we quickly began making arrangements. We ended up spending our anniversary at the family ranch with all of his family as we laid her to rest. We were both really mourning the loss and trying to wrap our heads around it and really tried to lean on each other. By the next month however we were right back where we were before her passing. Mid September Dave came to me and said he was tired of fighting and he wasn’t sure he wanted to be married anymore. I hesitantly admitted I was feeling the same way and when he left for work later that day, we had decided it was more of a goodbye than a see you later. We had decided to separate. I realized pretty early on this wasn’t truly what I wanted but I was so frustrated I wasn’t sure what to do. Dave took a little longer however to come around. I won’t get into all the details of what happened between us in the weeks to follow but I will say we said and did alot of things to hurt one another. During our separation, my grandmother passed away and I found myself back home with my parents for the funeral. I spent 6 years praying for God to move in my husband’s heart. To change him. I never once asked for God to change ME. I never asked for God to move in MY heart and reveal to me what I was doing wrong because I was so focused on what he was doing wrong. I was so focused on my hurt and my resentment that I couldn’t see my contributions to the demise of my marriage. But the night of my grandmother’s funeral I ugly cried out to the Lord. I asked him to reveal to me what I could change in myself, I asked him to help me get over the hurt of the past, and finally I asked for peace and for comfort for whatever his will was for my marriage. I couldn’t beg him to make Dave want to be married to me anymore, I began to plead for HIM to invade my heart and make me okay with being on my own if that’s so what he wanted for my life. I asked him for strength and wisdom to be a strong mother for my girls through this difficult time. For the first time in weeks, I slept soundly through the night. When I woke up the next morning, I decided it was time to stop mourning my marriage. I wasn’t going to cry or beg Dave to stay, if he wanted to leave, I would let him and I would be okay. Just like that, God moved. Dave asked to see me that night, we talked, I cried, he asked for forgiveness, so did I. We decided to work on things and communicate more. He looked at me in a way I had never seen him look at me before. When I asked him what made him suddenly want to see me, he couldn’t really provide an answer other than he was just sitting there watching tv and felt like he HAD to see me. Something extraordinary happened that night. We became friends. Best friends. The month or so afterwards were difficult because we were still working through some things together and trying to mend some hurts. I’m sitting here in awe of the miracle God has worked in our marriage since then. My husband has become one of the most patient kind men I know. He always puts the girls and I first. He makes our marriage a priority and goes to church with me when he’s home. He calls me and texts me every chance he gets and makes me feel so loved daily. We truly enjoy each other’s company and when he looks at me, I can visibly see his love for me. I on the other hand probably could still work on my nagging but I do try harder to show my appreciation for all he does and sacrifices for our family. I’m asking God daily to show me how to love my husband more and to fully mend all of my past hurts. I spent many years being patient with Dave and I’m thankful he was patient with me this last year while I worked through some hurt, insecurities, and some struggles of my own. I’m glad I didn’t give up on him easily and glad he hasn’t given up on me. So while a 7 year anniversary may not seem like something super spectacular to you, in many ways, it was the most special milestone of all for us. It was the first anniversary of our new beginning, it was an anniversary I didn’t think we were going to make it to. We are so appreciative of our family and friends who vigilantly prayed with us and for us and truly fought for our marriage along side us.

Honey, I’m thankful for second chances. I promise to let my guard down and just live. I promise to *try harder* not to nag and to remember to pick up your dry cleaning. I love you 809238423740298840923374238409280 +7. I can’t wait to see what adventures our next year brings. ❤

Therefore what God has joined together, let no one separate. Mark 10:9

1157441_712992542060565_707162254_n

On our Wedding day August 9, 2008

11102716_1096186983741117_3107134563277155906_n

11836887_1166694546690360_8396722456888624101_n

Love thy neighbor. Unless he’s gay?

Social media has been blowing up all week over the supreme court ruling allowing same-sex marriage. 90% of the time, I attempt to just keep my head low and my mouth shut when it comes to taboo subjects. Why? Because, SOMEONE will always be offended by what I have to say. It’s no secret that I am a Christian woman, my thoughts are fairly conservative on moral issues. I’m absolutely horrified by what some of my “Christian” friends are posting about the subject. Everyone is entitled to their opinions and beliefs but at what cost to the feelings of fellow human beings? I try not to delete fb friends for their beliefs and/or choice in sin because it’s not my place to judge them. This week however, I had to delete a few folks when I read some seriously horrible things that they wrote about the situation. I don’t know why any human being would feel the need to say such hateful things about another group of human beings. I can only blame complete ignorance. I’ll try to make this short and sweet…

Do you have sin in your life? I can personally say that despite my faith and conviction for Christ, I have still knowingly sinned.

Cheated on your significant other? Even THOUGHT about cheating on your significant other? Looked at pornographic materials or watched a pornographic movie? Have you lusted after someone other than your spouse? Had sex before marriage? These are ALL forms of sexual sin. Our society packages sexual sin with a pretty little bow and makes it all seem alright and as Christians, we buy into the fact that what we are doing is so much different than homosexuality. We’ve made homosexuality the greatest sin. We’ve got Christian women going to see movies like 50 shades of gray and Magic Mike and their husbands being okay with it because it’s “just a movie” but not seeing that those movies are full of sexual sin! I haven’t seen either of them to speak from personal experience but I know what they are about and I gotta tell you, they are oooooooooozing with sin and temptation! Guard your heart ladies and know that Satan uses all sorts of ways to attack you spiritually. Guys, there’s nudity flowing through media today. You’re frequenting restaurants and bars that boast scantily clad women in bikinis, crop tops, and booty shorts bringing you your wings and beer. Hell, you’re even having your hair cut by women wearing shorts the size of panties and shirts so tight and short they leave little to the imagination. In today’s marriage, pornography, and strip clubs, and risqué movies are just okay.

But I tell you that anyone who looks at a woman lustfully has already committed adultery with her in his heart. Matthew 5:28

Remember that ladies and gentlemen!

But I’m not just talking about sexual sins here folks. We sin every.single.day but somehow, we dull down our own sins and say, “well, at least I’m not gay!”. I’m not saying homosexuality isn’t a sin, because the bible clearly tells us it is. The bible tells us not to do a lot of things, but we still do them.

Do not get drunk on wine, which leads to debauchery. Instead, be filled with the Spirit, Ephesians 5:18

Y’all, you know we’ve ignored this little tidbit of advice a time or two! hahahaha I kid but really. There are different levels of sin of course but sin is sin and each sin causes us to fall short of what God wants for us. Envision if you will that our lives, as Christians, are a target. In the center, at the bullseye, is God, a perfect sinless day. The outer rings are different levels of sin. Each day, we go out with our arrows and we aim for the center but we don’t make it. Our arrows hit different rings each time. We may get close to the center some days and we may barley make the target at all on others but we NEVER actually hit the center. Some people get closer than we do, some not at all but in the end, none of us hits the bullseye. What’s my point here? We are ALL sinners, so unless you’re sinless, shut your mouth and stop being so hateful! Have we as Christians become so offended by the sin of others that we forgotten completely that God commands us to love Him AND love others? He never ever EVER says Love thy neighbor, unless he’s gay. Our job isn’t to judge others, it’s to love them. We will ALL be judged for our sins when our time comes. I want to encourage you today to read Romans 2 and to remember that judging others and condemning them for their sin isn’t your job and may actually be keeping you from the glory of God. You don’t have to believe in gay relationships or support gay marriage but you certainly have to love God’s people. Stop the division and the hate and just love one another. I want to remind you that many of these loving people you are condemning to hell, love the Lord too.

To my friends who are part of the LBGT community, I deeply apologize for the hatred and backlash you have received by the Christian community and I hope it will not leave a bad taste in your mouth for the church as a whole. God loves ALL his children! ❤

image1